
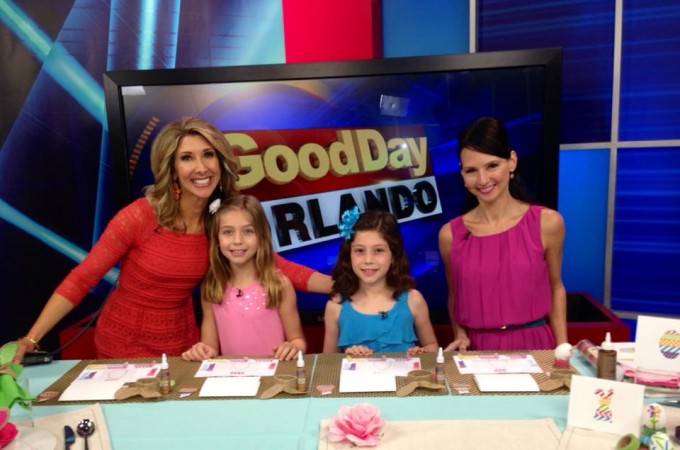
Easy Easter DIYs!
It’s DIY Friday! so here are some fun and colorful DIYs you can easily do at home with the kids for Easter or Passover – Best Part, all without the mess of liquid dyes, so break out the Washi Tape… Here we go!
What is Washi Tape?
Washi tape originates from Japan and feels like masking tape — very, very pretty masking tape coming in so many patterns and designs! Washi tape is typically made from natural fibers, such as bamboo or hemp, but most commonly from the bark of trees that are native to Japan — the mulberry, the mitsumata shrub or the gampi tree. Most washi tapes are strong and functional as well as pretty, making them wonderful for both everyday and decorative use. *Warning: Use of this amazing product may cause a washi tape craft or office addiction! 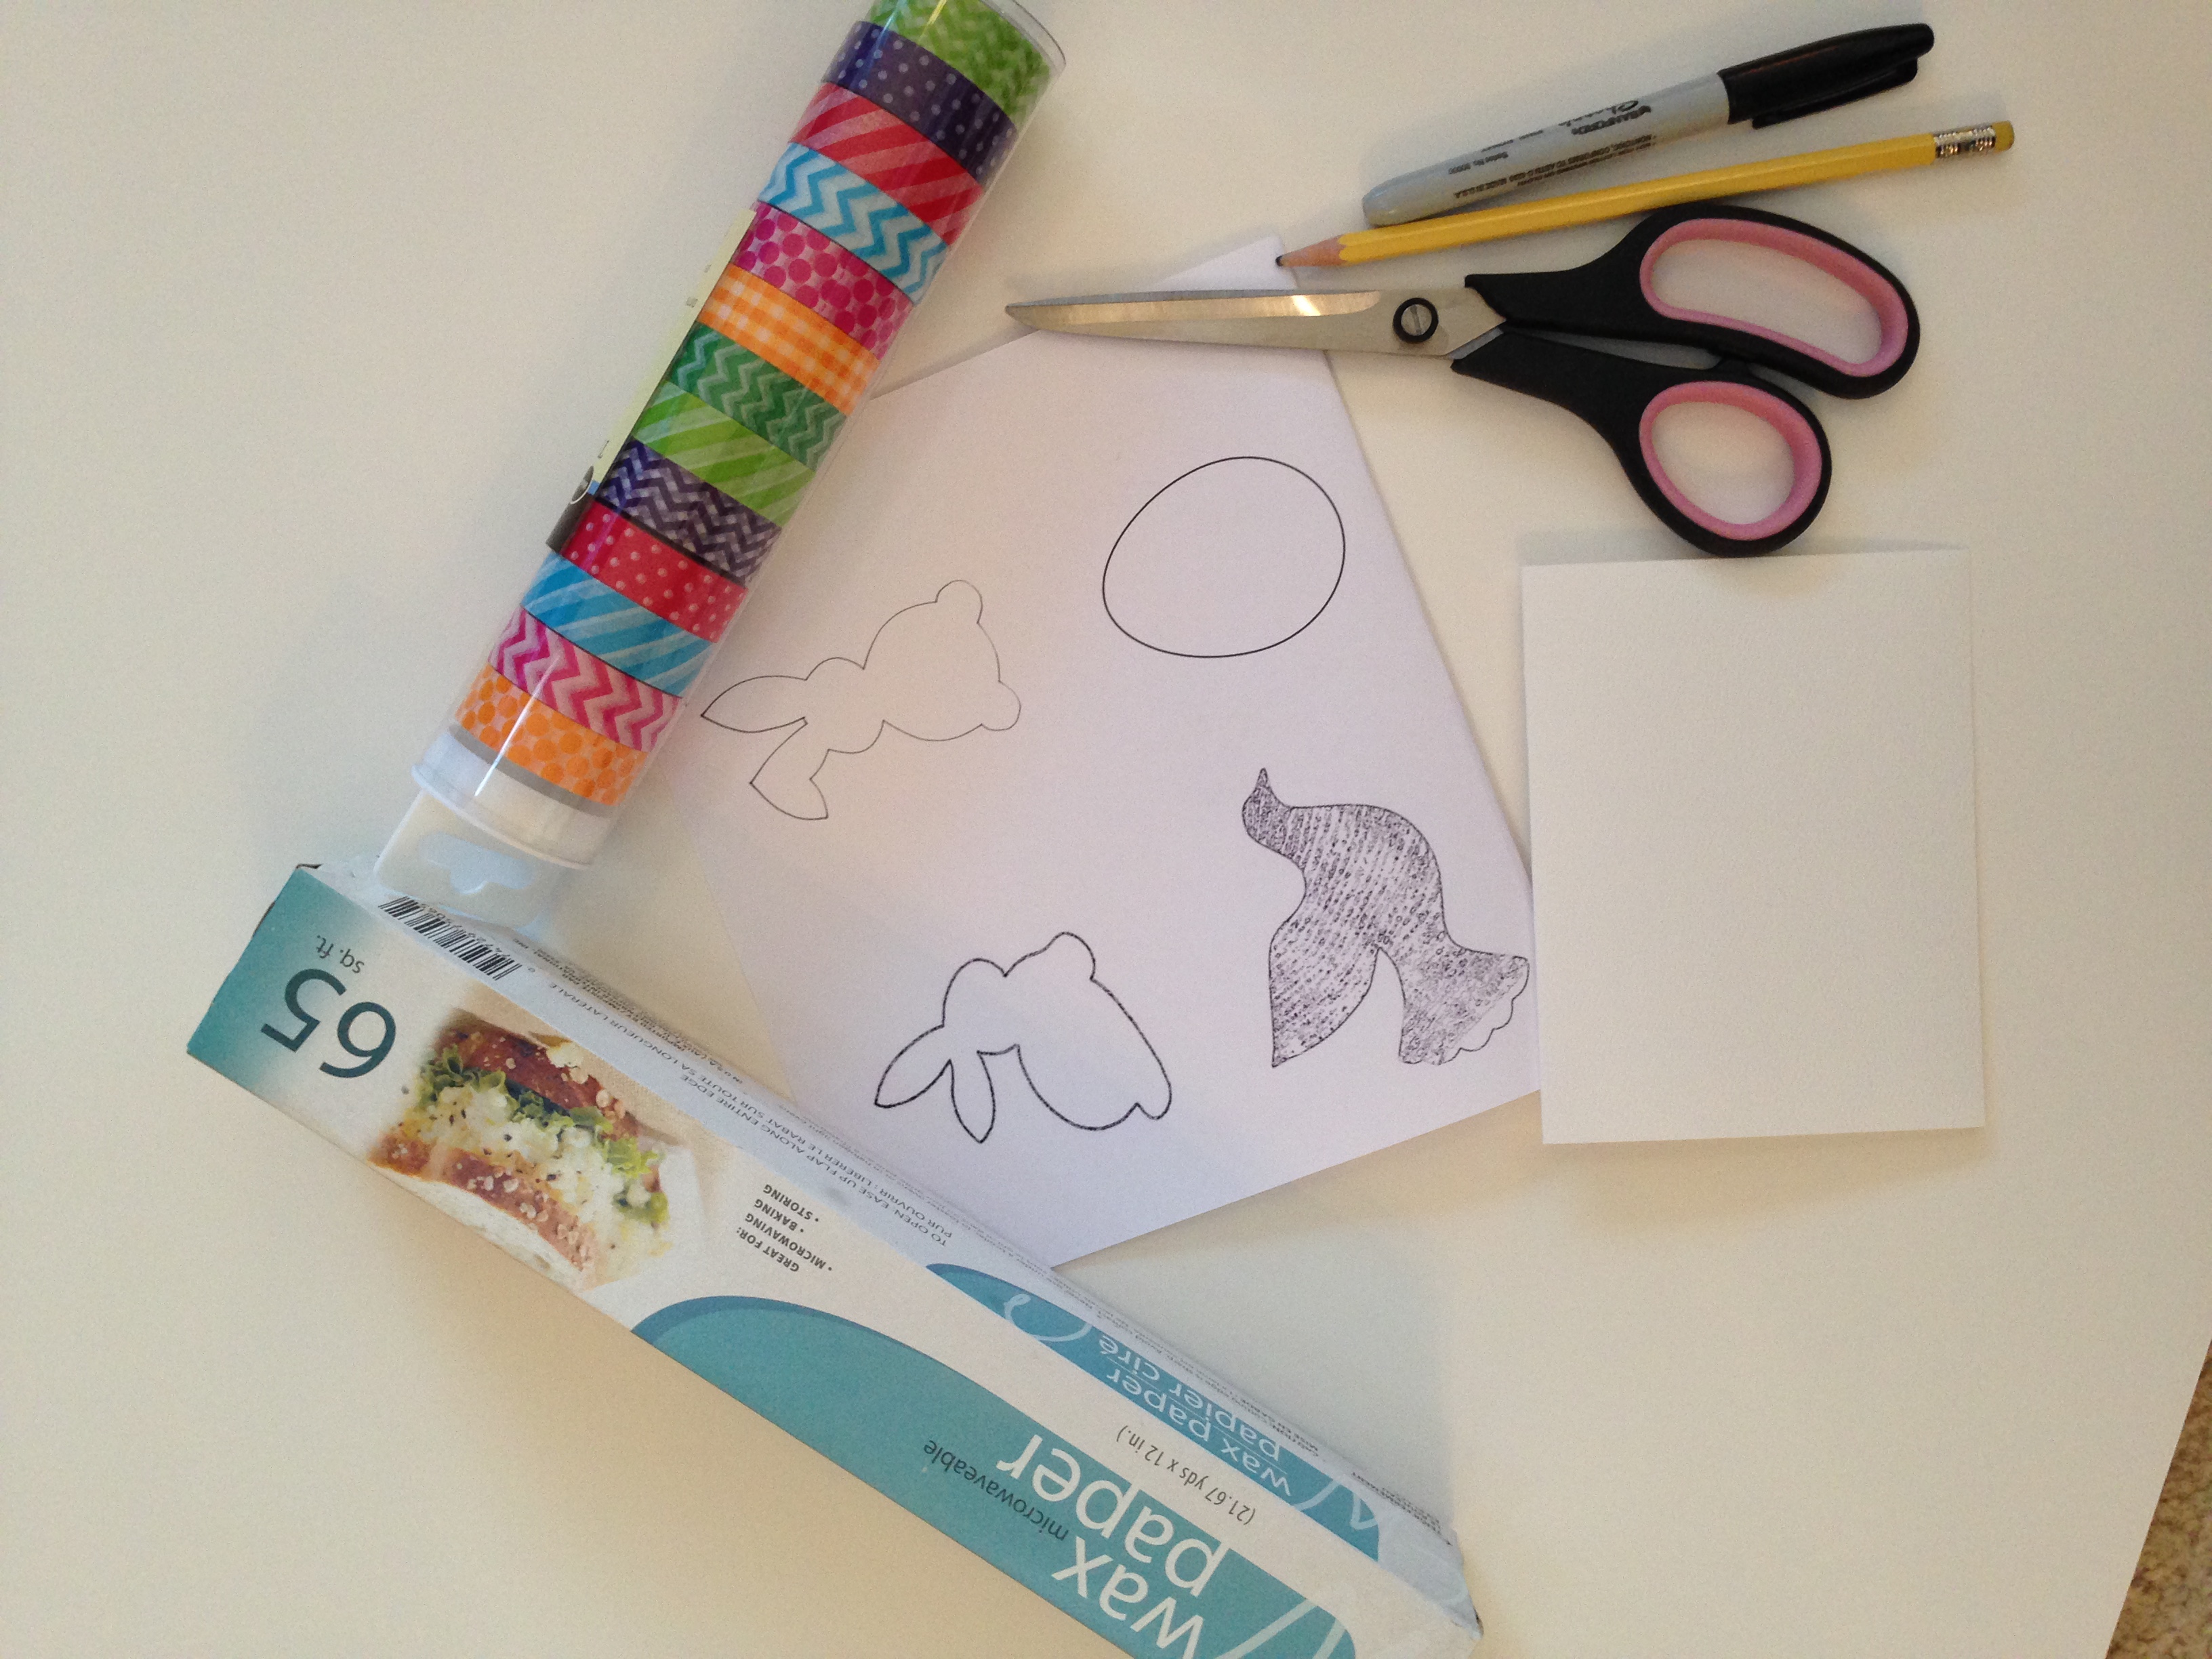
Quick Tip: I purchased a roll of 13 different designs from www.michaels.com for $19.99 but with the 40% off coupon only paid $12 and gave me so many options!
Washi Tape Easter Eggs
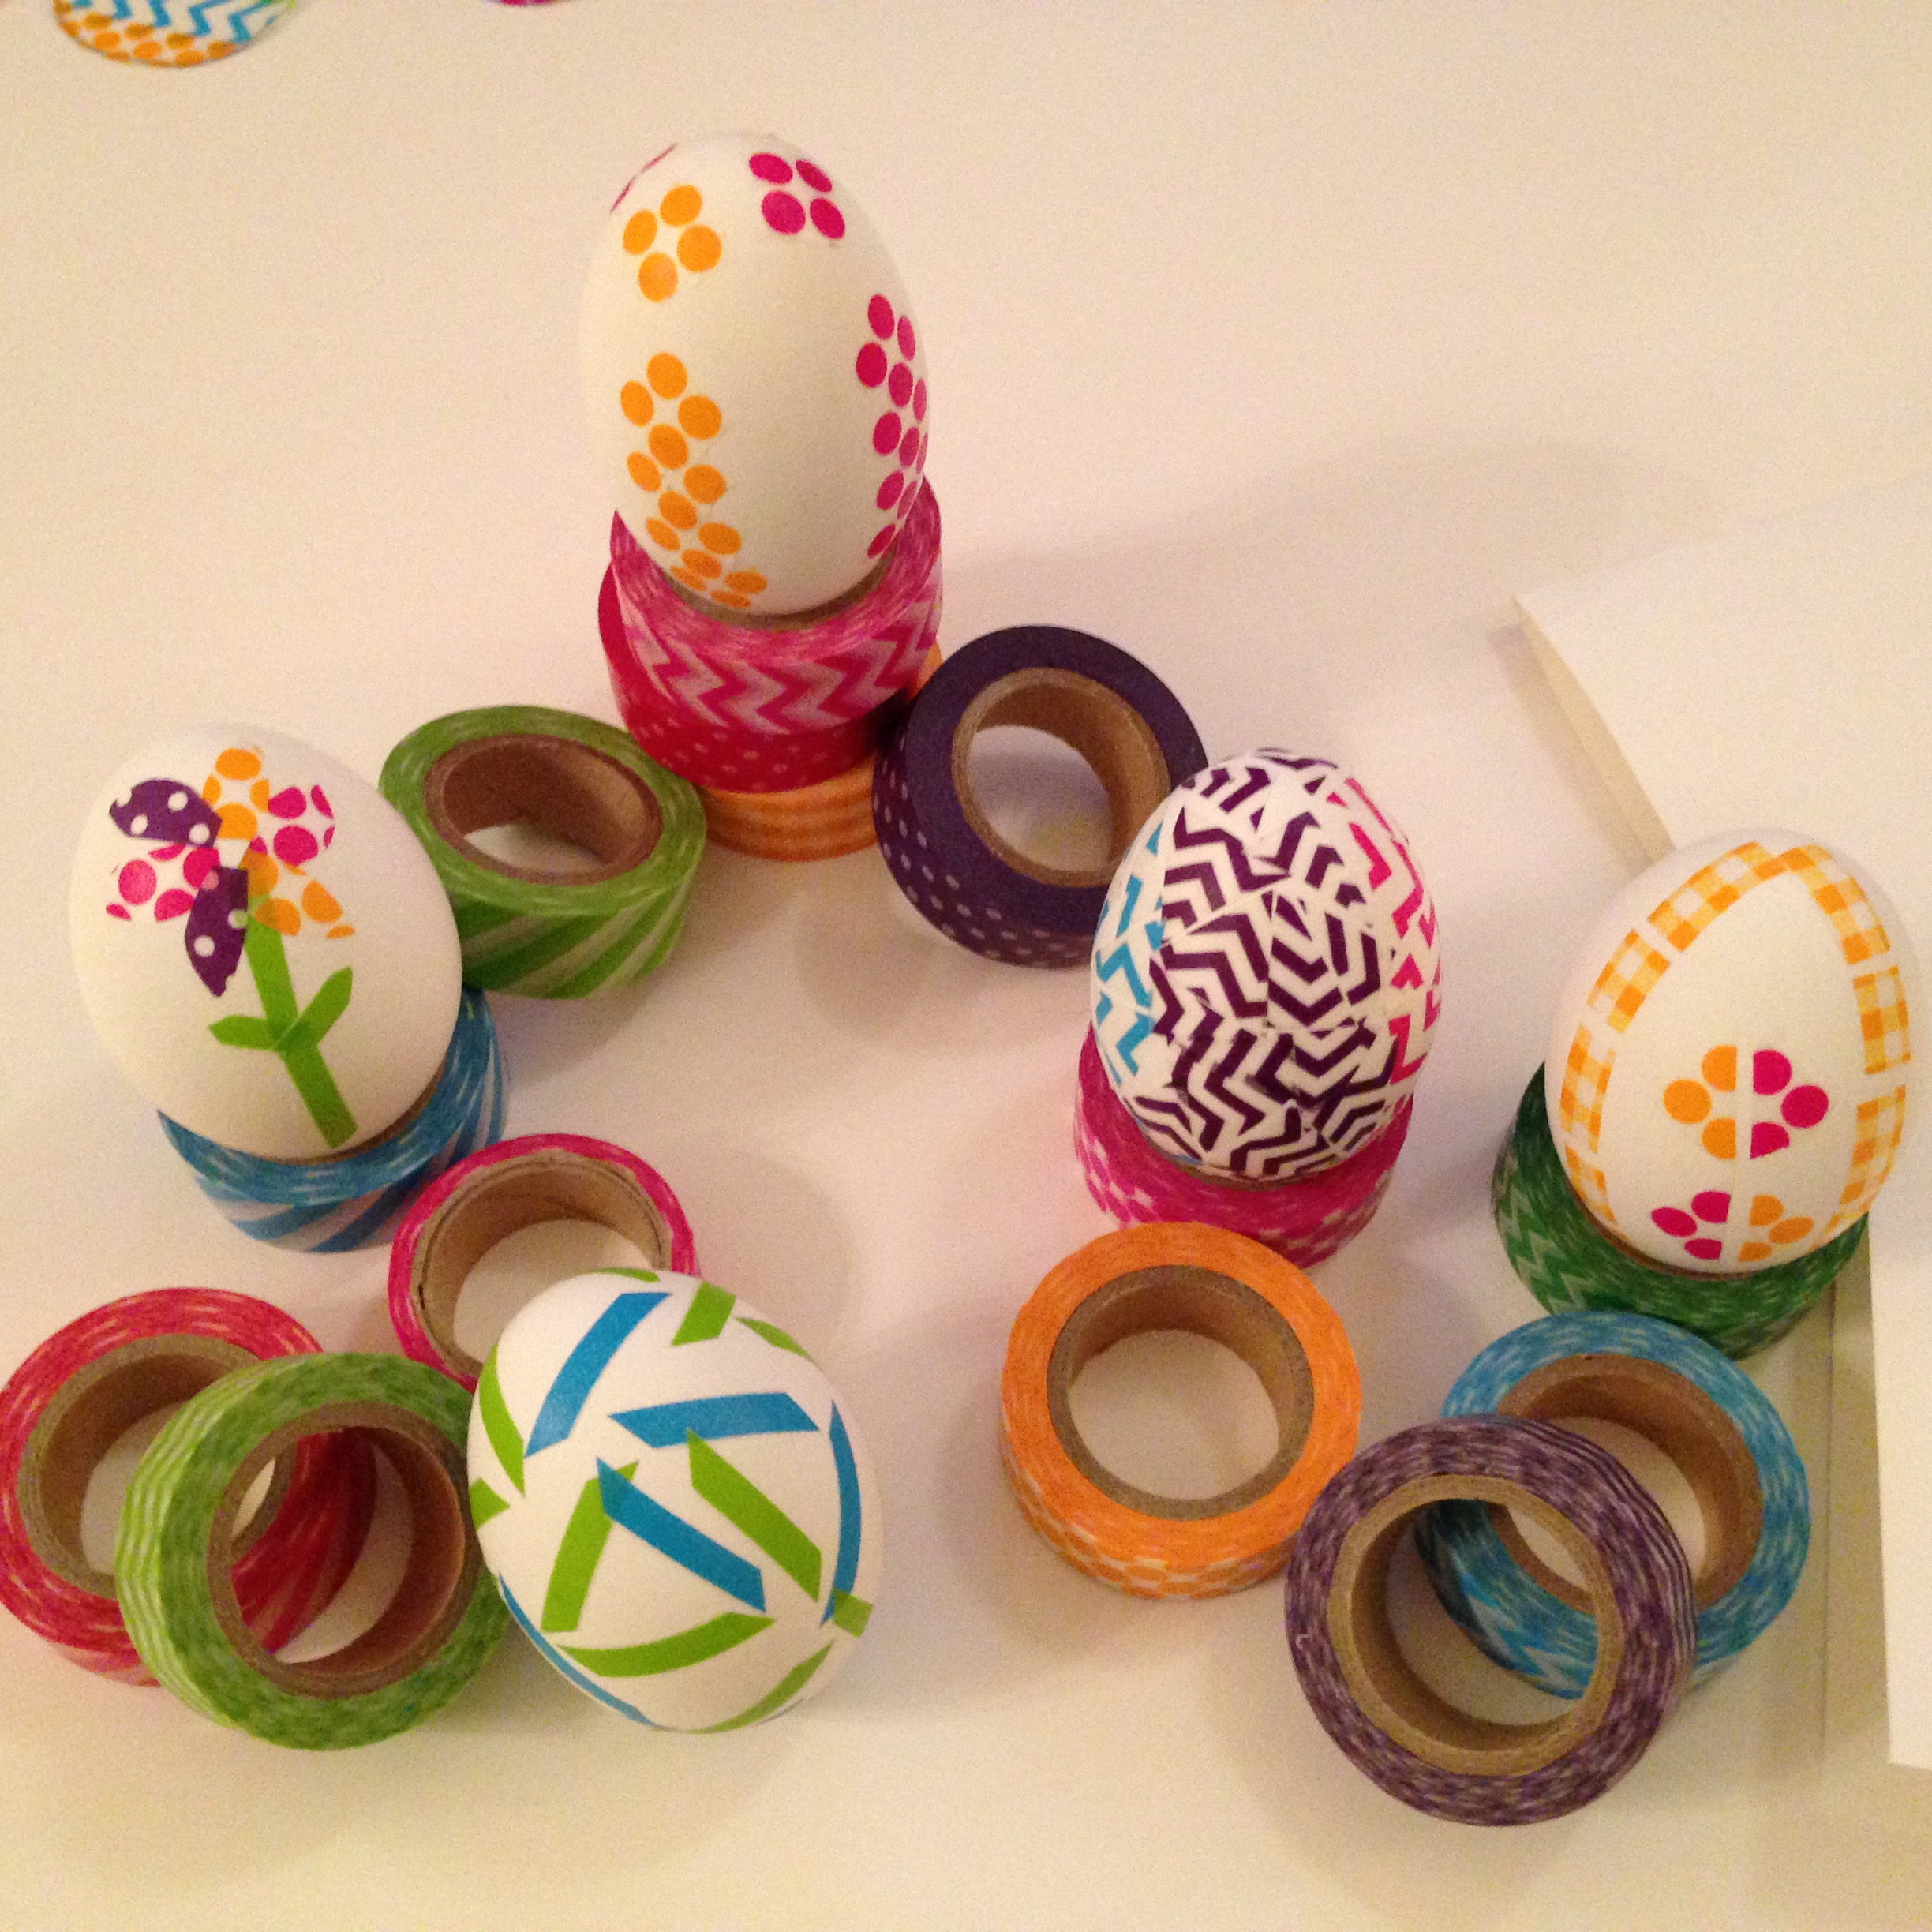 I don’t know about you but I always have a silent panic attack when those cups of easter egg dye are on my table. I line the table with newspaper and pray none of the cups get knocked over. It’s a fun process for the kids but not a super fun process for me in the anticipation of the mess I have to clean up and the hope that nothing gets ruined in the process, right? Have you been there? So, I wanted to find a fun and alternate way to decorate eggs this year to curb the anxiety, prep and clean up… Solution: Washi Tape to the rescue!
This could not be easier and allows for amazing creativity! All you have to do is put out a pair of scissors for each child and a variety of colorful rolls of Washi Tape and let them go crazy designing and decorating… It’s always amazing to see what they come up with and create. Then snap some photos and upload them to www.Pinterest.com for all to see and be inspired by, the kids will love it and you’ll love not having to clean up dye soaked newspapers from your beautiful table!
Quick Tip: Here is a great step-by-step guide on how to make perfect hard boiled eggs. I loved the tip about adding salt to the water to keep them from cracking. I made 18 eggs and only two shells cracked so maybe that tip helped? http://www.simplyrecipes.com/recipes/how_to_make_perfect_hard_boiled_eggs/
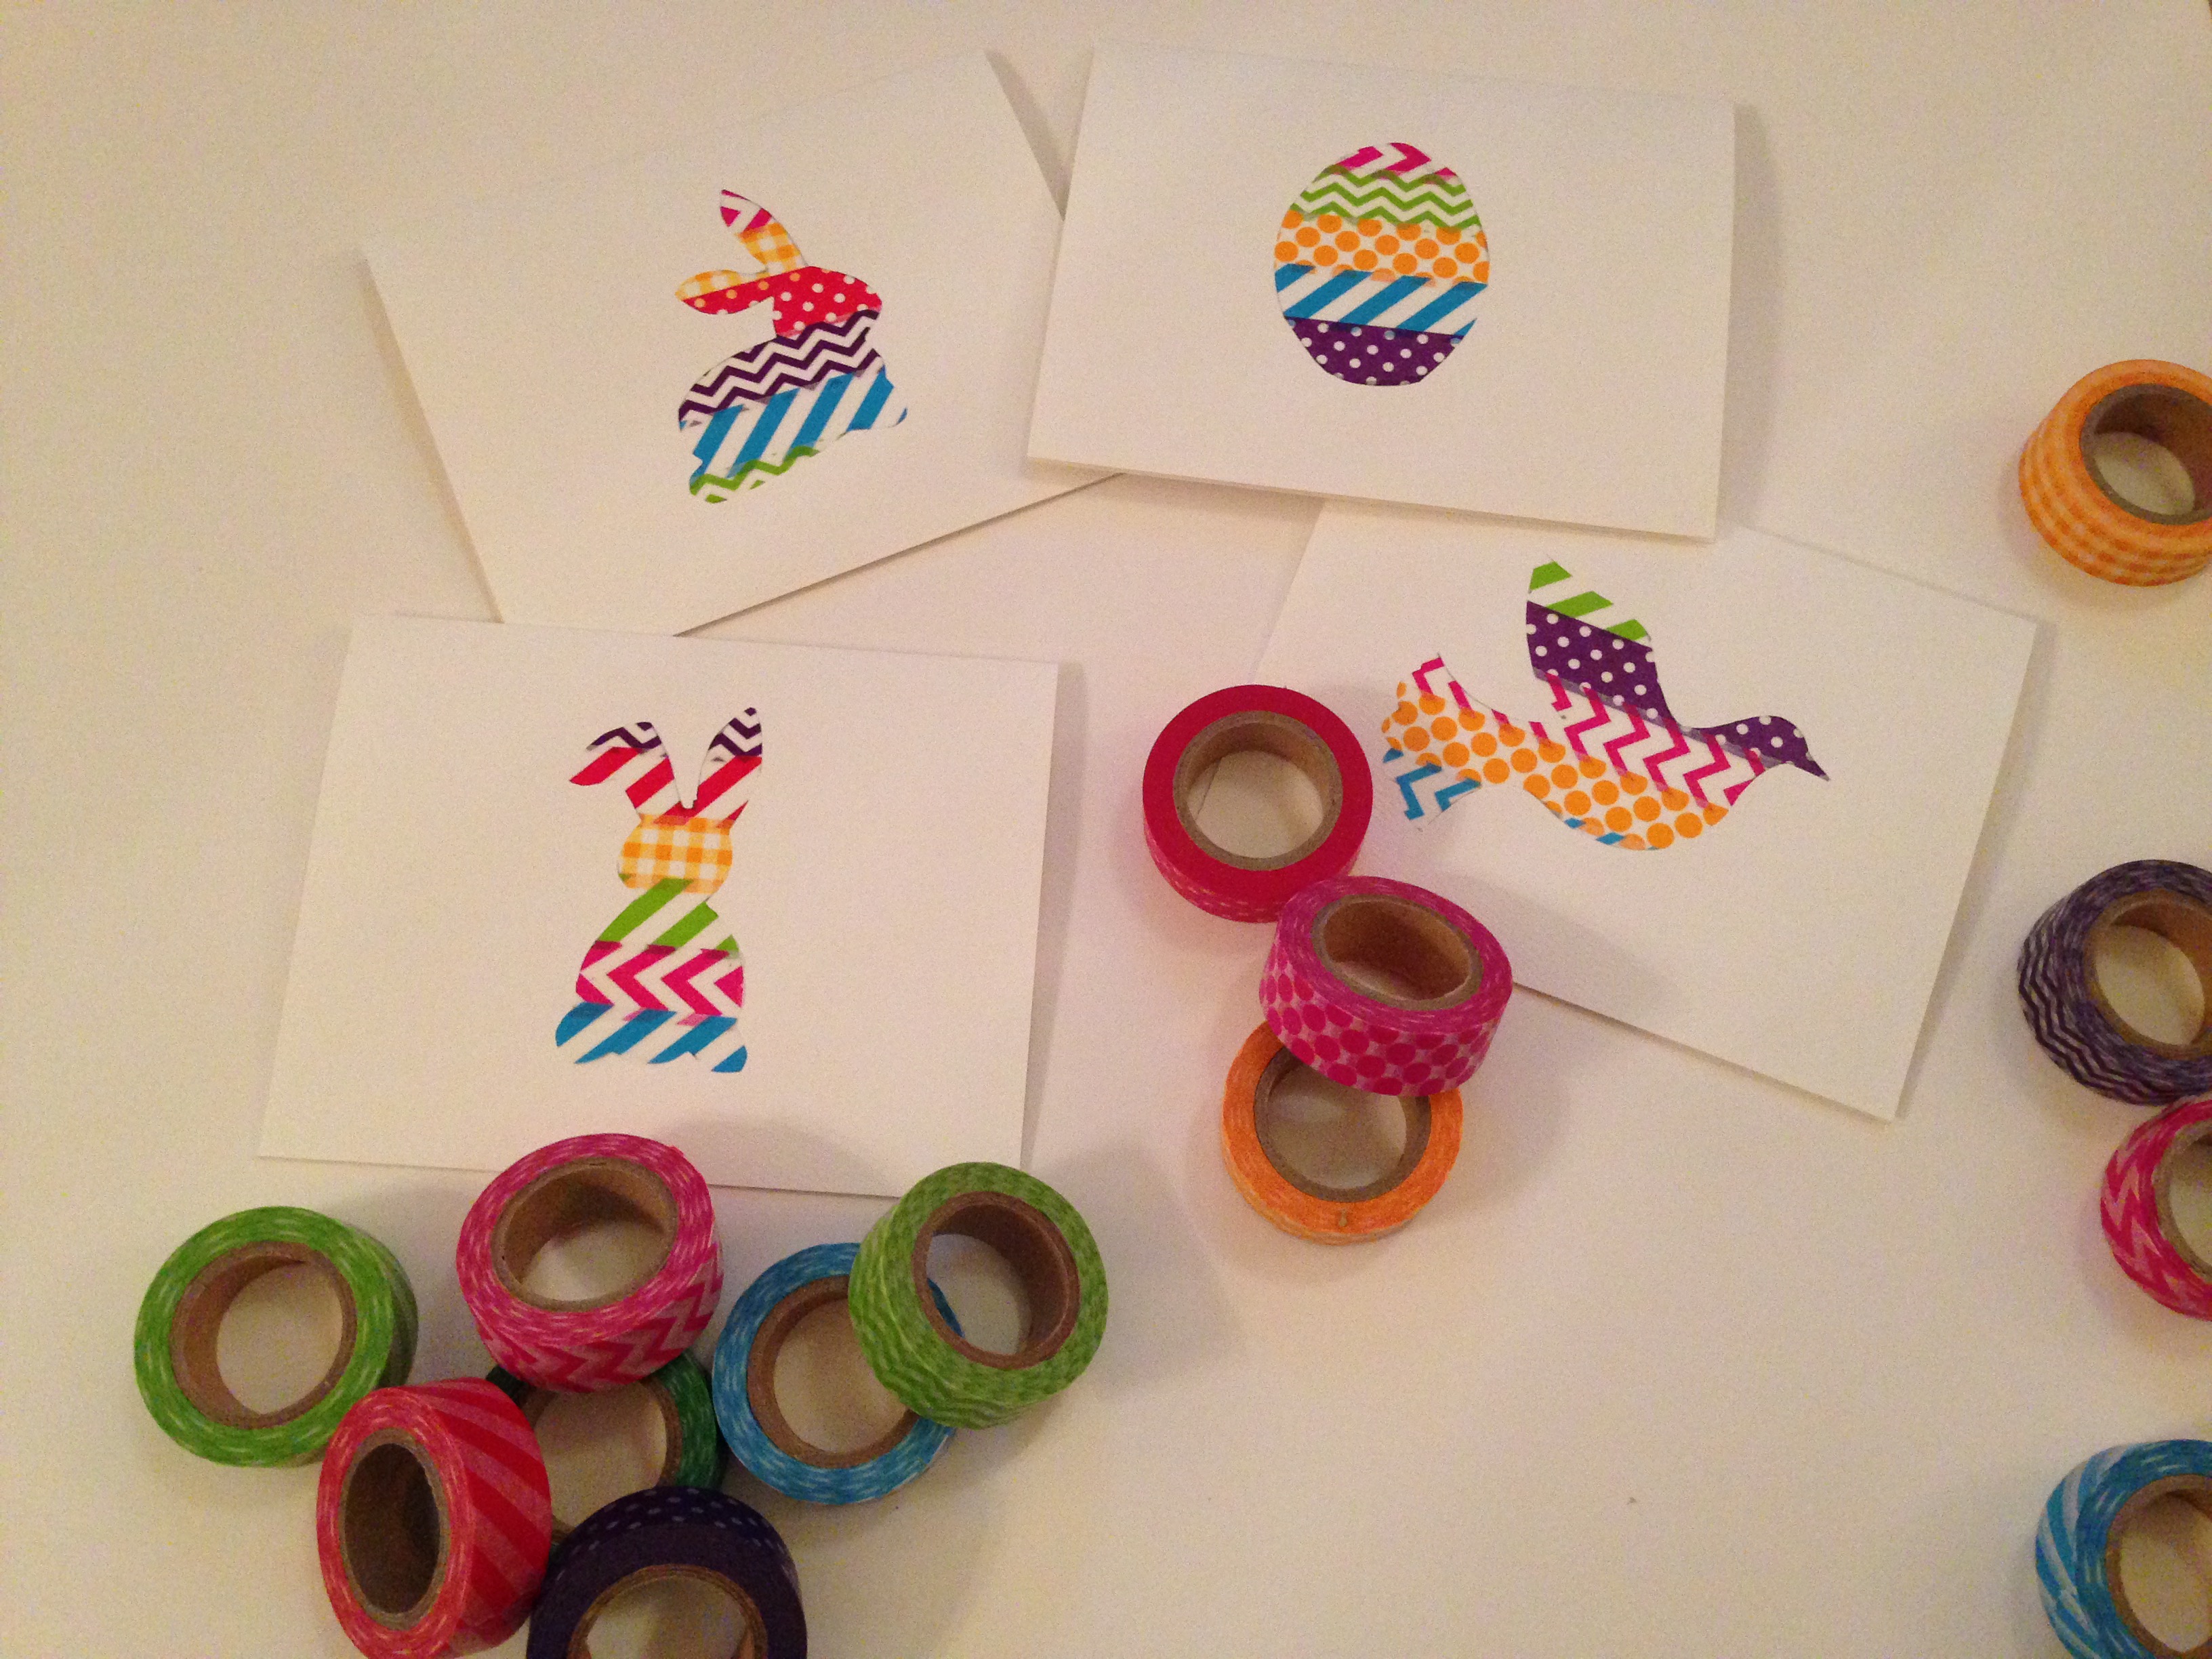
Washi Tape Easter or Passover Cards
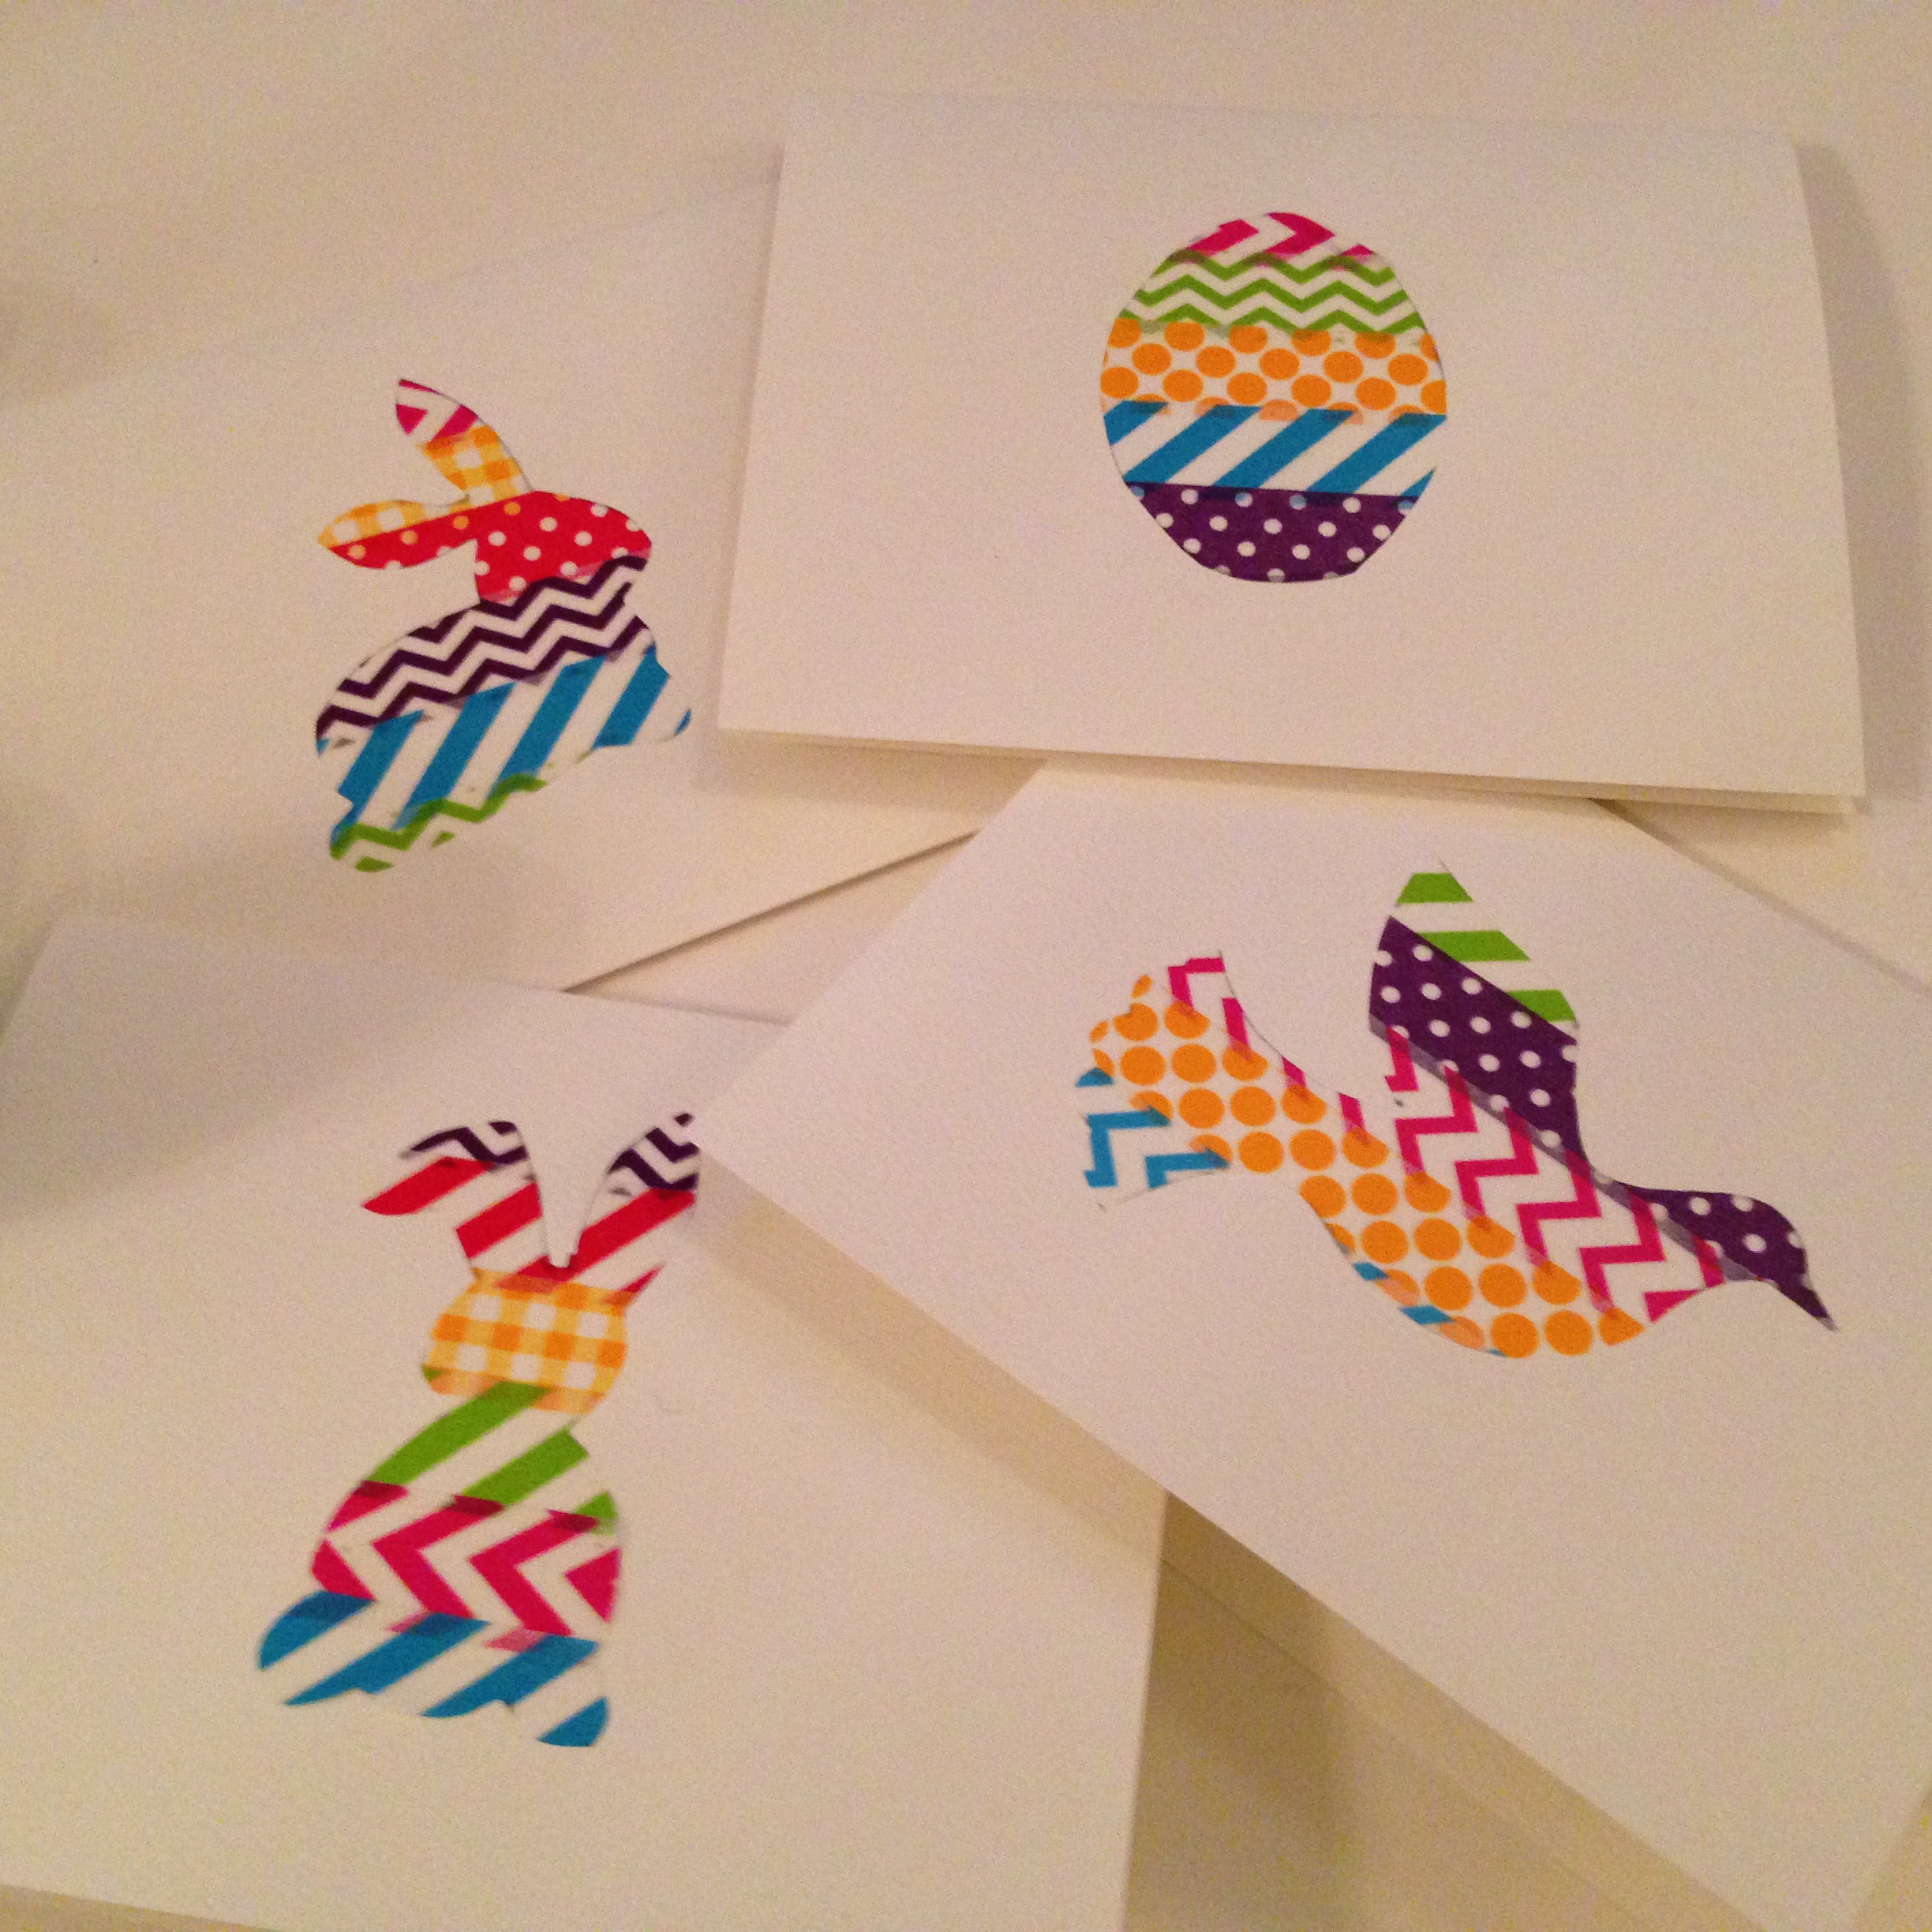 Here’s a really simple technique for making washi tape shapes and adorable Easter and Passover your notecards.
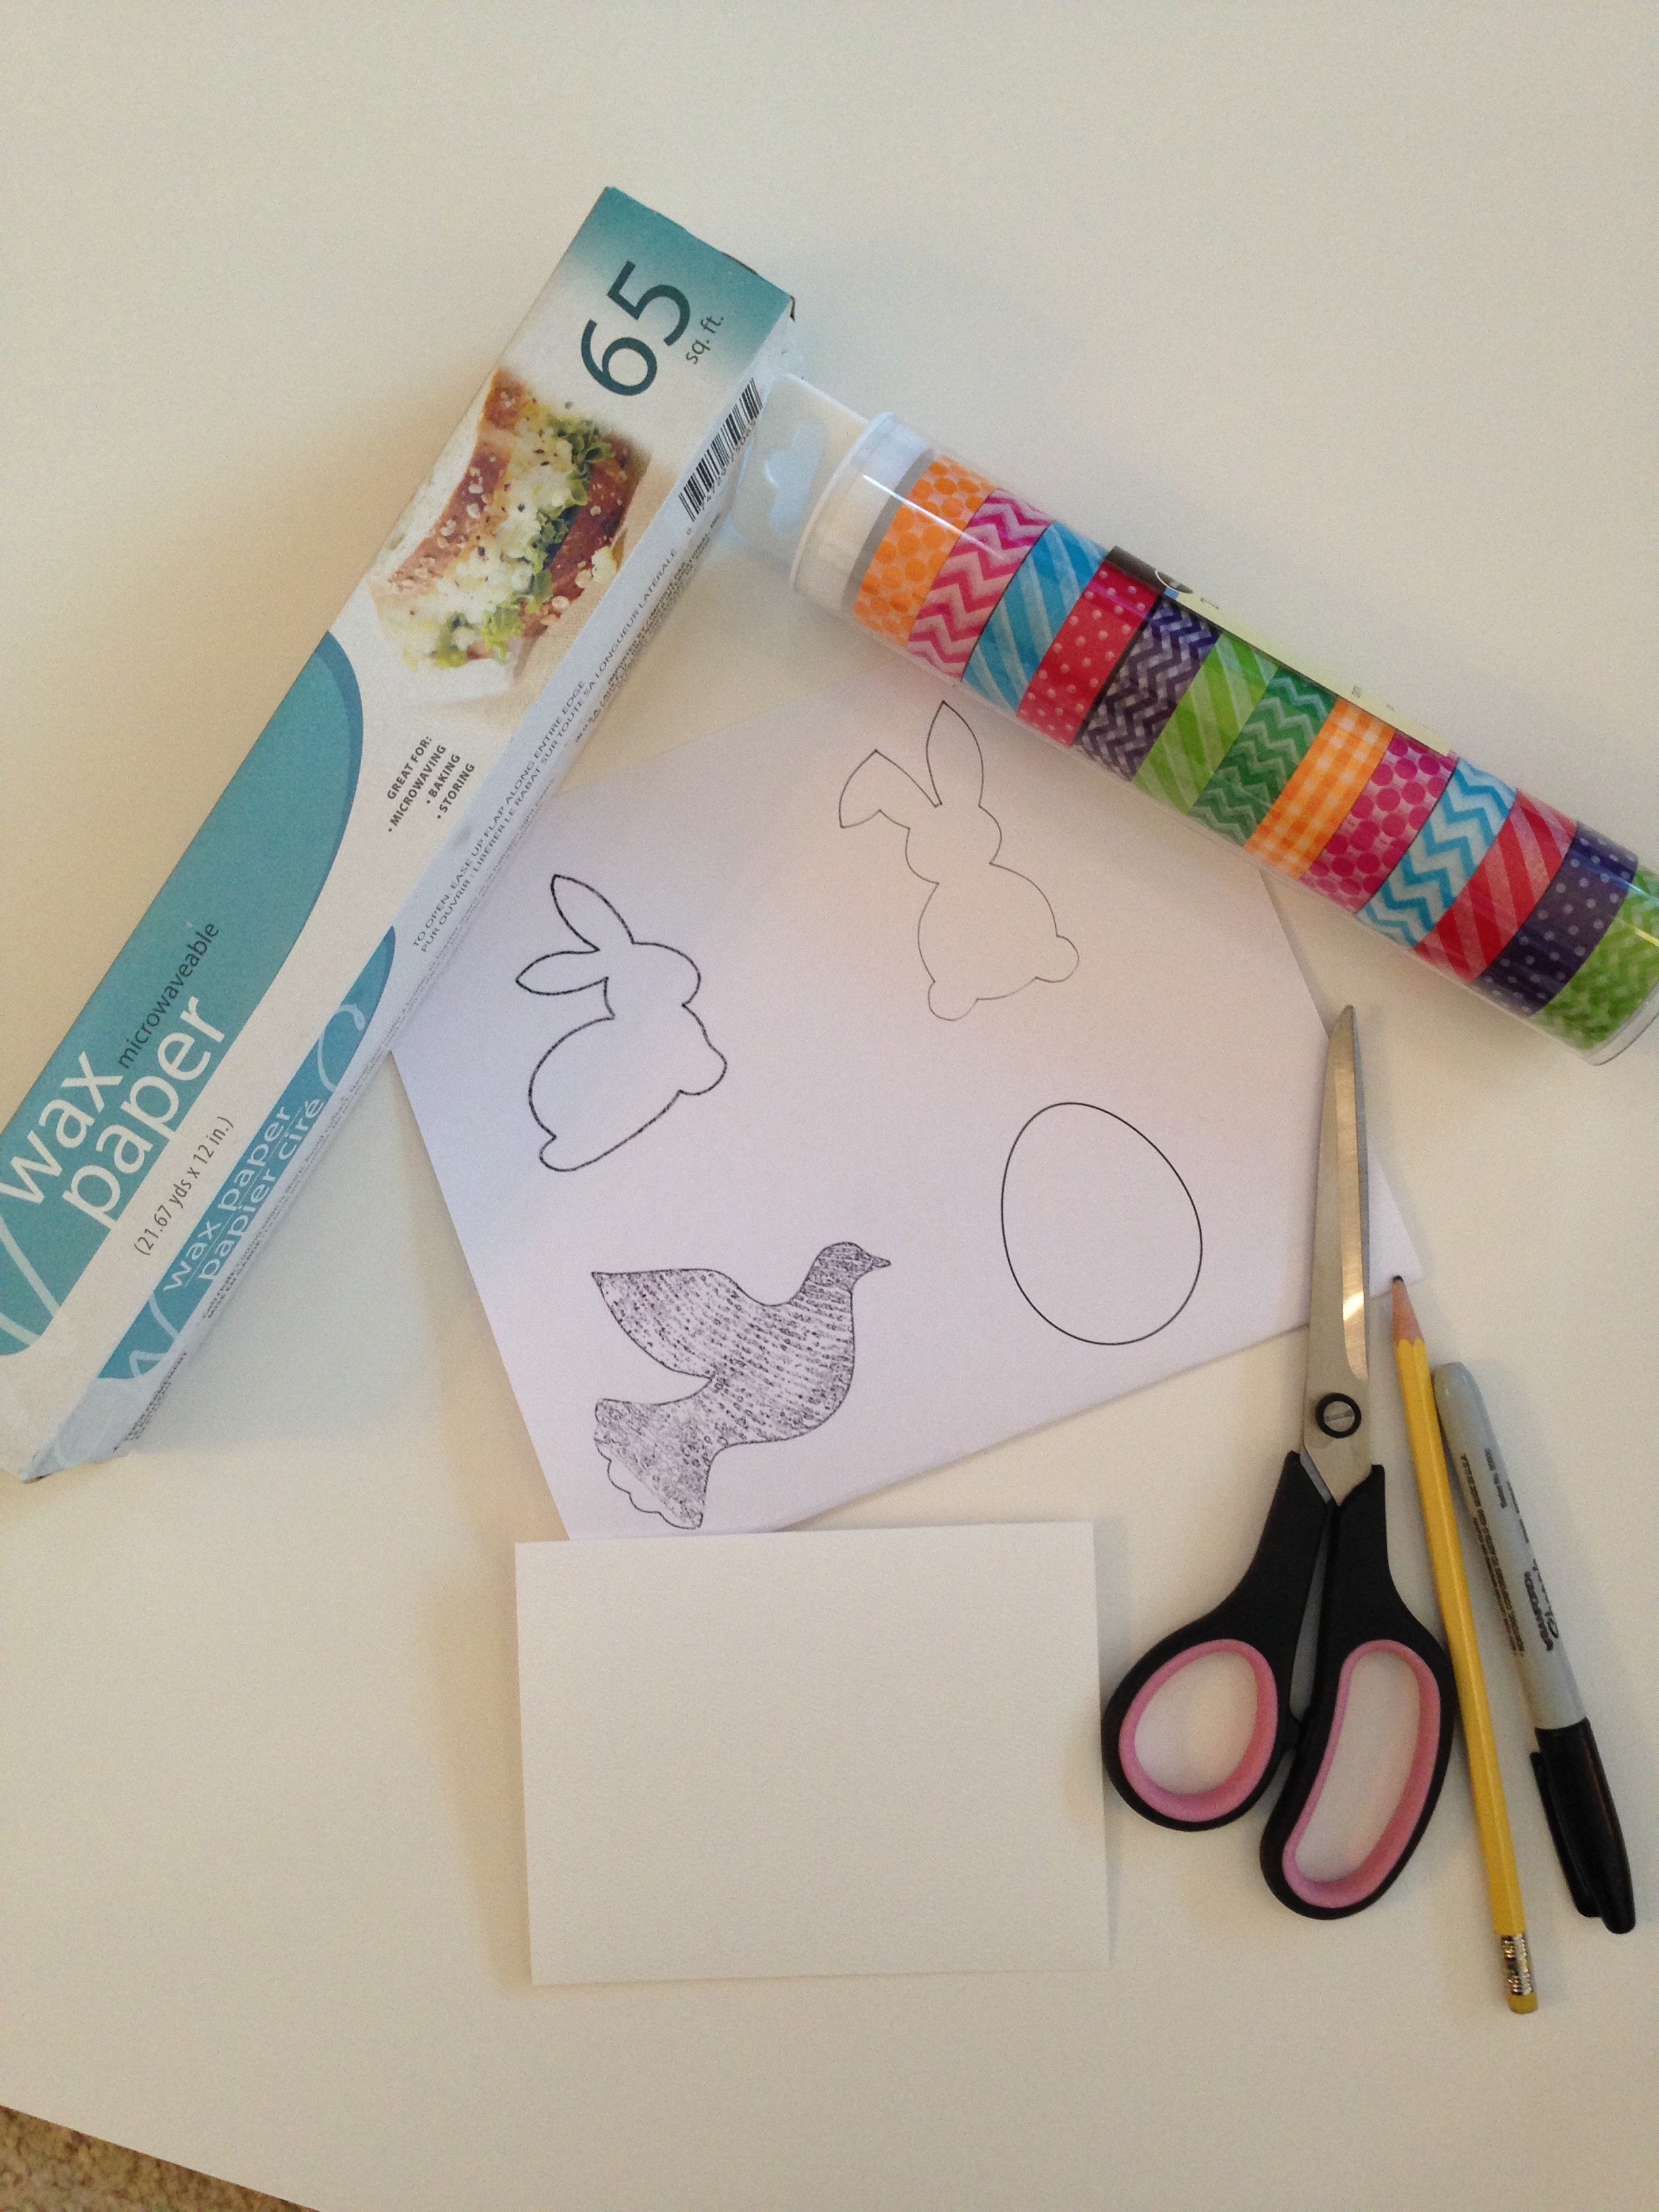
Here is what you will need:
- Washi Tape – I found mine at Michaels
- White Blank Notecards – I love the White Matte Textured Notecards from Office Depot that come in a set of 50 with envelopes for just $9.99
- Parchment / Waxed Paper
- Scissors
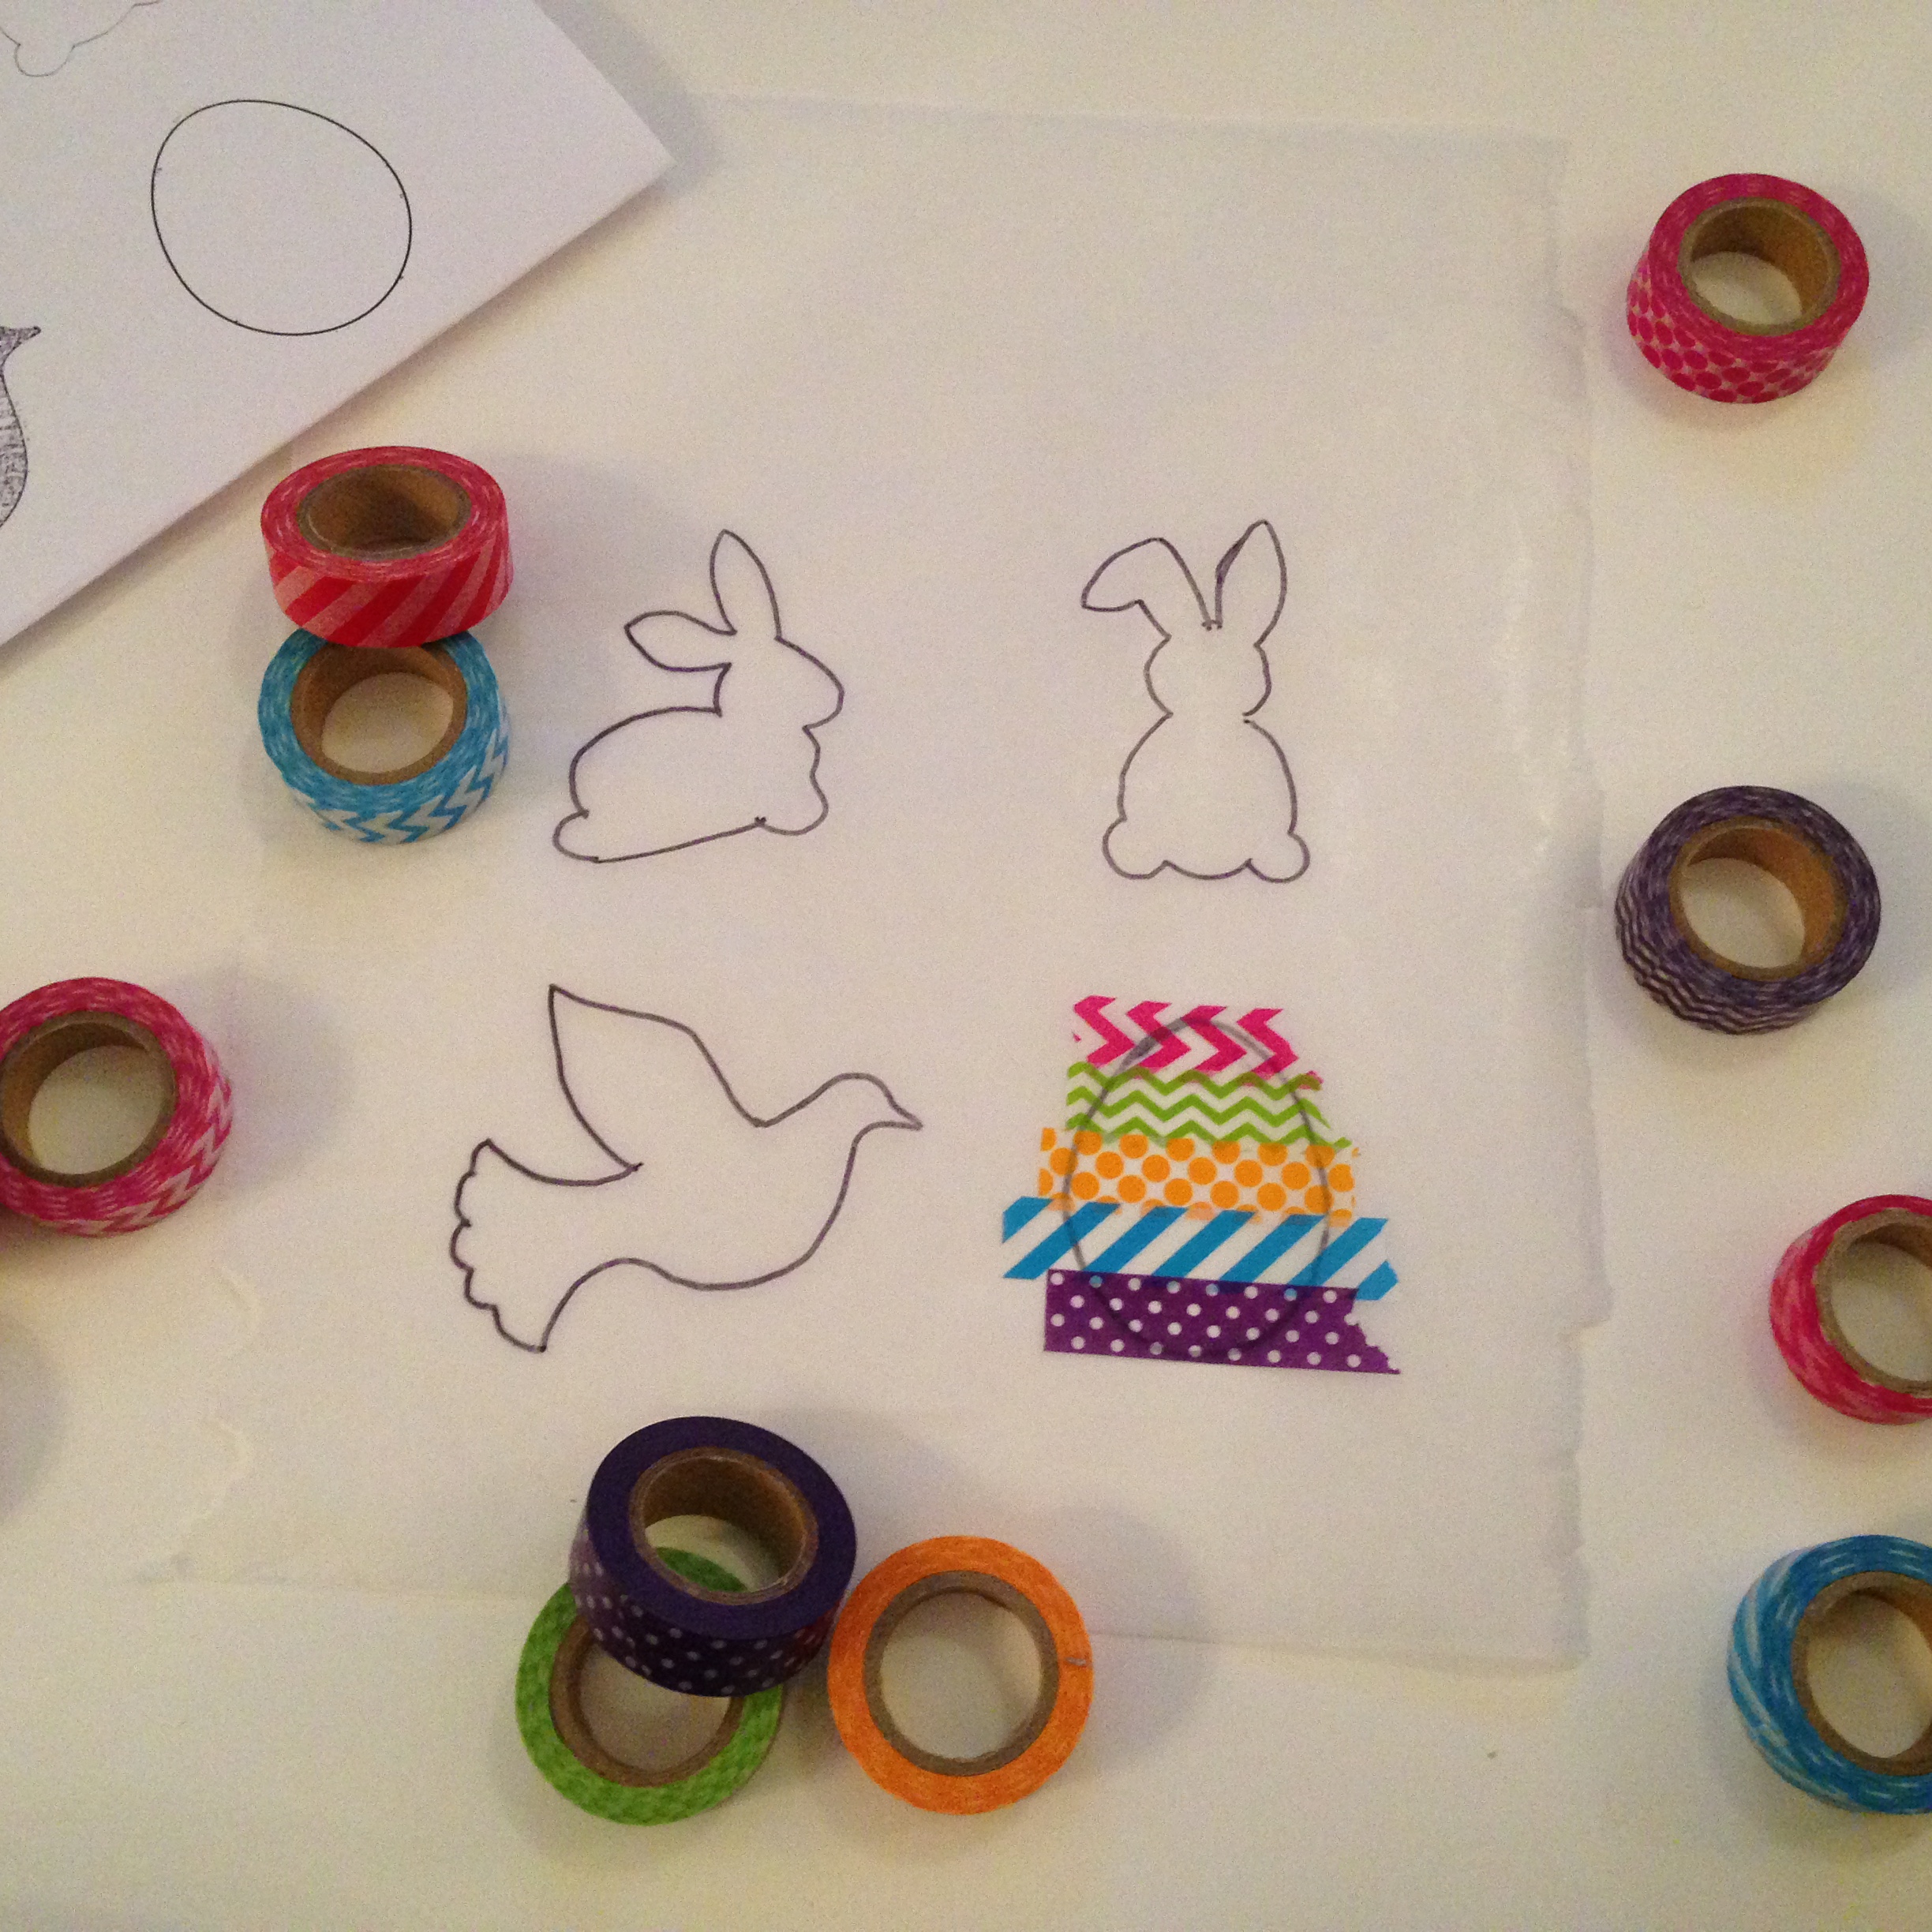
- Line Drawing of your desired shape you want to create on your notecard. You can download my patterns already prepped for you here: Washi Tape Easter and Passover Card Patterns
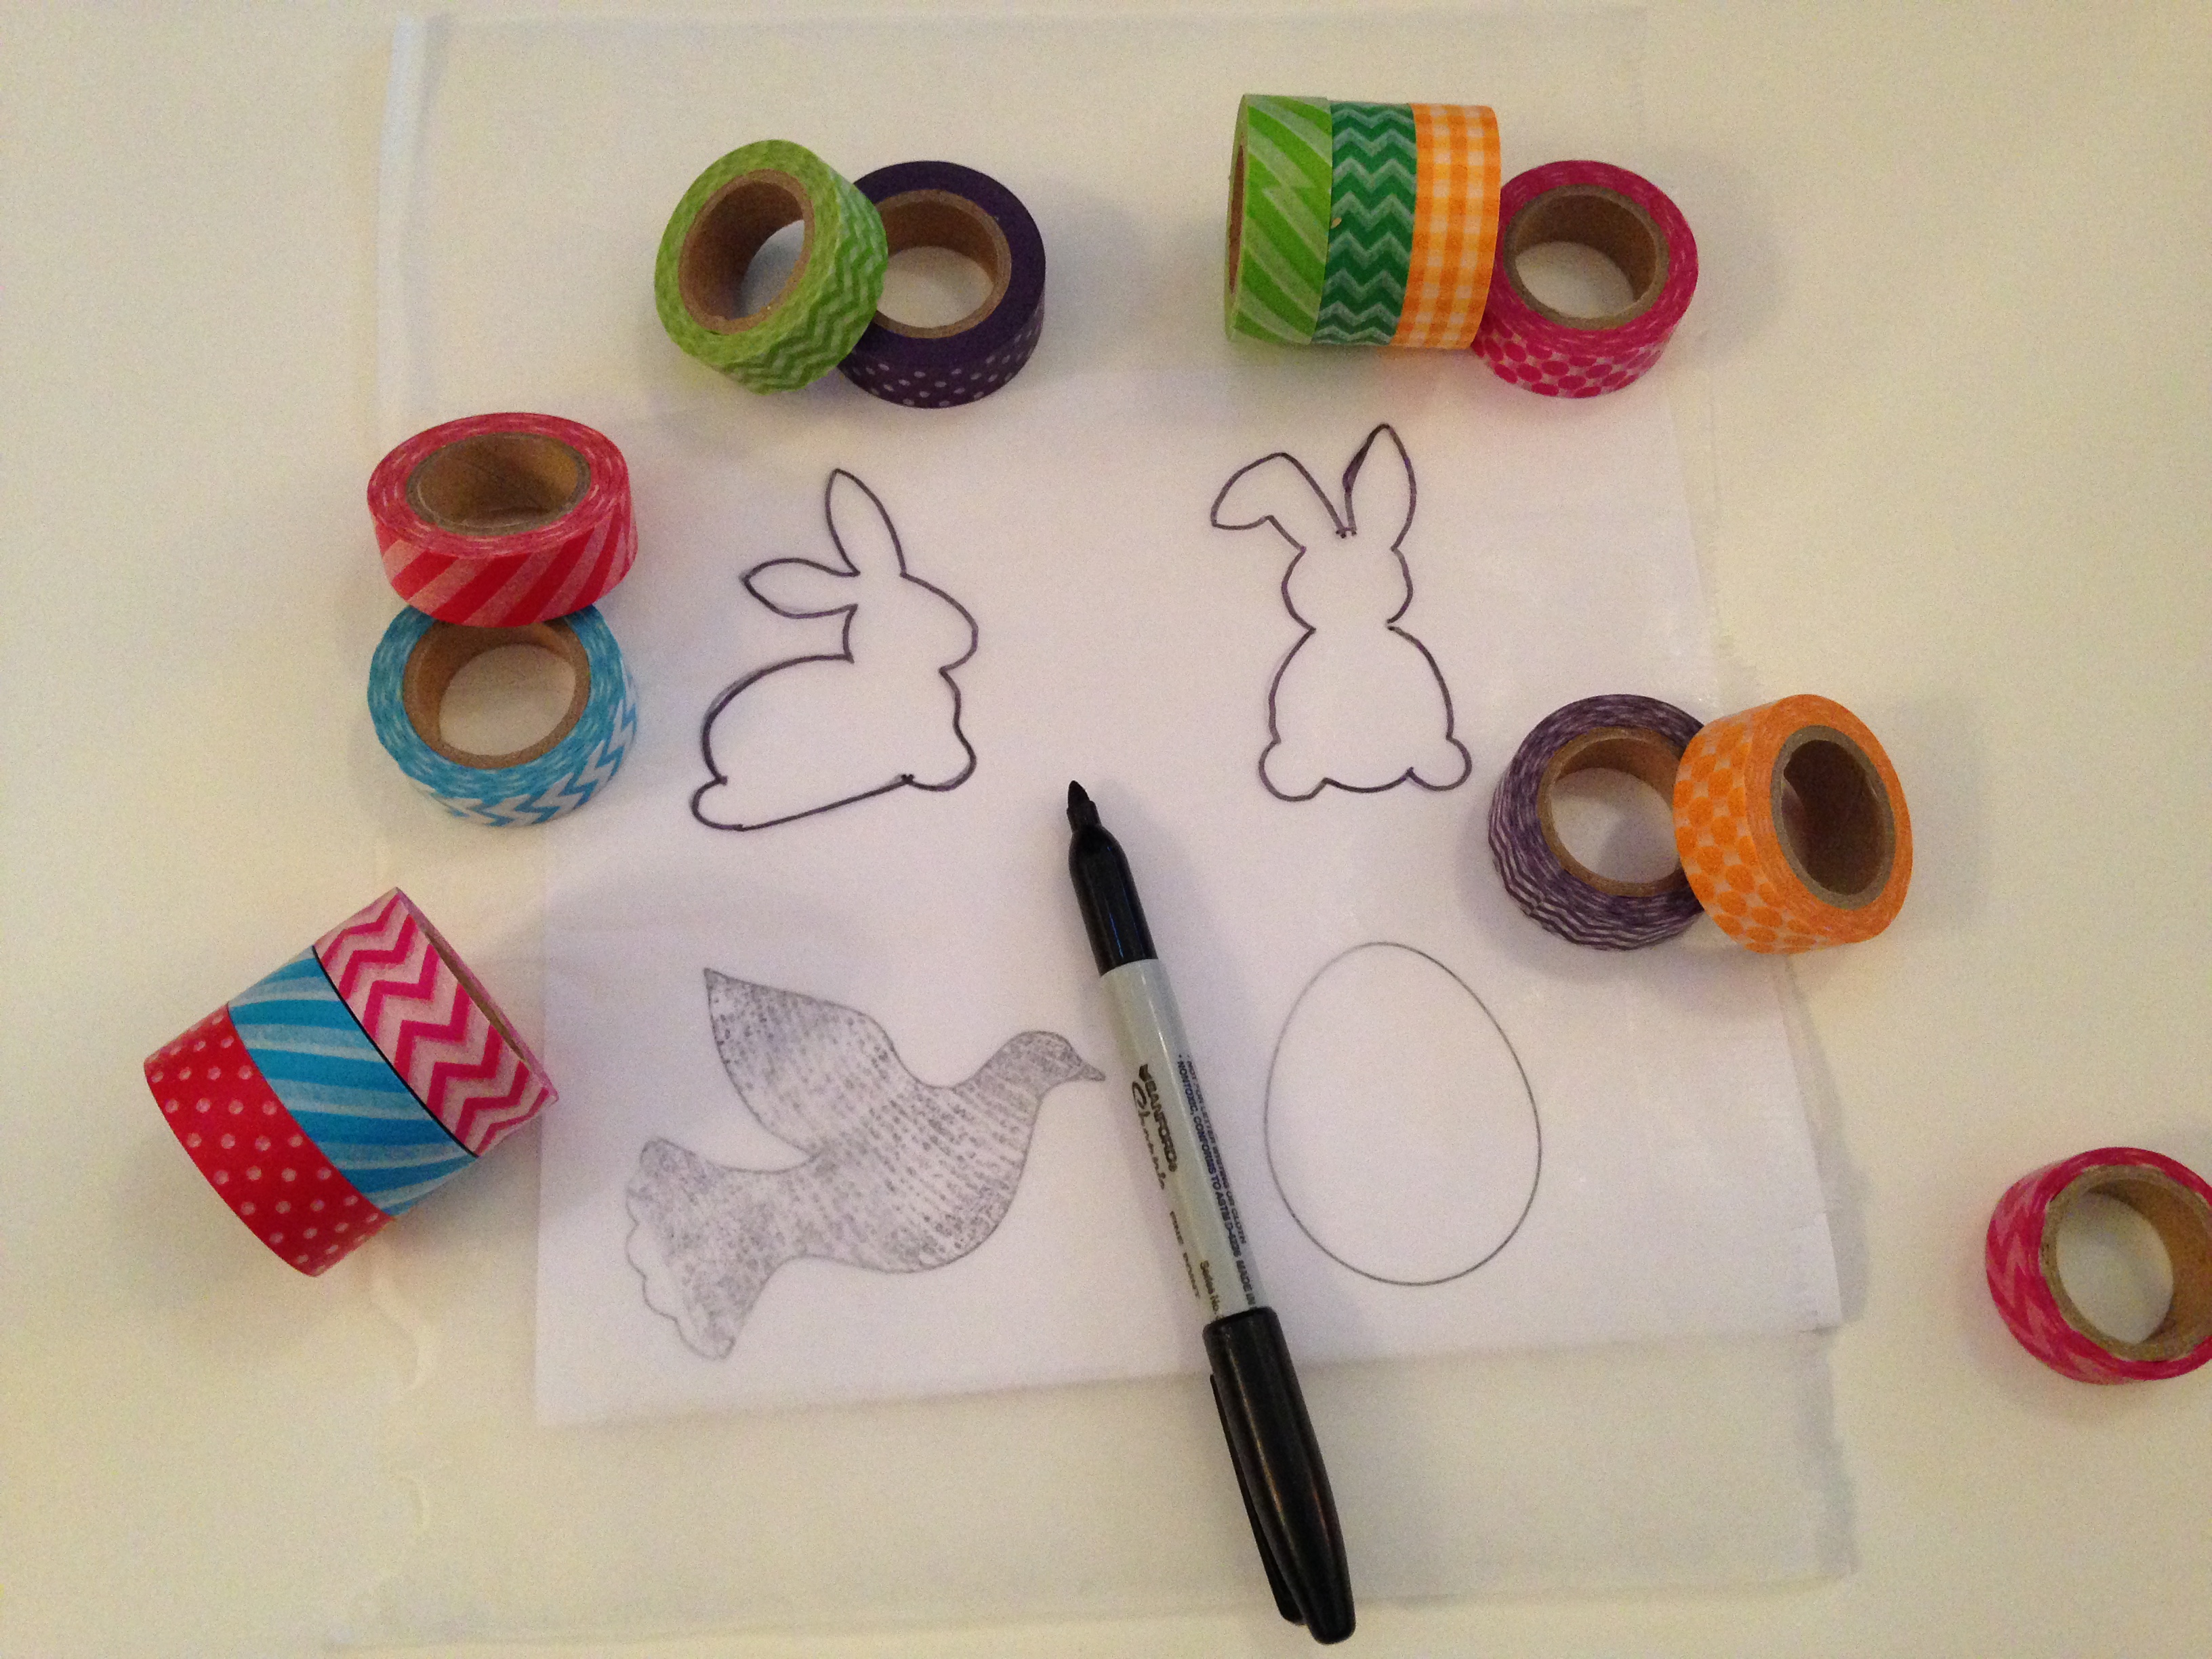
 Flip the waxed paper over and use a black marker to trace images with the wax side face down on the patterns. Quick Tip: If you tape over the ink, the ink can transfer to the washi tape so trace on the backside of the paper.
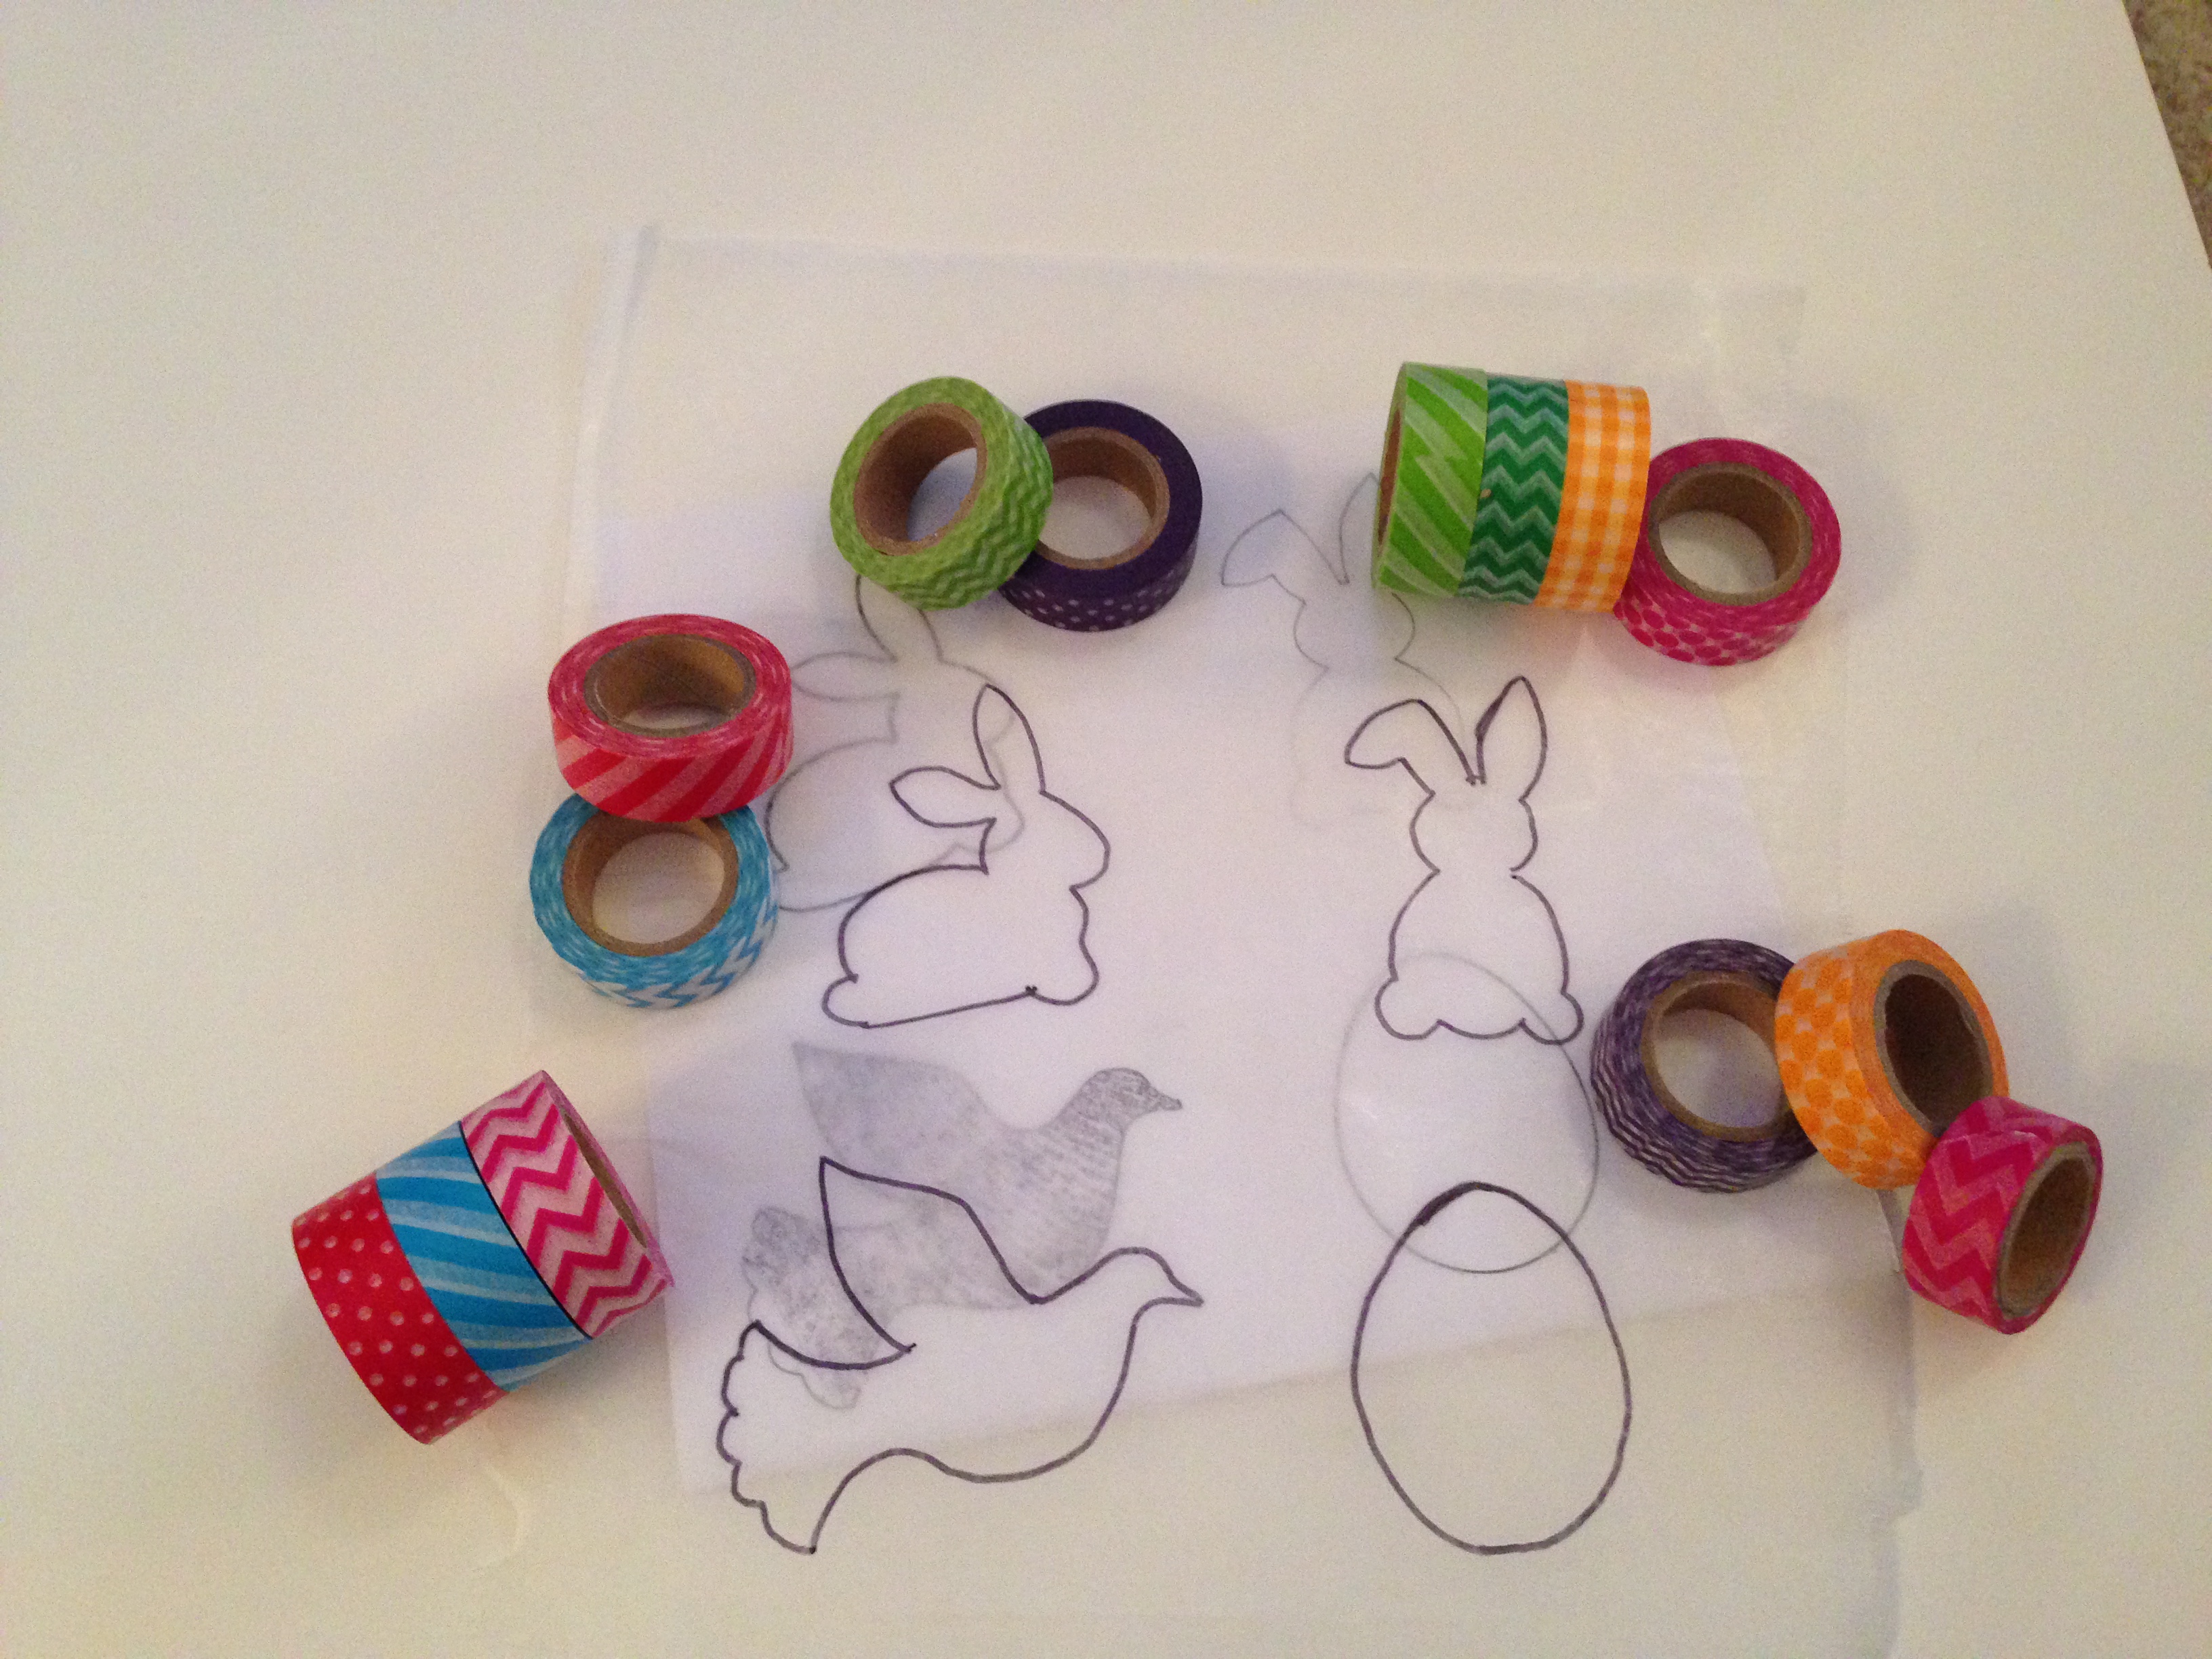
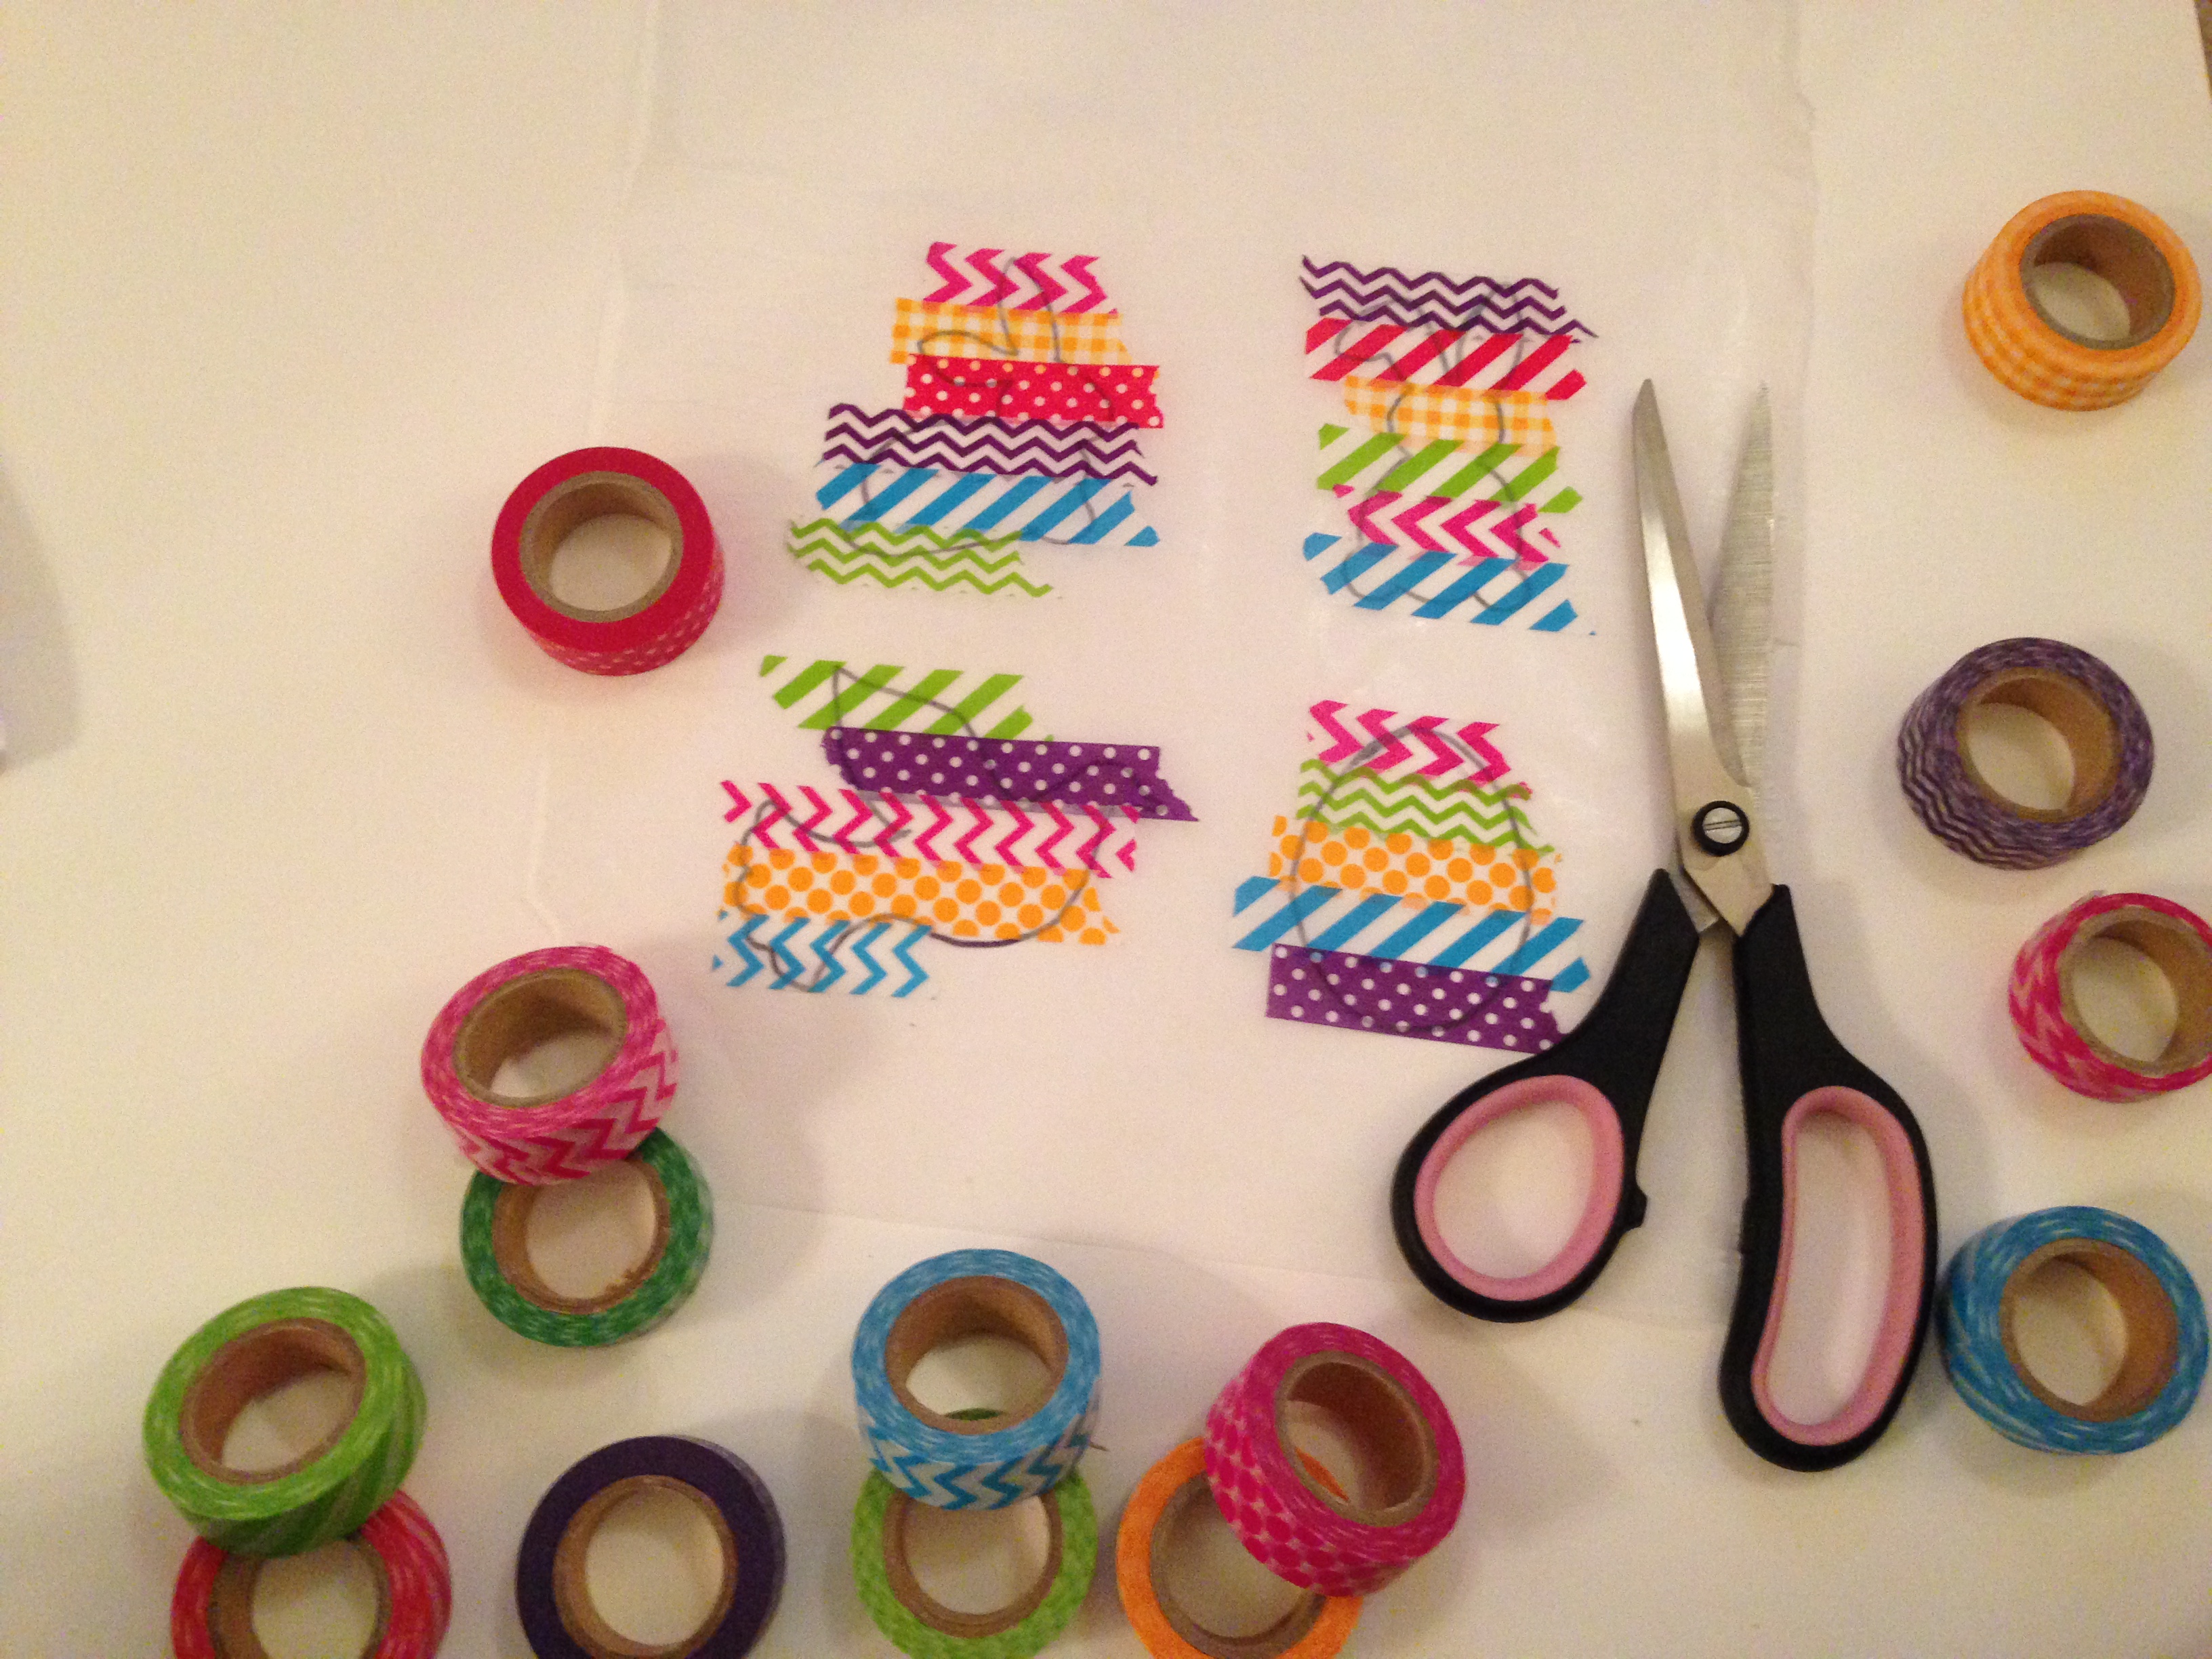
 Once you are finished tracing, flip the wax side up and cover the entire shape with strips of Washi Tape across the pattern (on the wax side). Don’t worry about the ripped and uneven ends, you’ll be cutting those off so just have fun! Quick Tip: Start at the top of the pattern and slightly overlap each layer of tape as you move down the pattern until the whole pattern is covered.
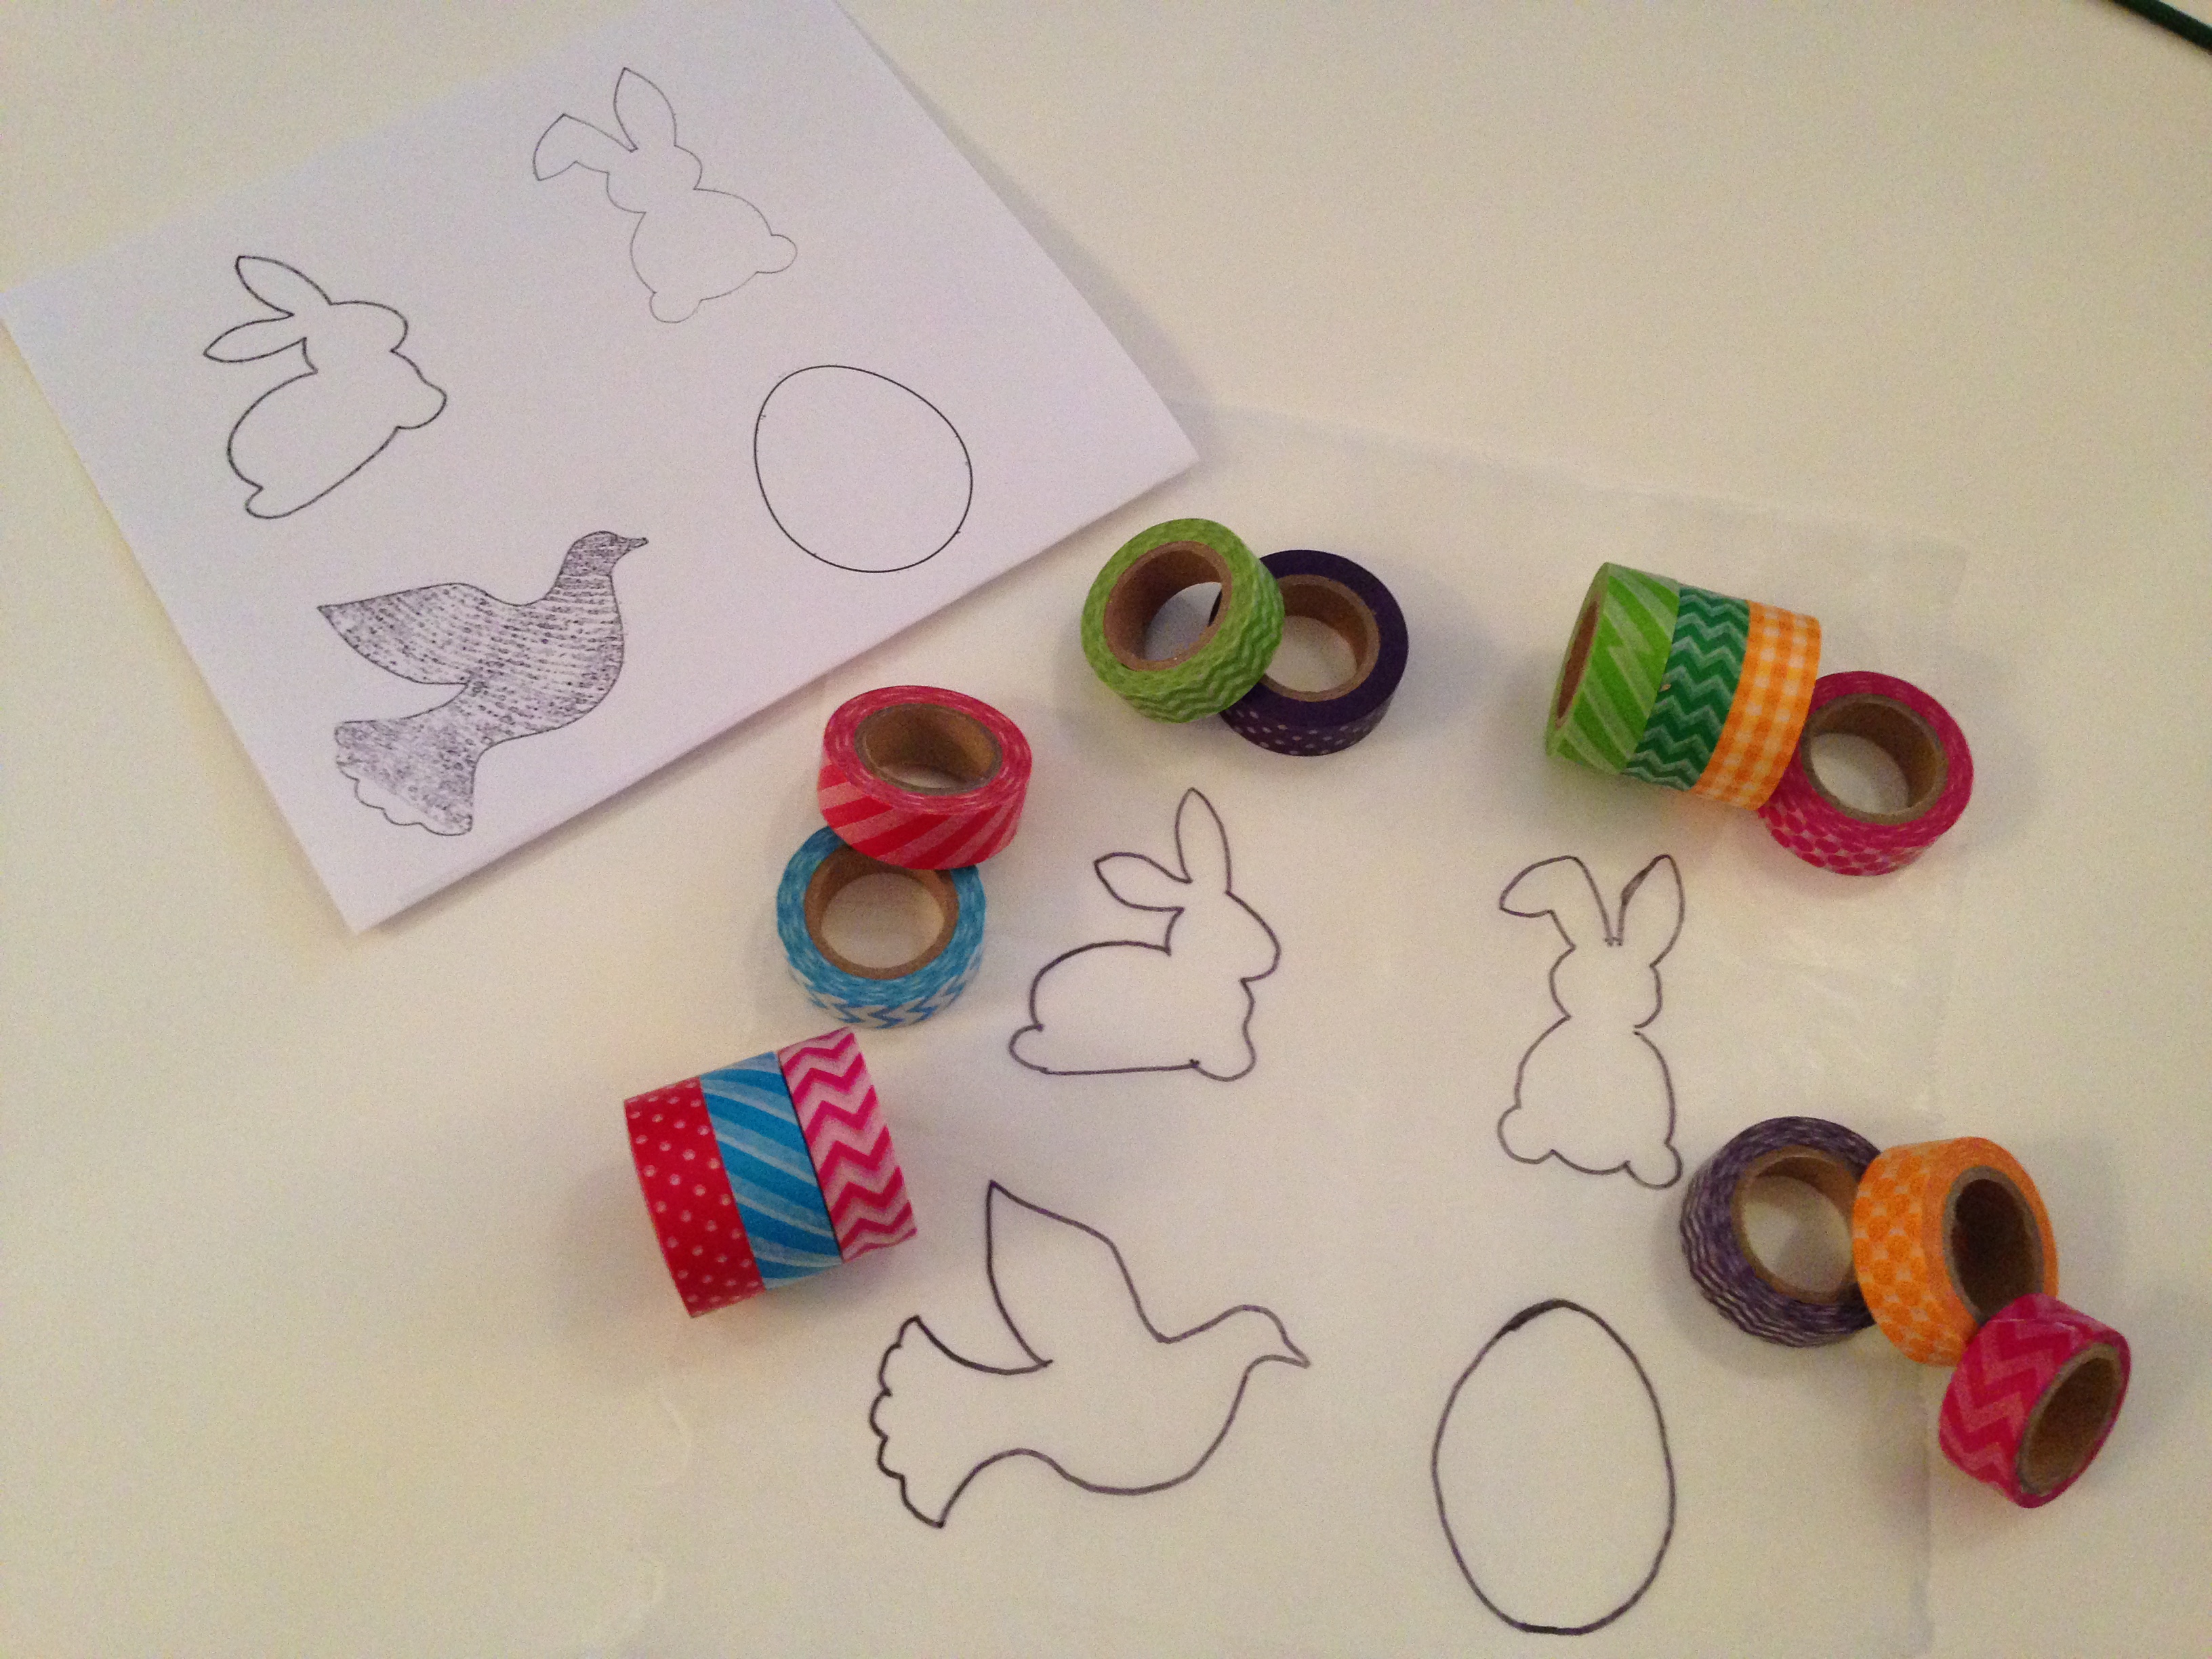
 When done covering the pattern with the tape, cut out pattern and peel tape off of the wax paper carefully from the top to bottom. Start peeling from the first piece of tape that you put down. The overlapping layers will hold the sticker together.
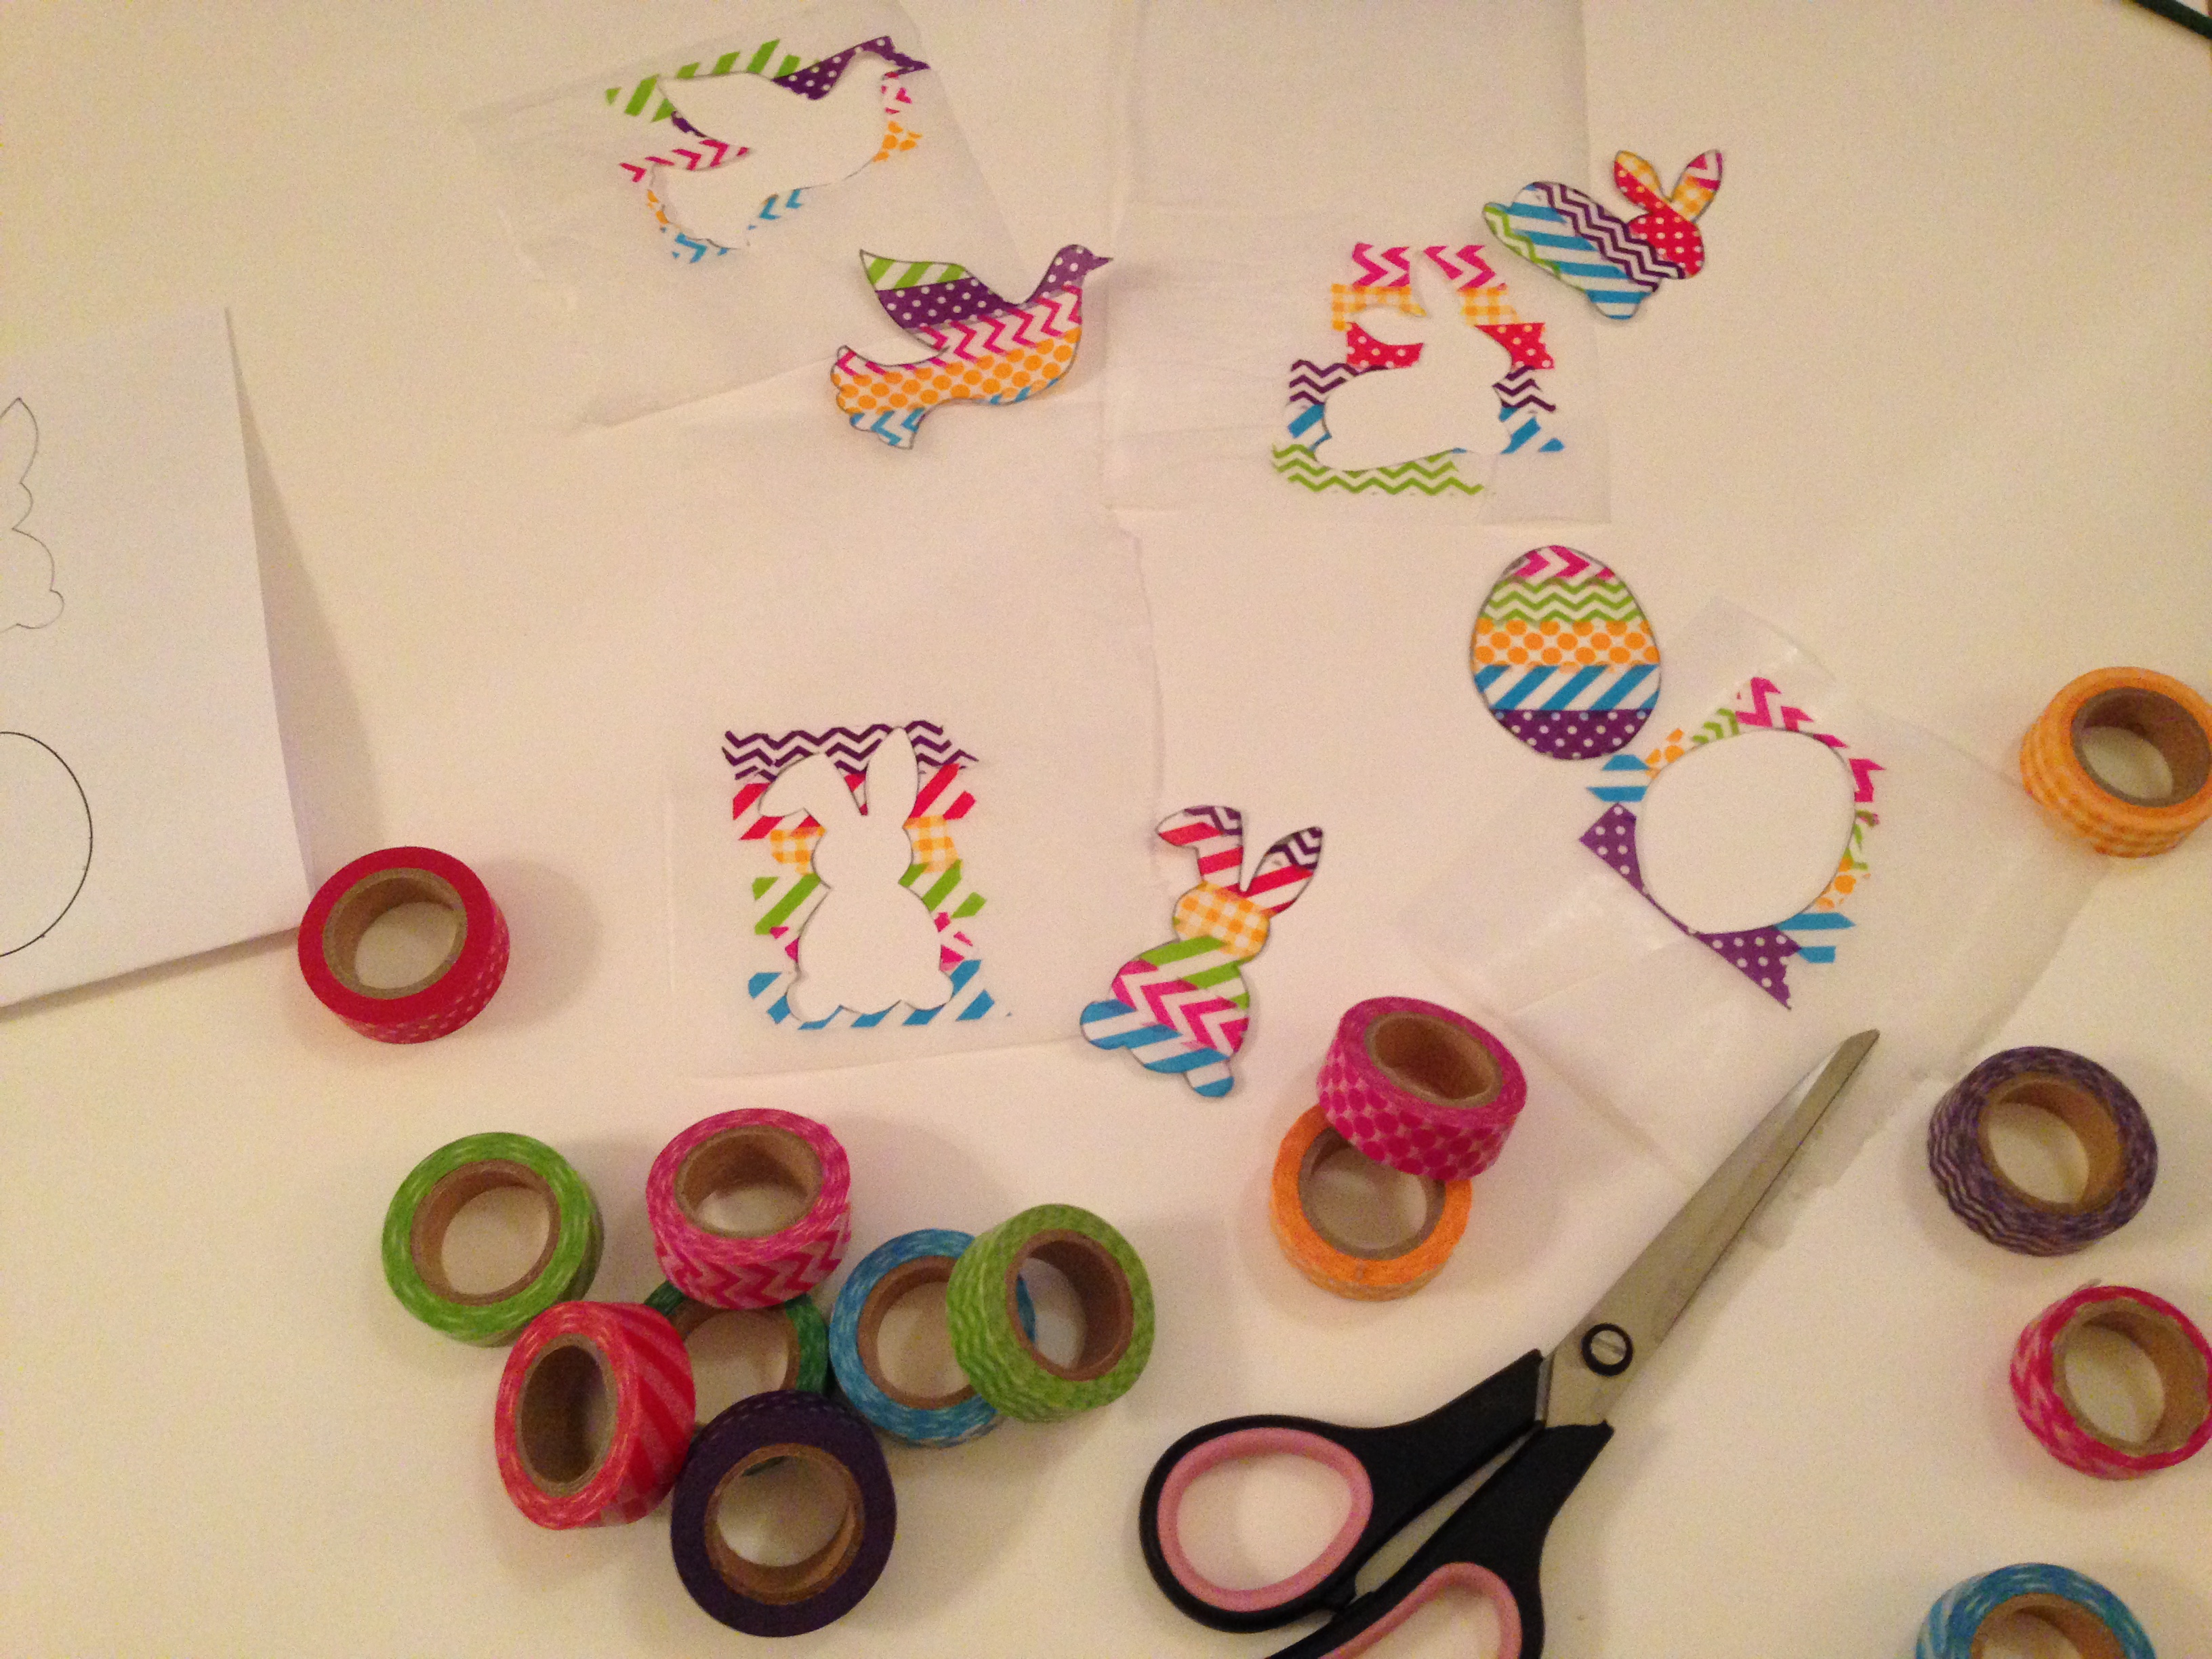
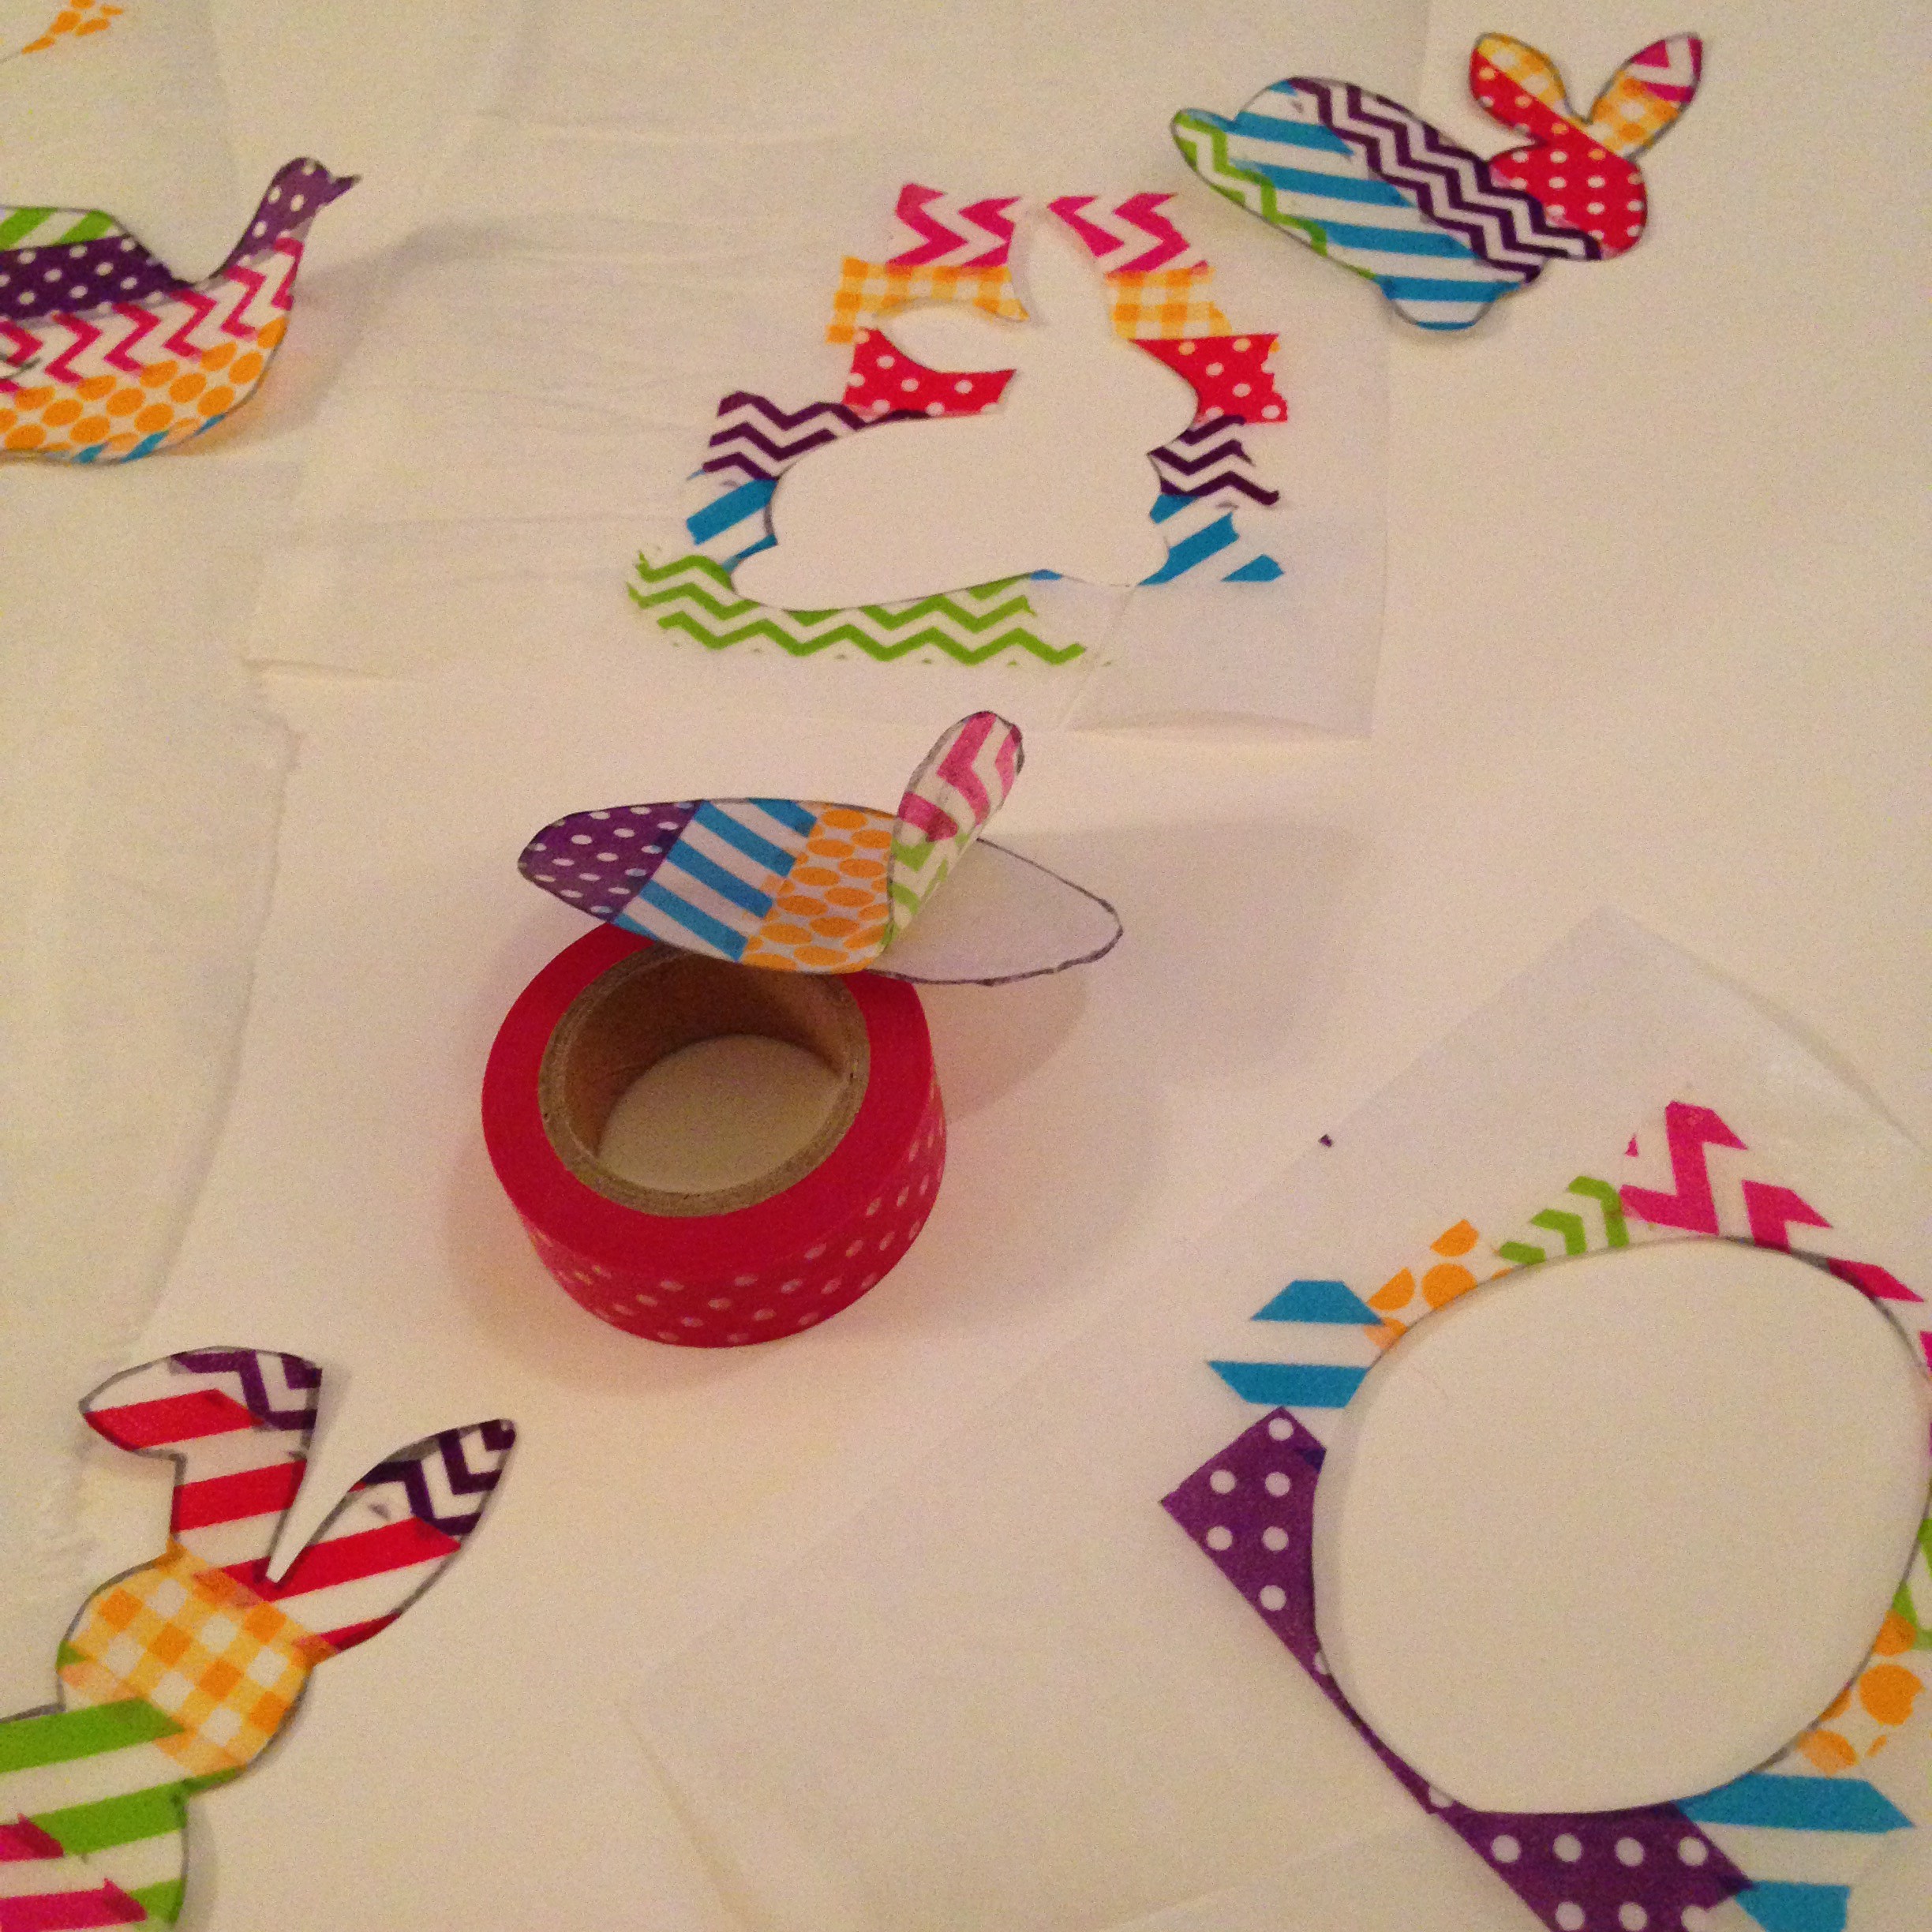 Place completed sticker on the front of a notecard and voila! Beautiful handmade cards for Easter or Passover!
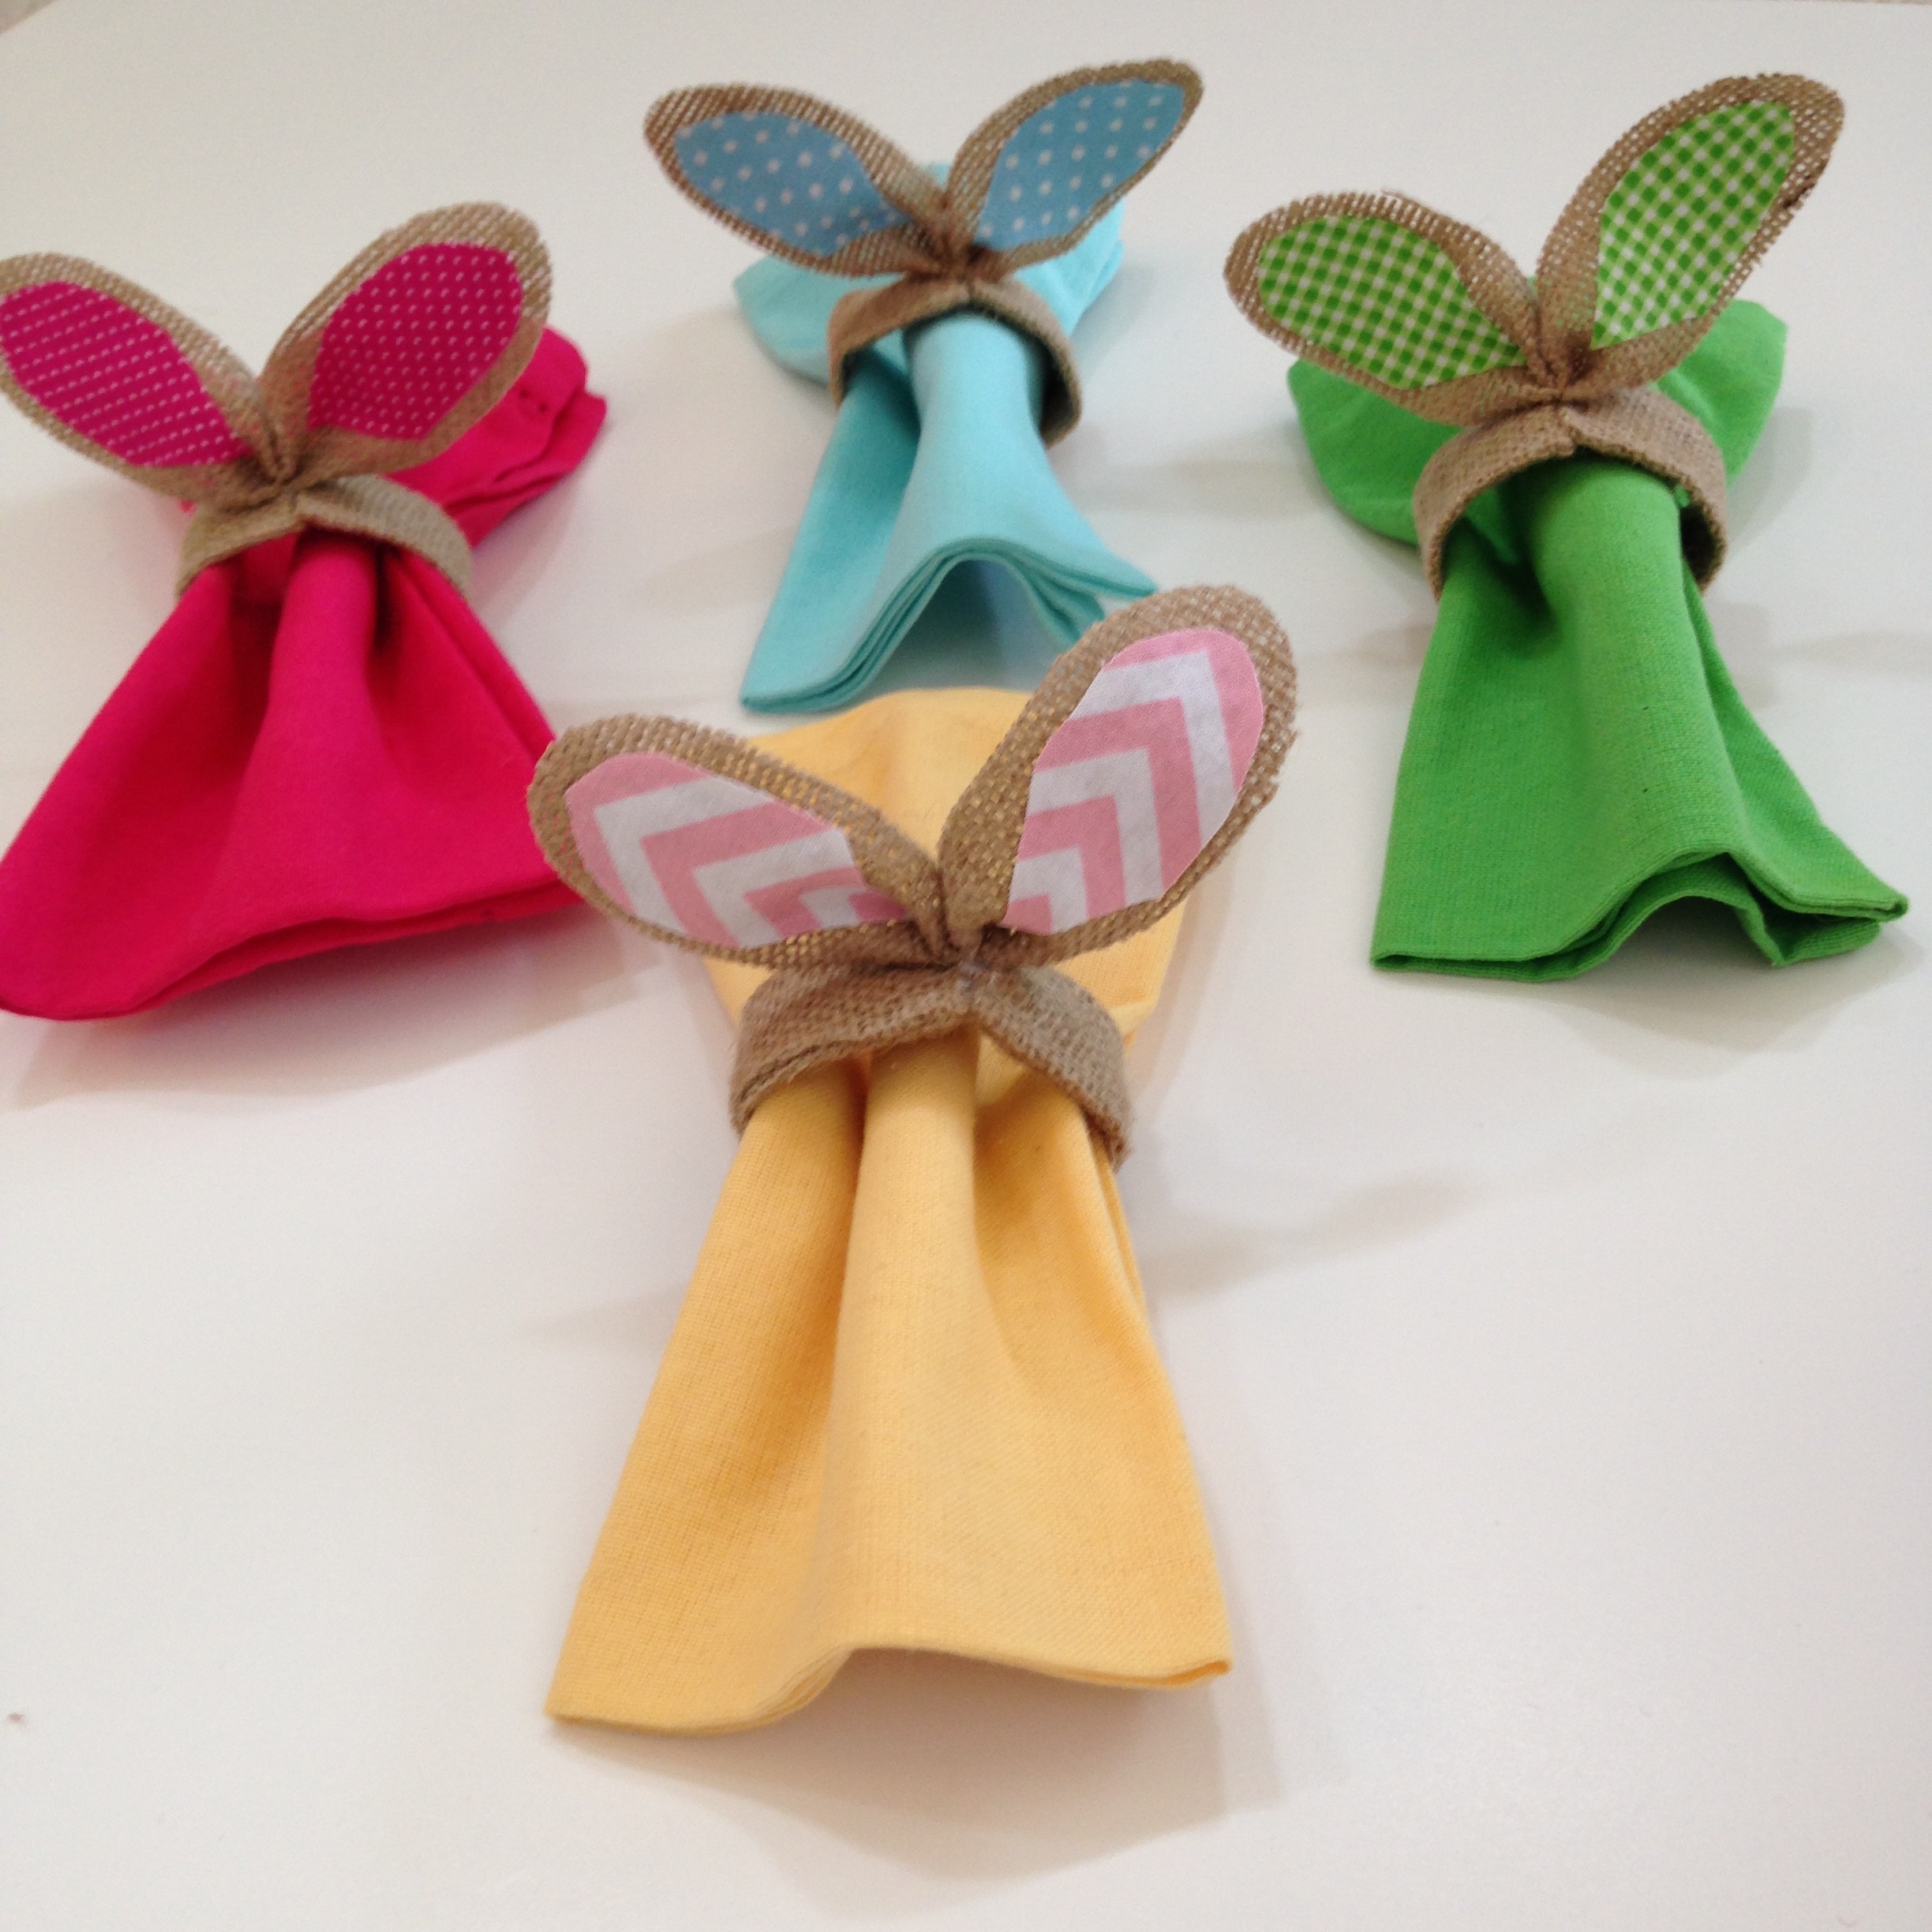
Easter Bunny Ears Napkin Rings
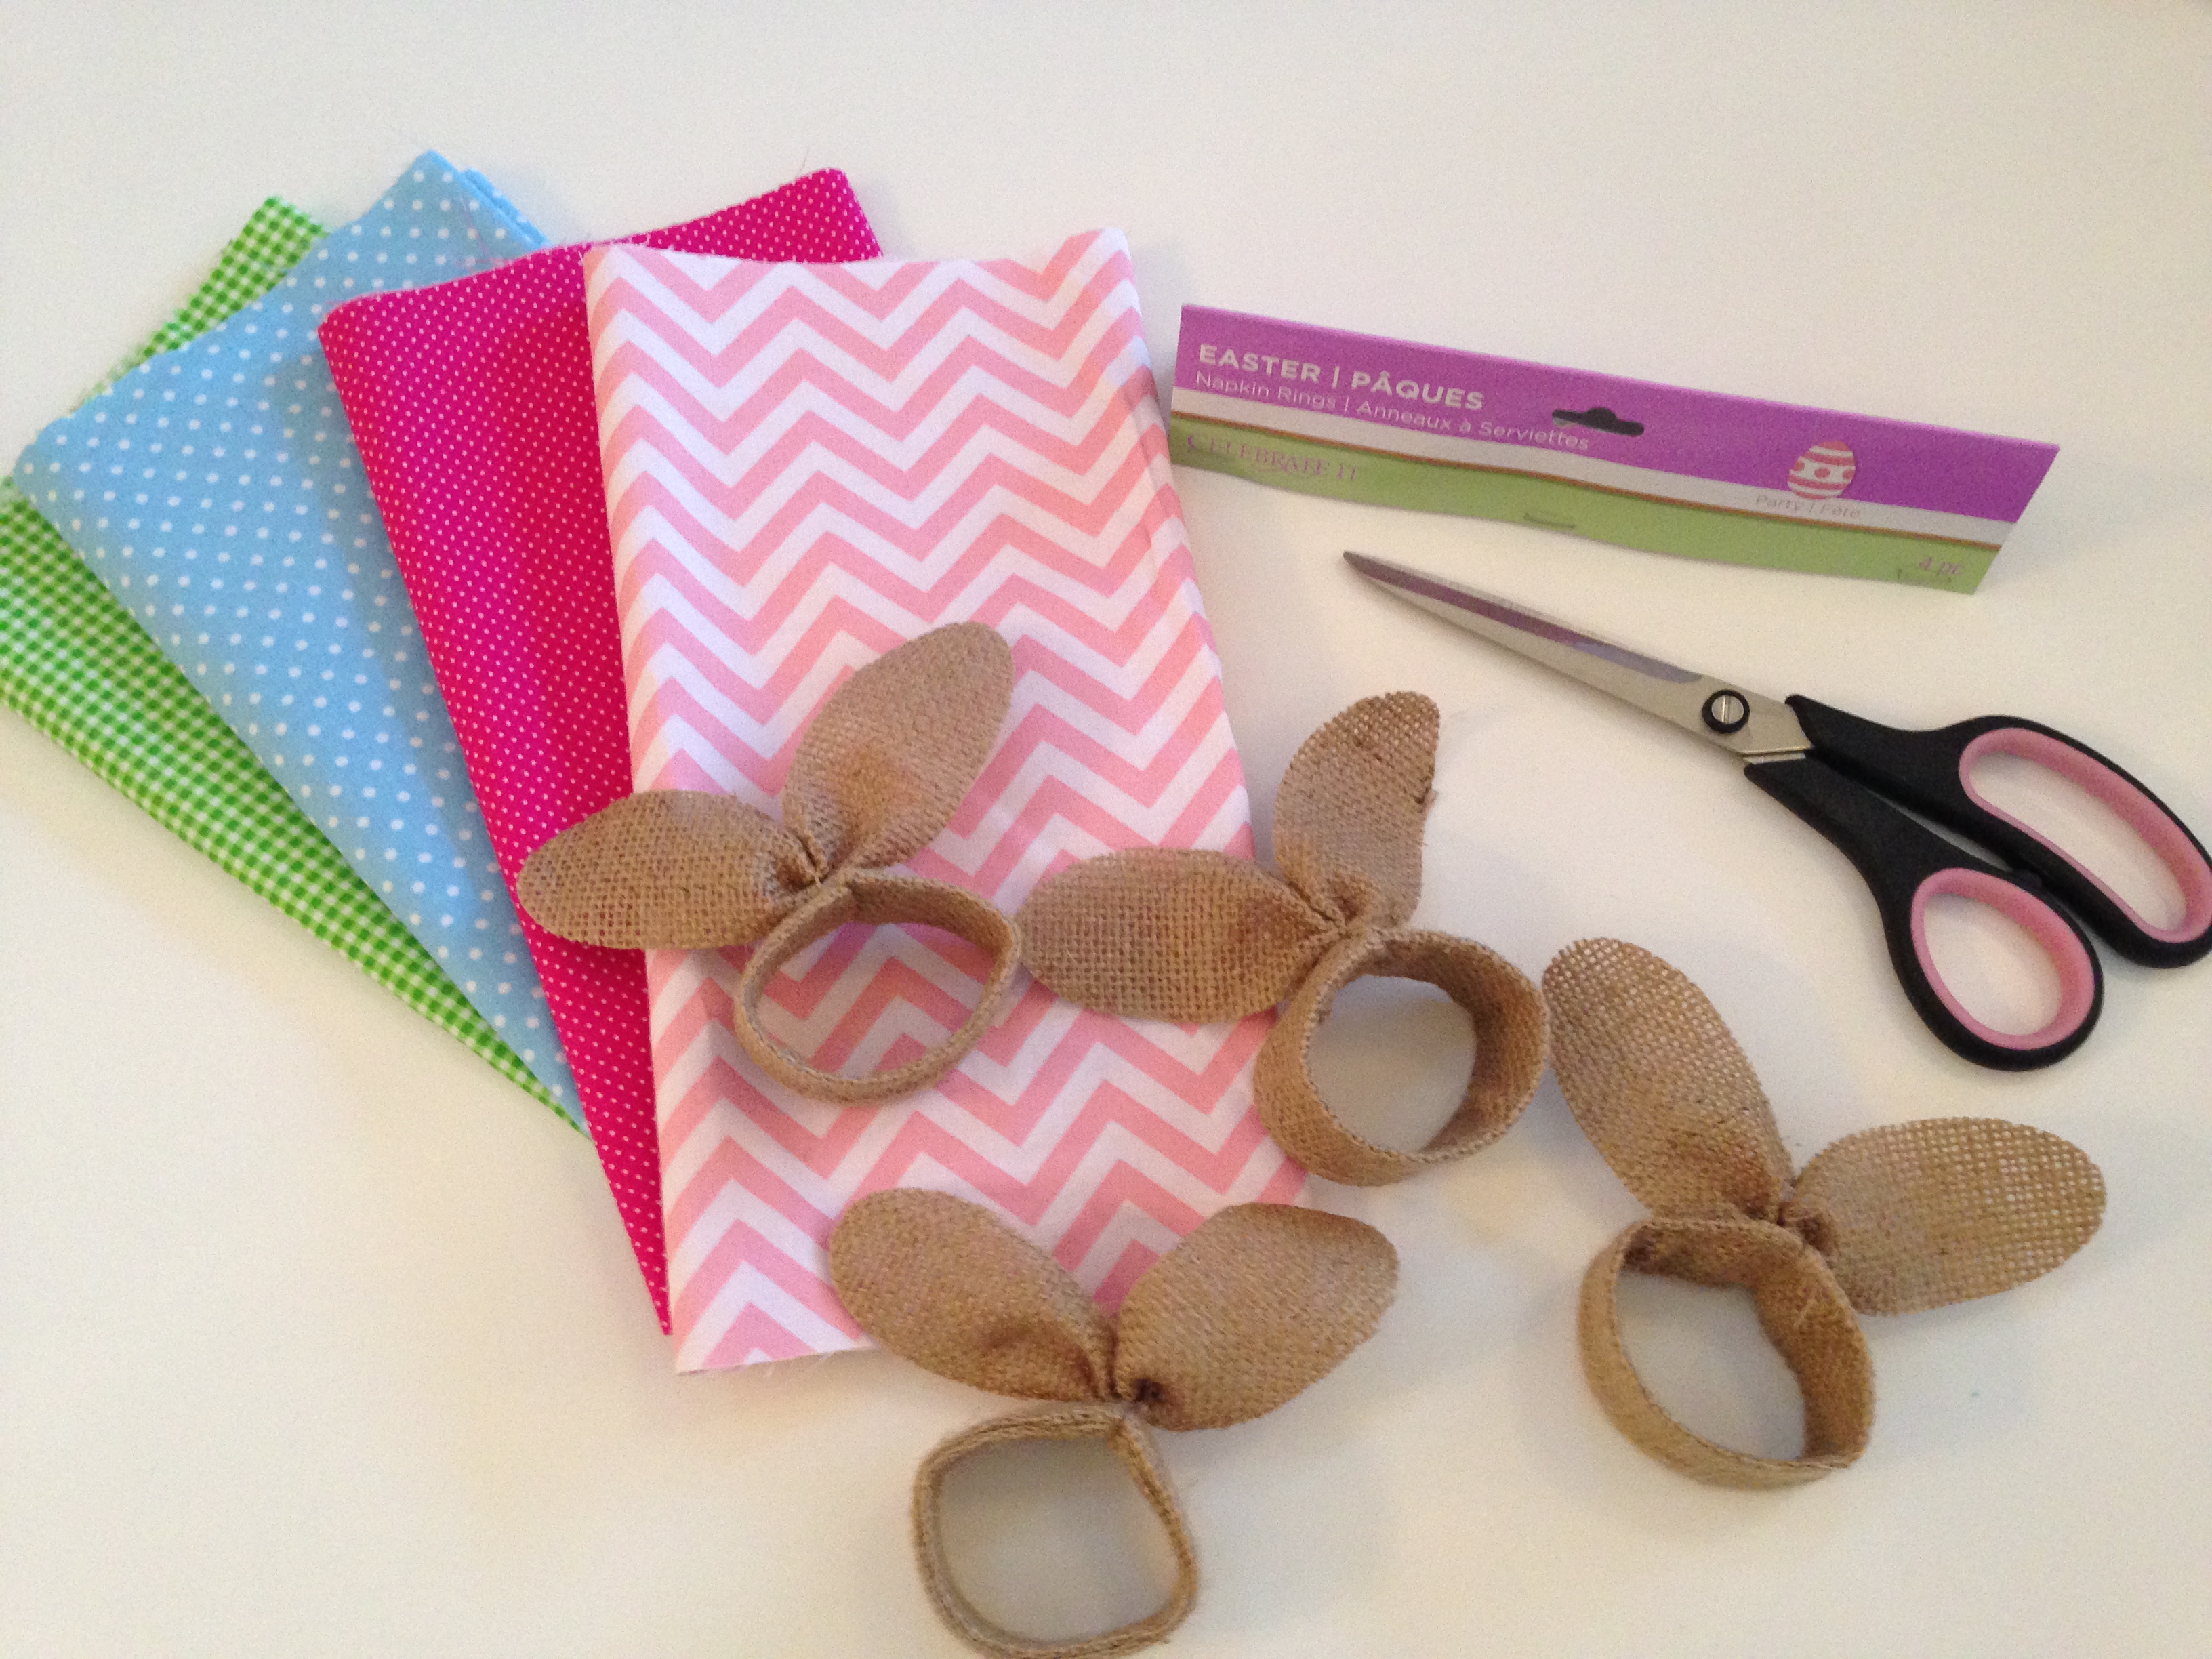
I found these adorable Bunny Ears Napkin Rings at Michaels for just $4.99 for a pack of four. They were actually on sale when I bought them so after the 40% off they were only $2.80 for the pack (about .75 each). The burlap is adorable but I love all of the colors of Spring so I wanted to add some colorful and patterned inserts to the ears to liven them up and make for an adorable Easter Table!
I purchased a ¼ of a yard of four different fabrics at Walmart for just $1 each. You will have plenty of fabric left over to use for other future projects.
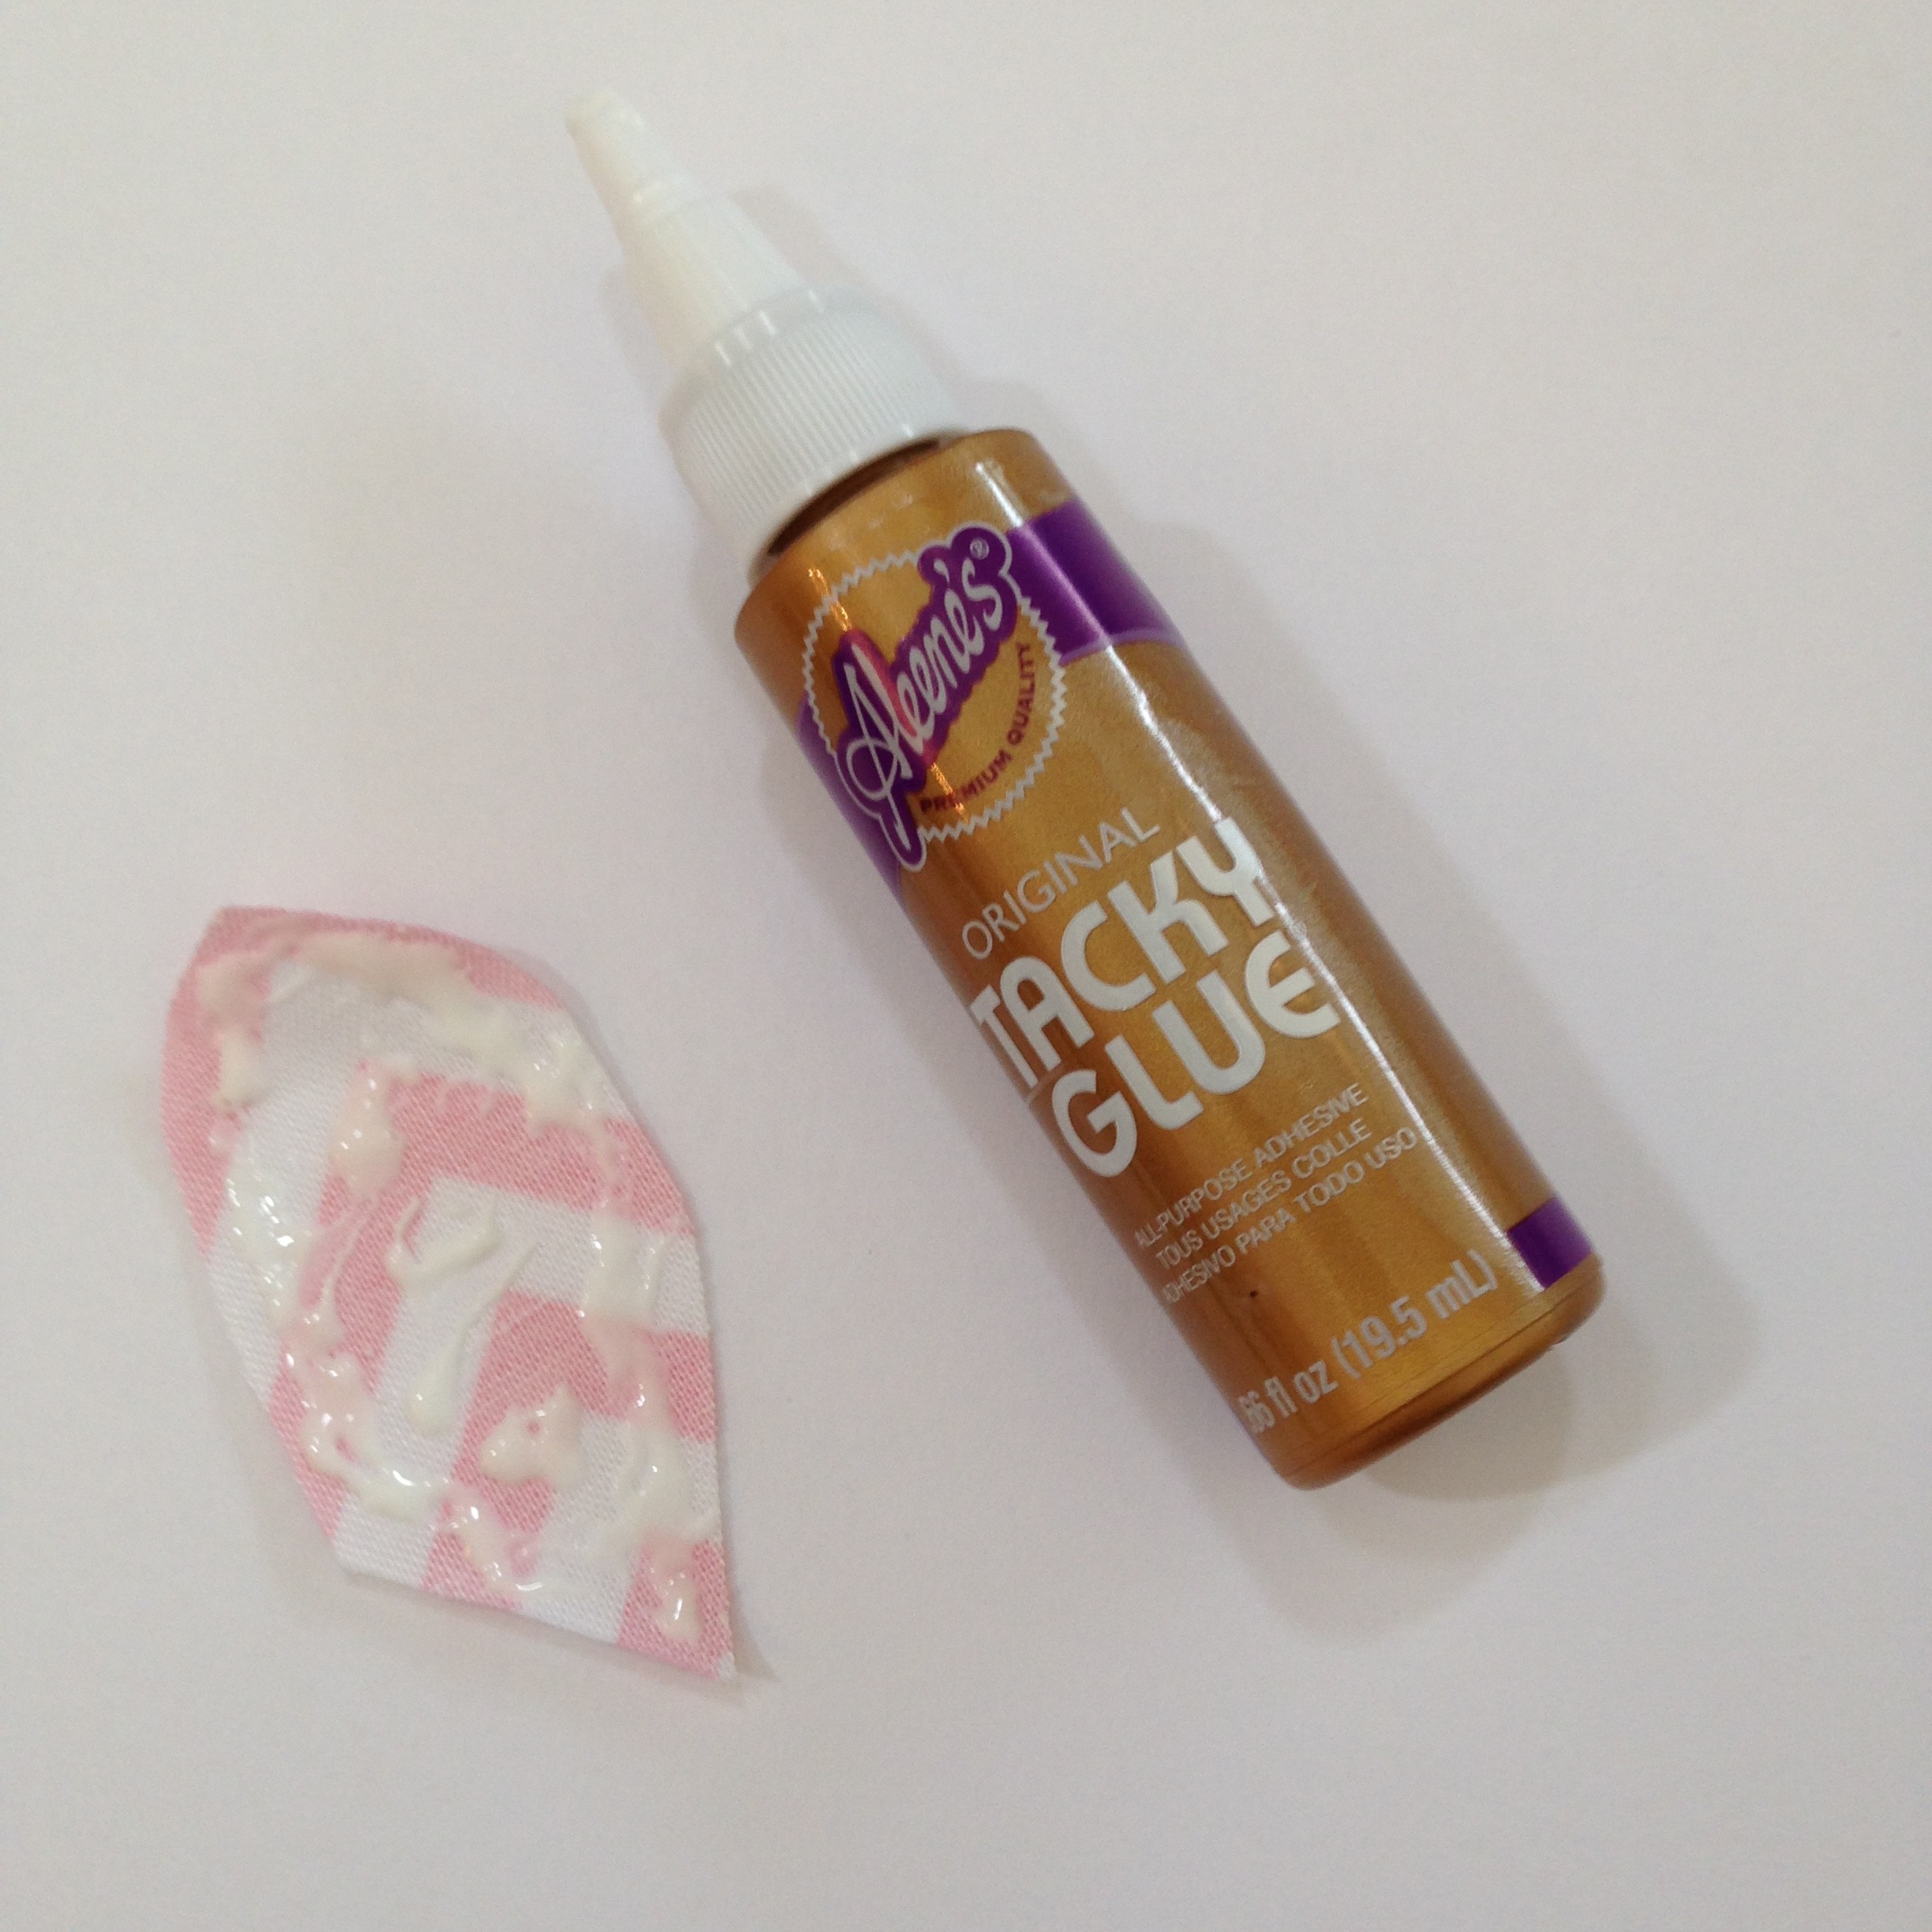
I bought some Alene’s Craft Glue at Michaels for $3.99 and then just needed a pair of scissors and a piece of paper to make a pattern.
Quick Tip: Use a piece of paper to make a pattern and save your fabric. Once you get your pattern the right size and shape you can use that to cut your fabric. Much easier and less expensive than experimenting with your fabric. I’ve already created it for you and you can download the pattern here! Bunny Ears Napkin Ring Pattern
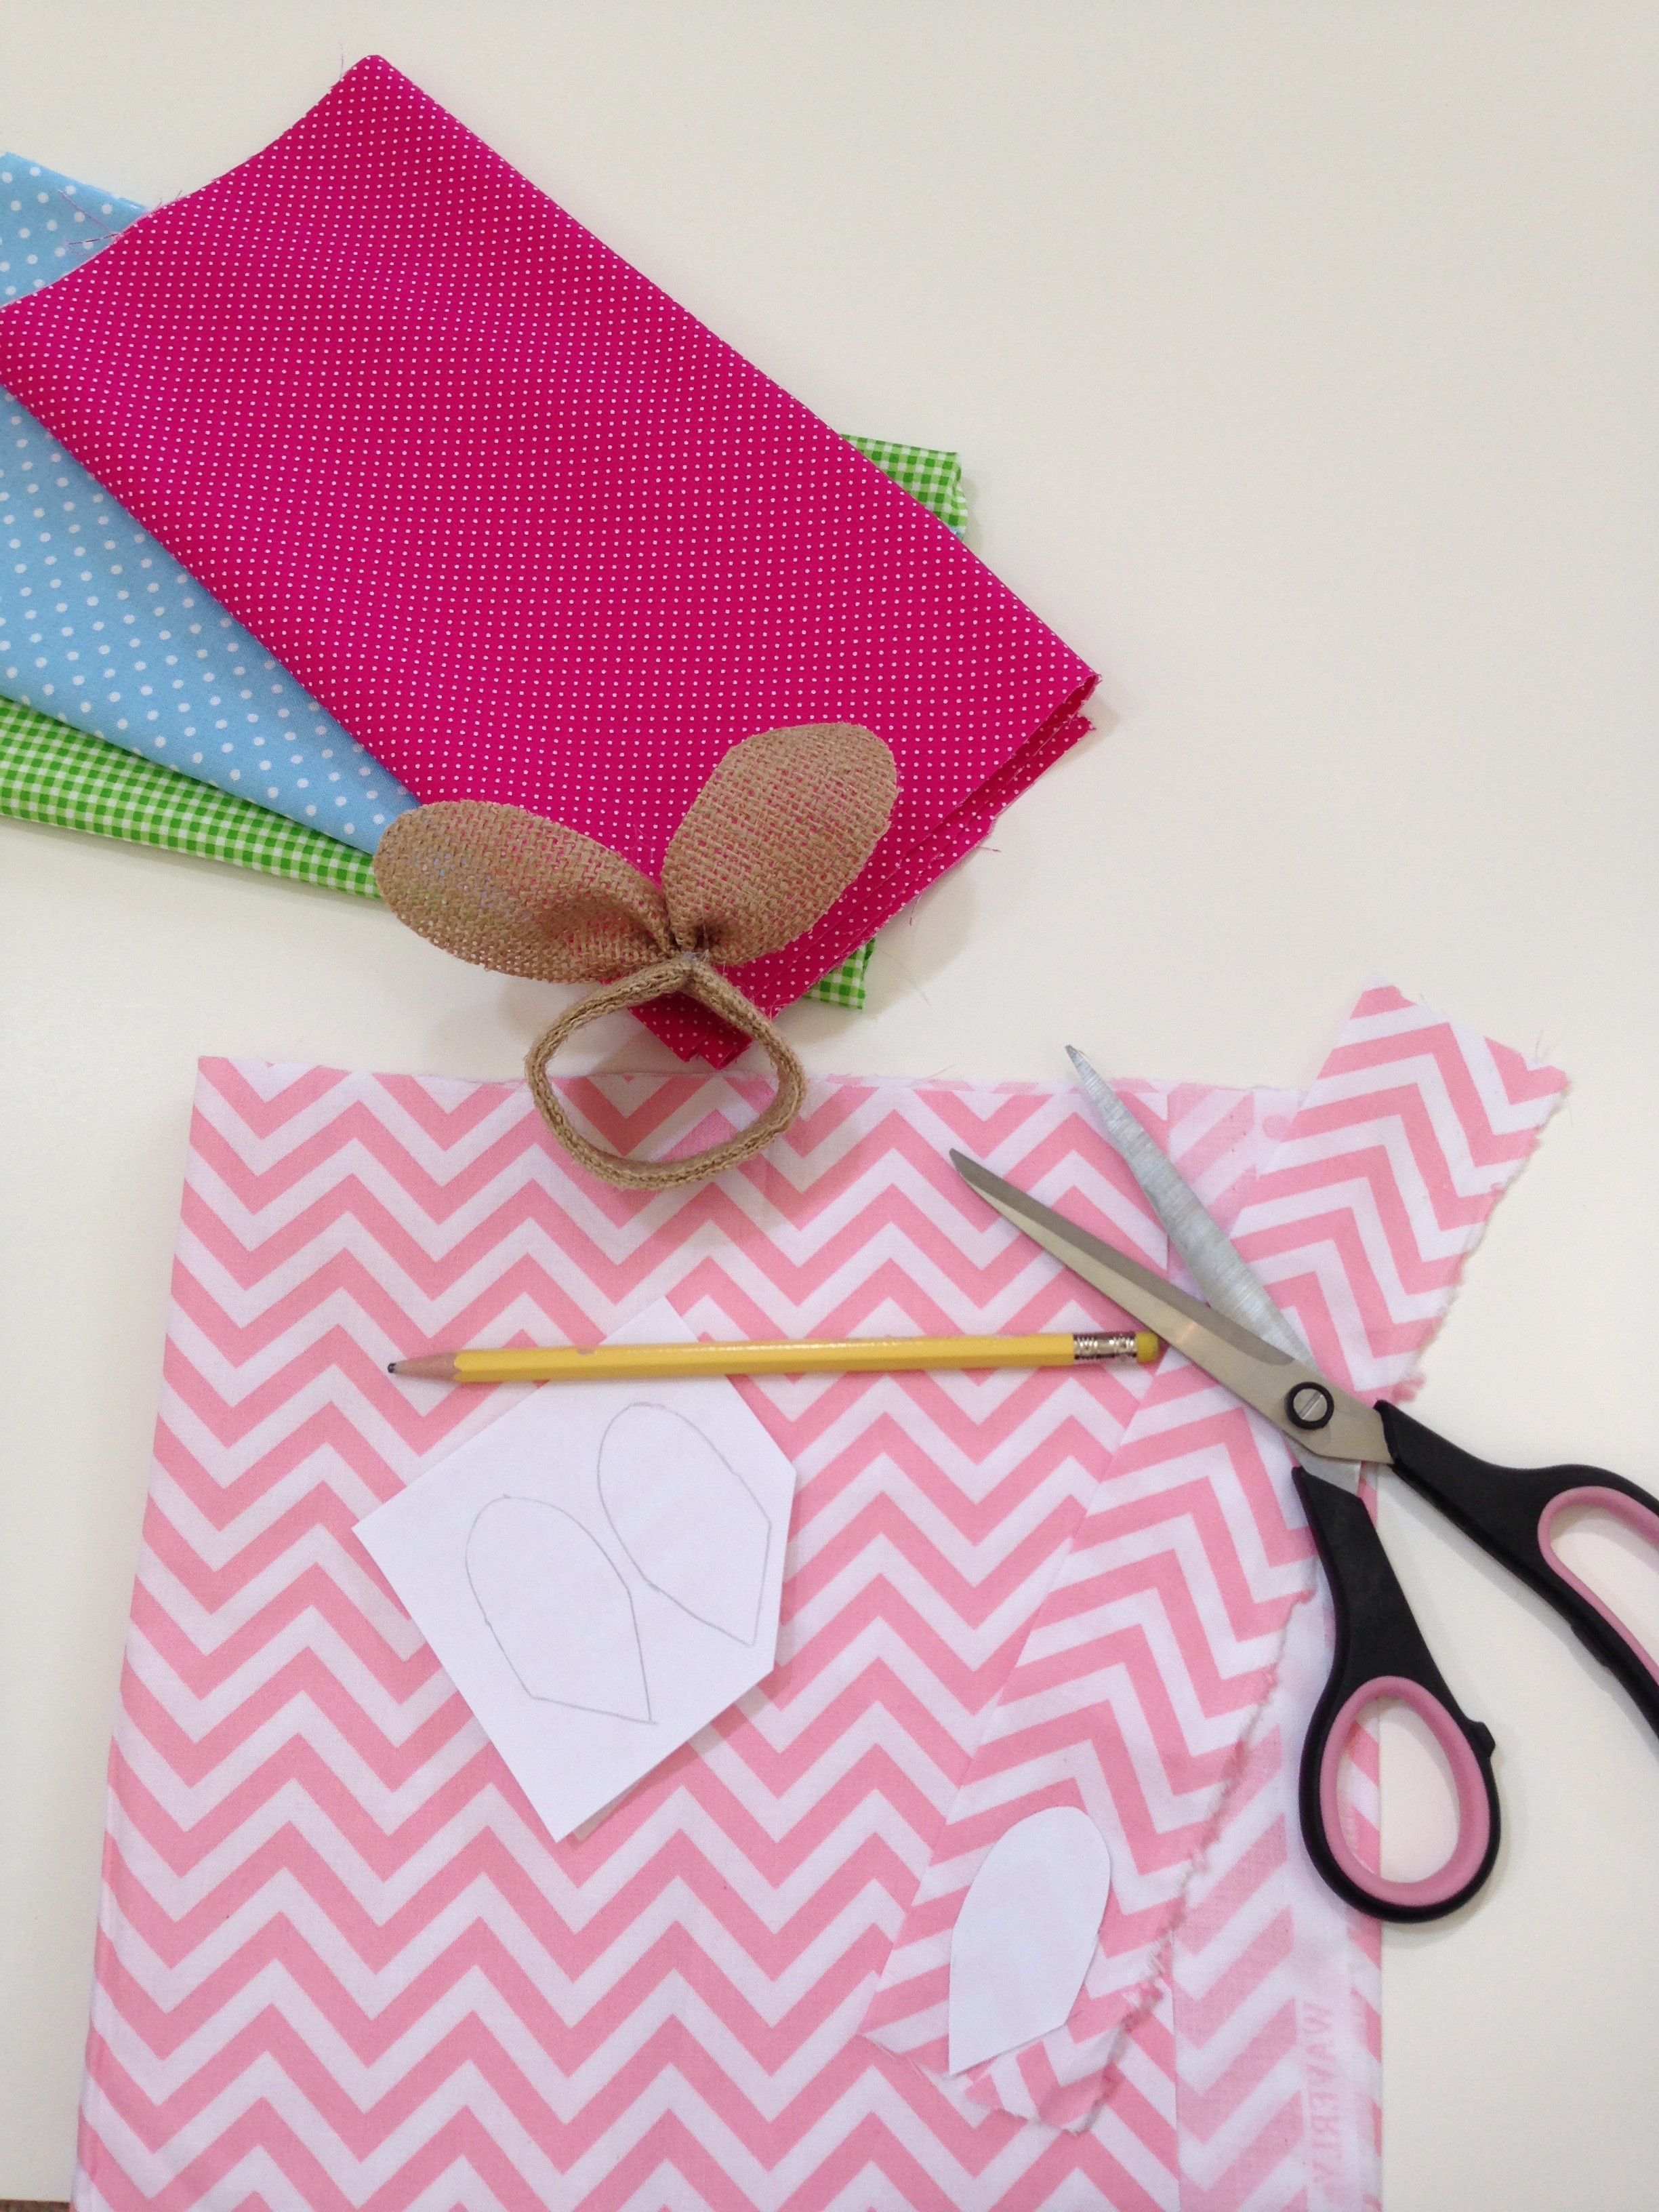
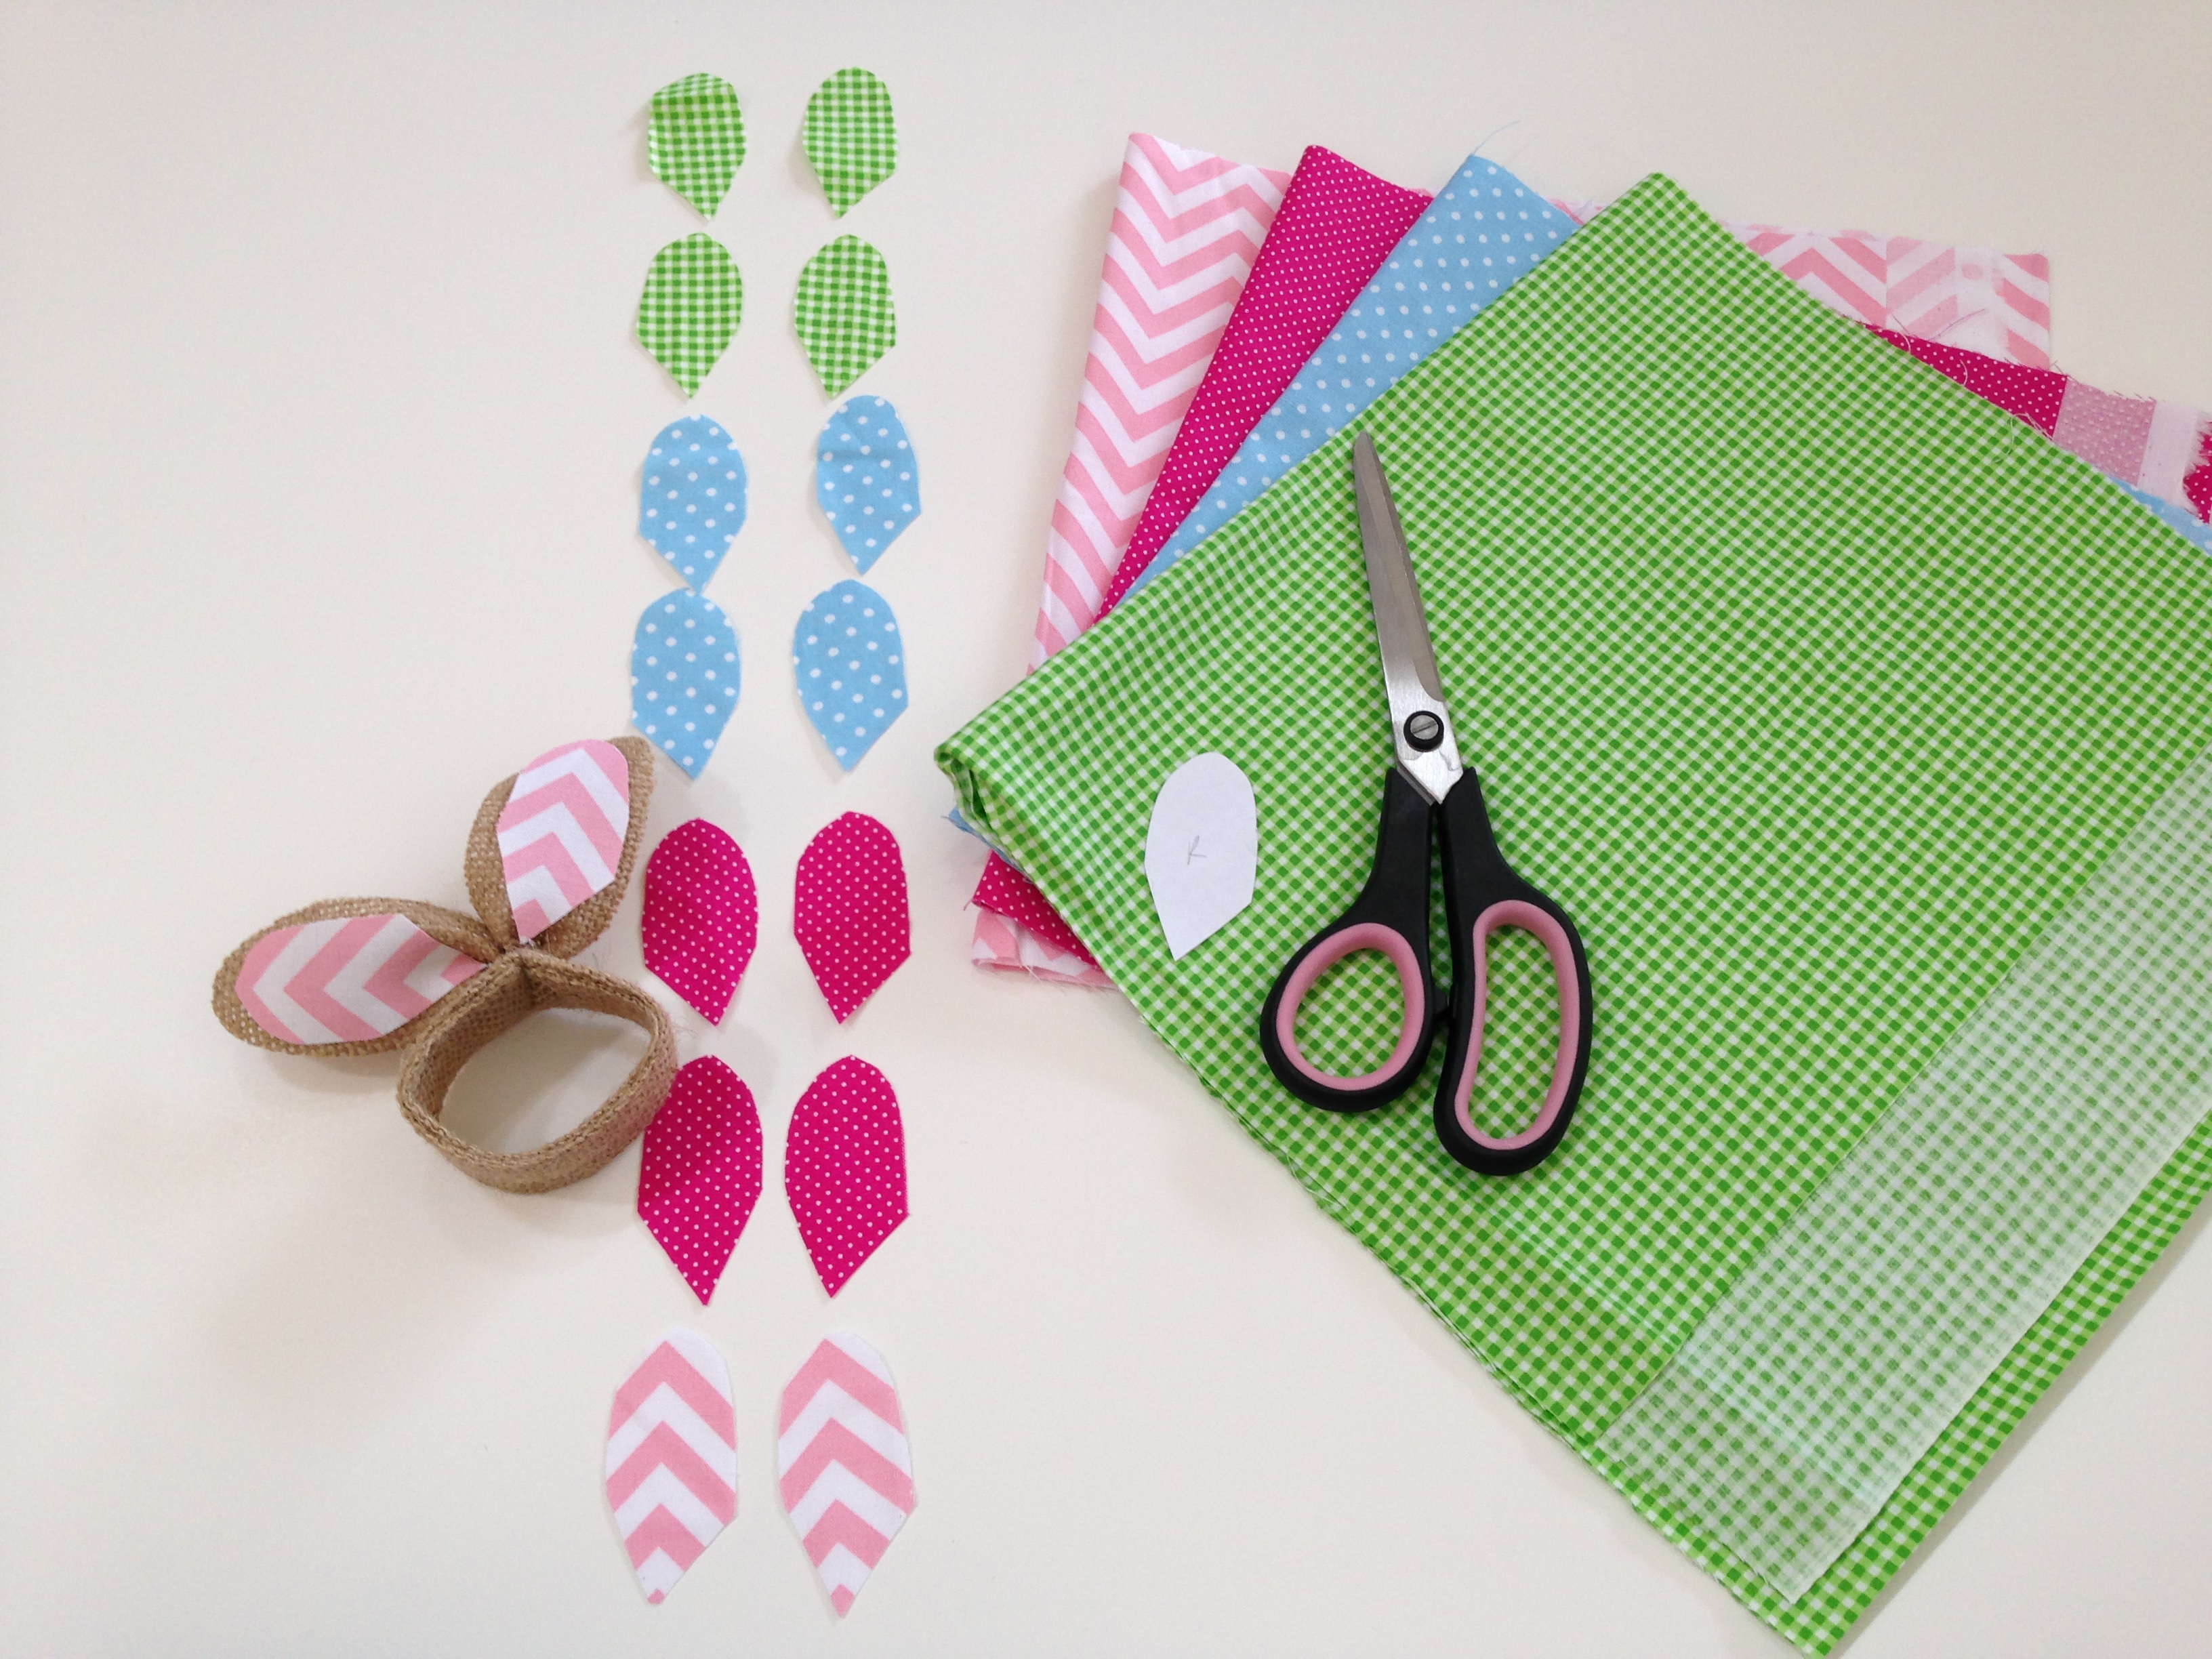 Pin your final pattern to your fabric and cut out your bunny ears inserts. Trace a line of glue just slightly inside the edge so when you press it down the glue won’t ooze out onto your bunny ears. It’s ok if it does slightly though since it dries clear so don’t worry too much!
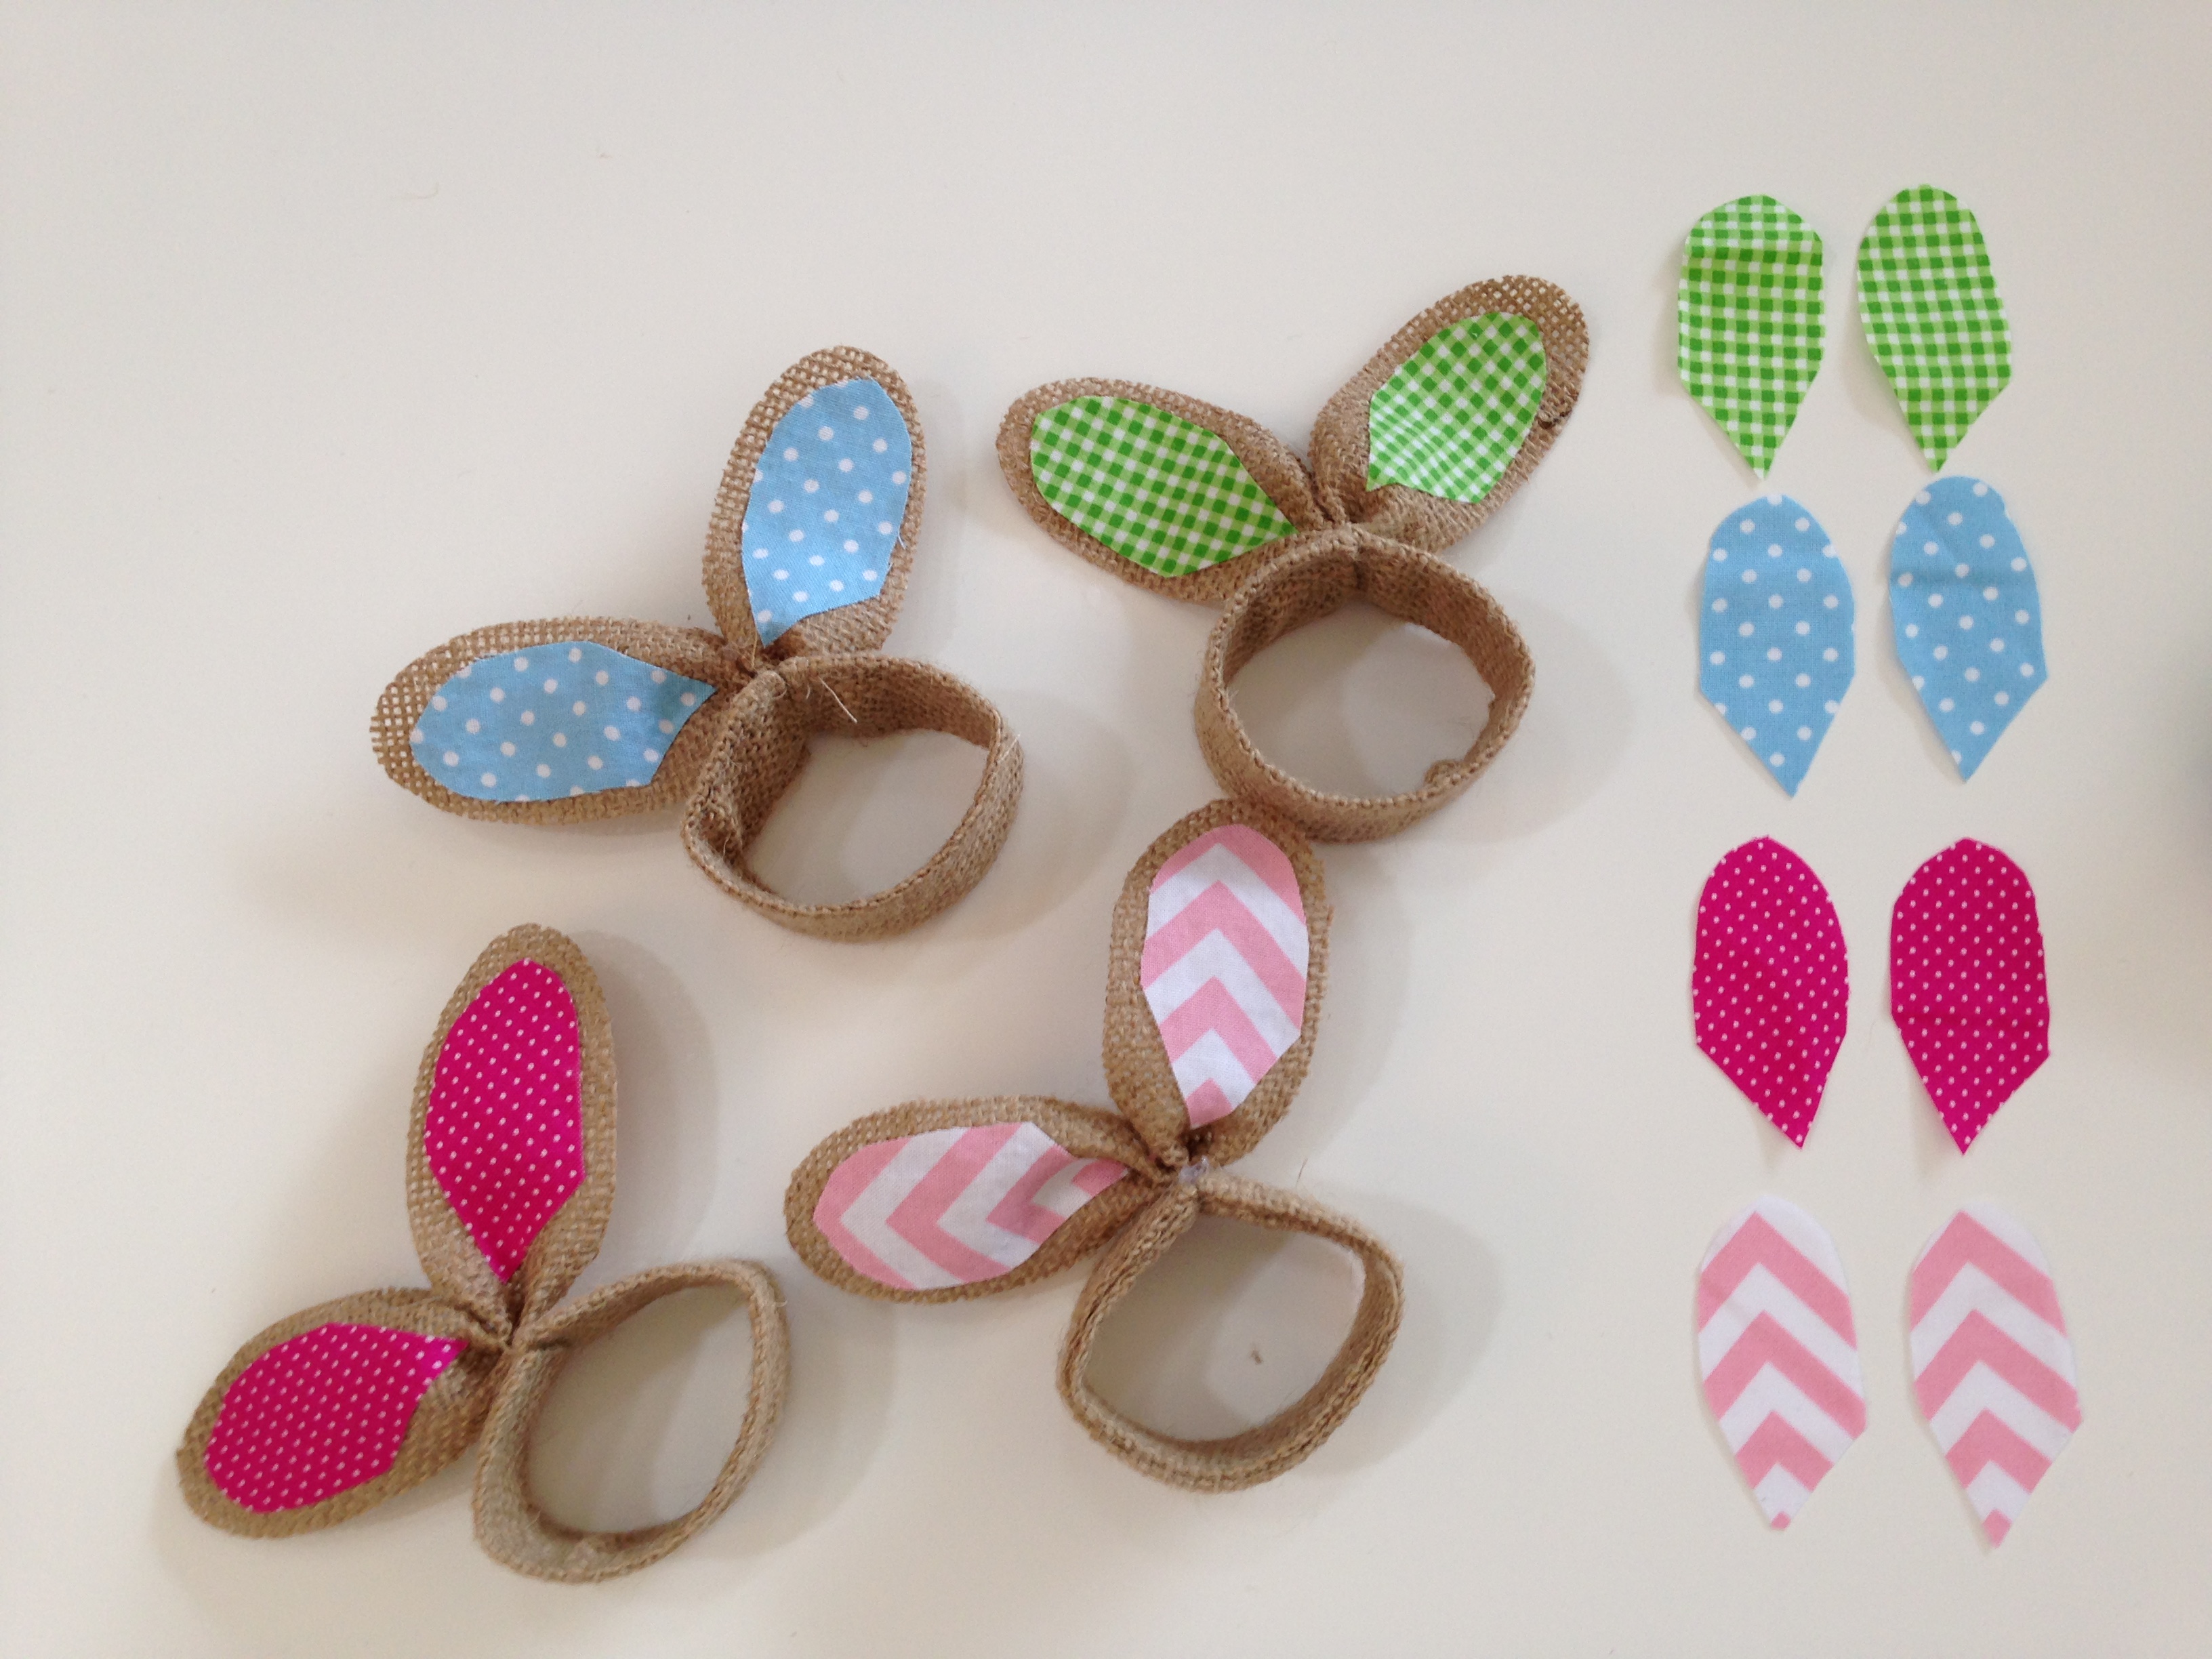 Press your fabric to your bunny ears and then let it dry… Once it’s dry, you’ll have adorable custom bunny ears napkin ring holders to “hop” up your table with some fun and whimsy!
“Bloomin” Spring Placemat
I love dressing up a table whether it is for a simple brunch just for your family or you are hosting a brunch or dinner for a group of guests you’d like to impress. It’s just like fashion in my opinion, you have your foundation pieces and then you have your accessory pieces that just bring the look to life. I love these “Bloomin” Spring Placemats that give your table a textured and 3-D effect but are also an amazing opportunity to pass on some simple sewing tips to your kids… I have the best memories of sewing with my Grandmother and Mother when I was younger which also gives them that basic skillset to sew on a button that falls off their shirt or fix a seam that is starting to rip open in an emergency moment, right?
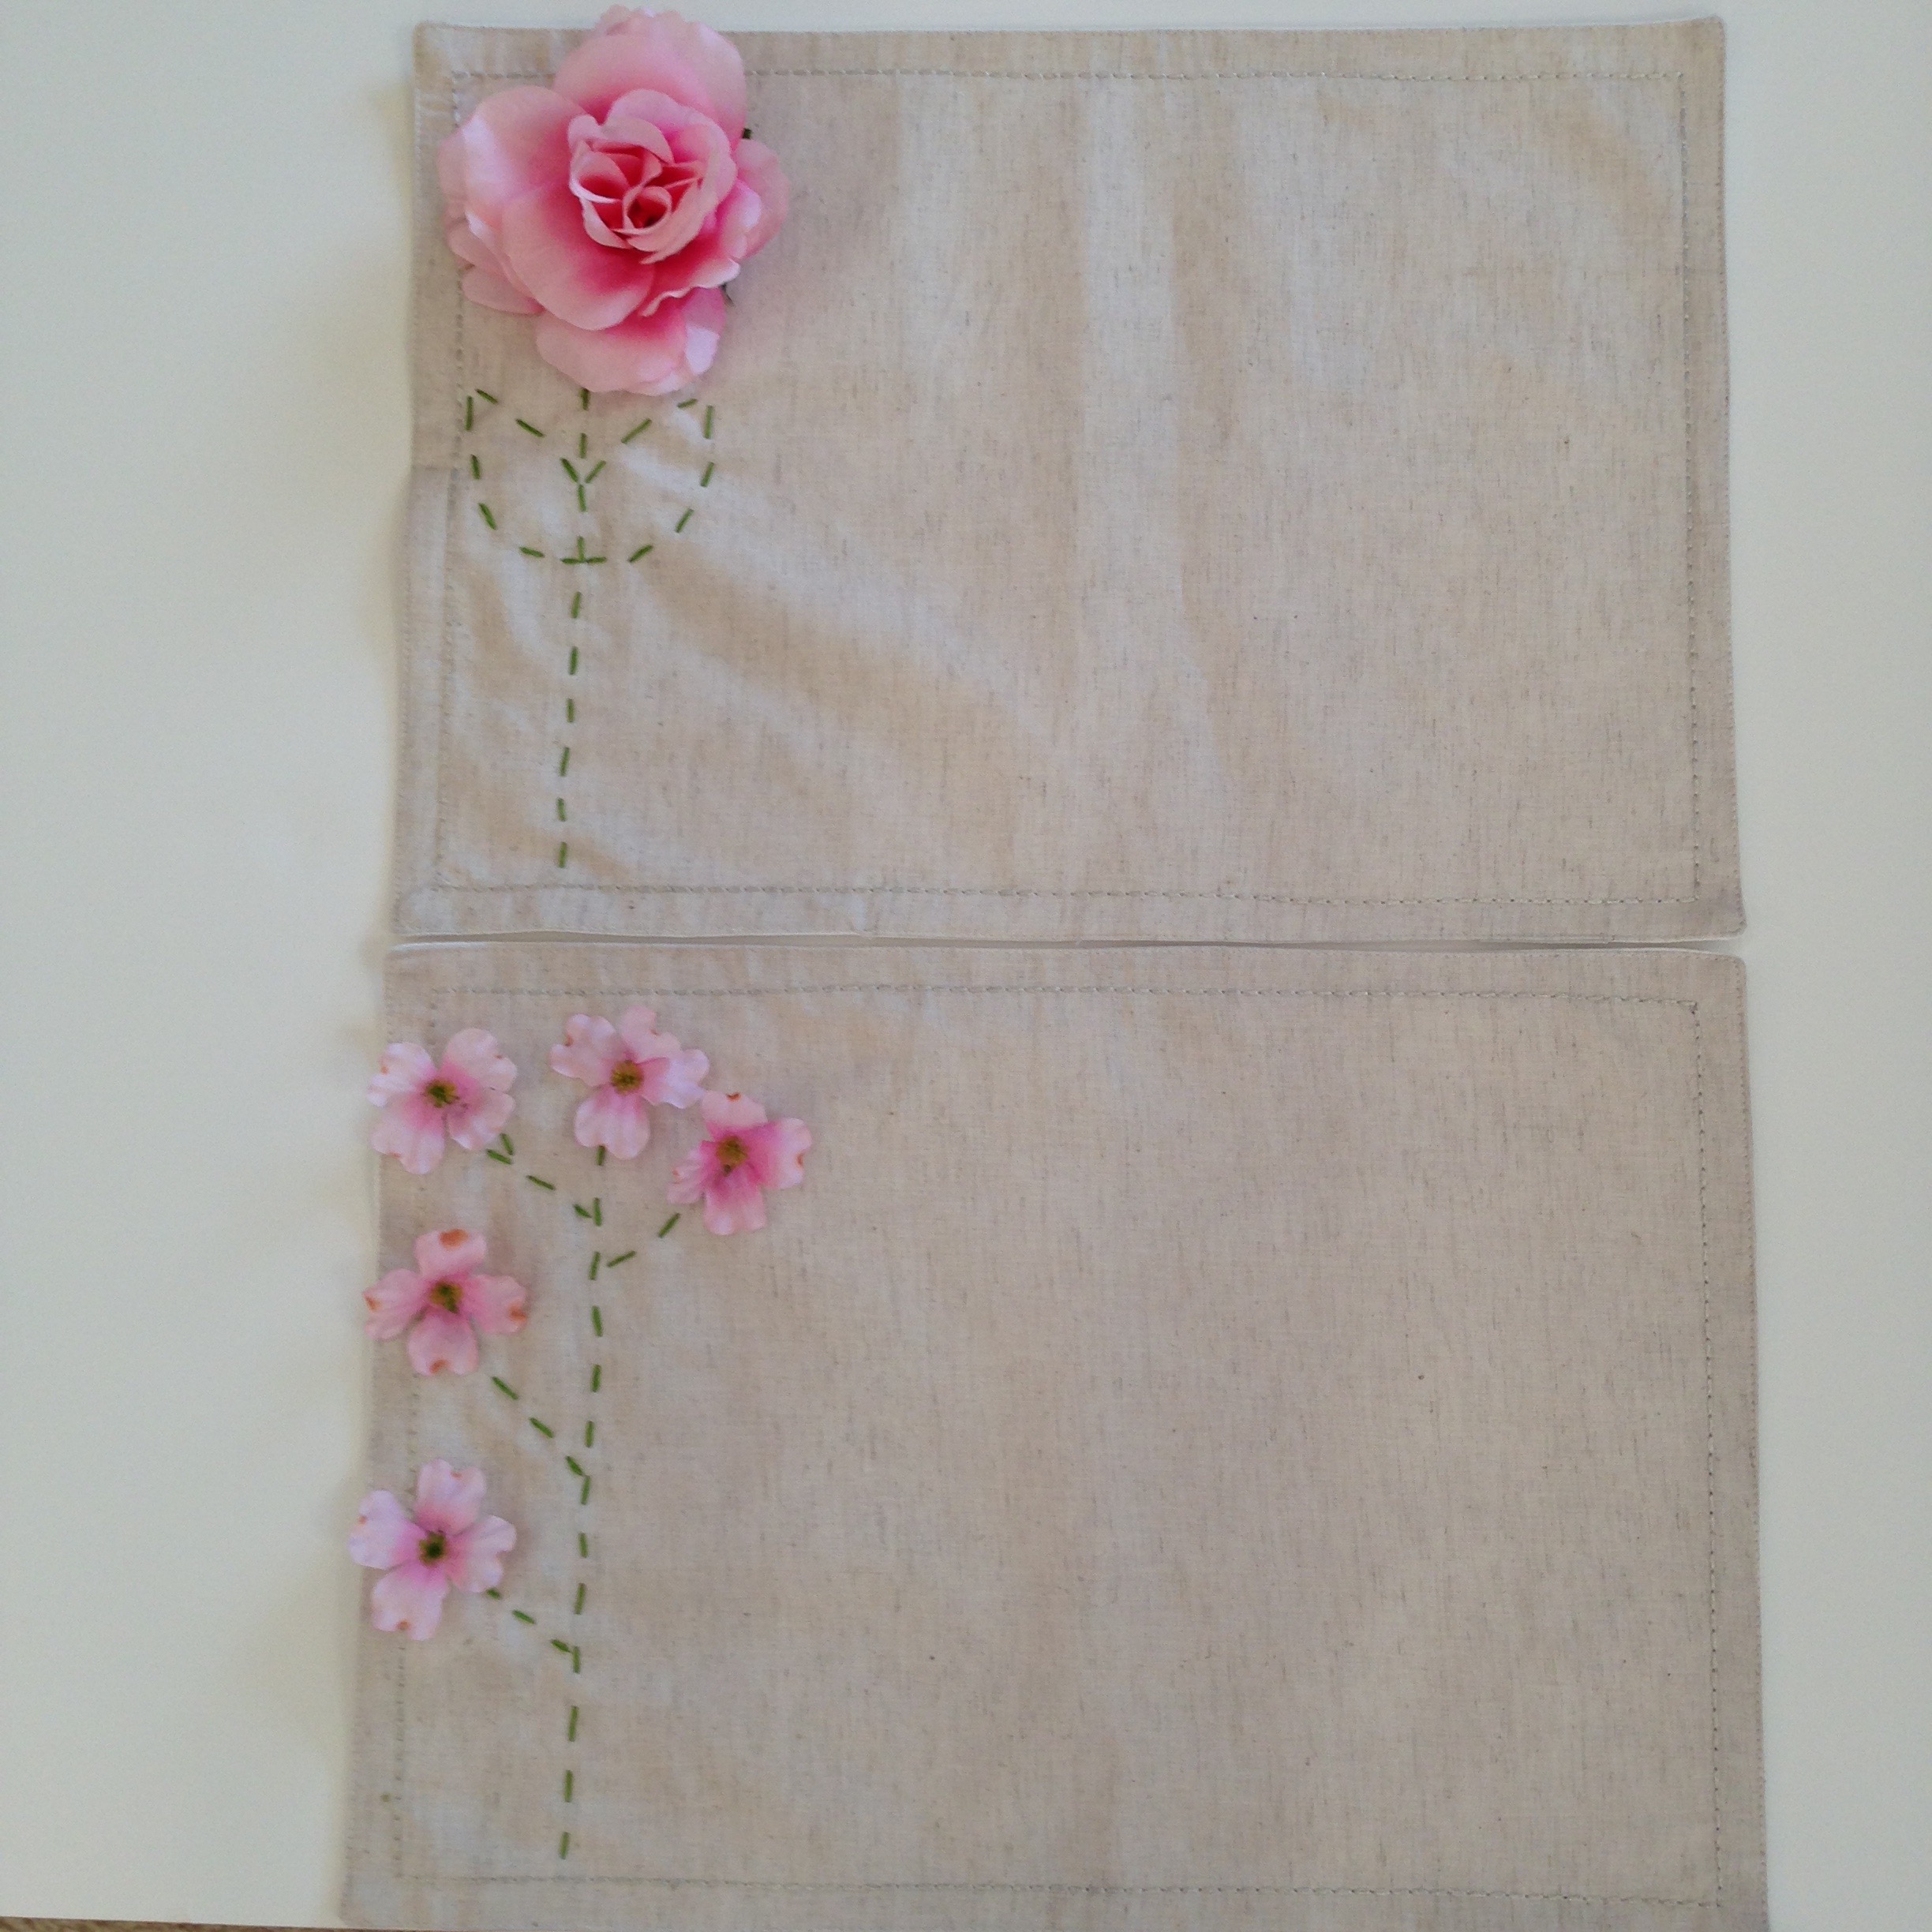
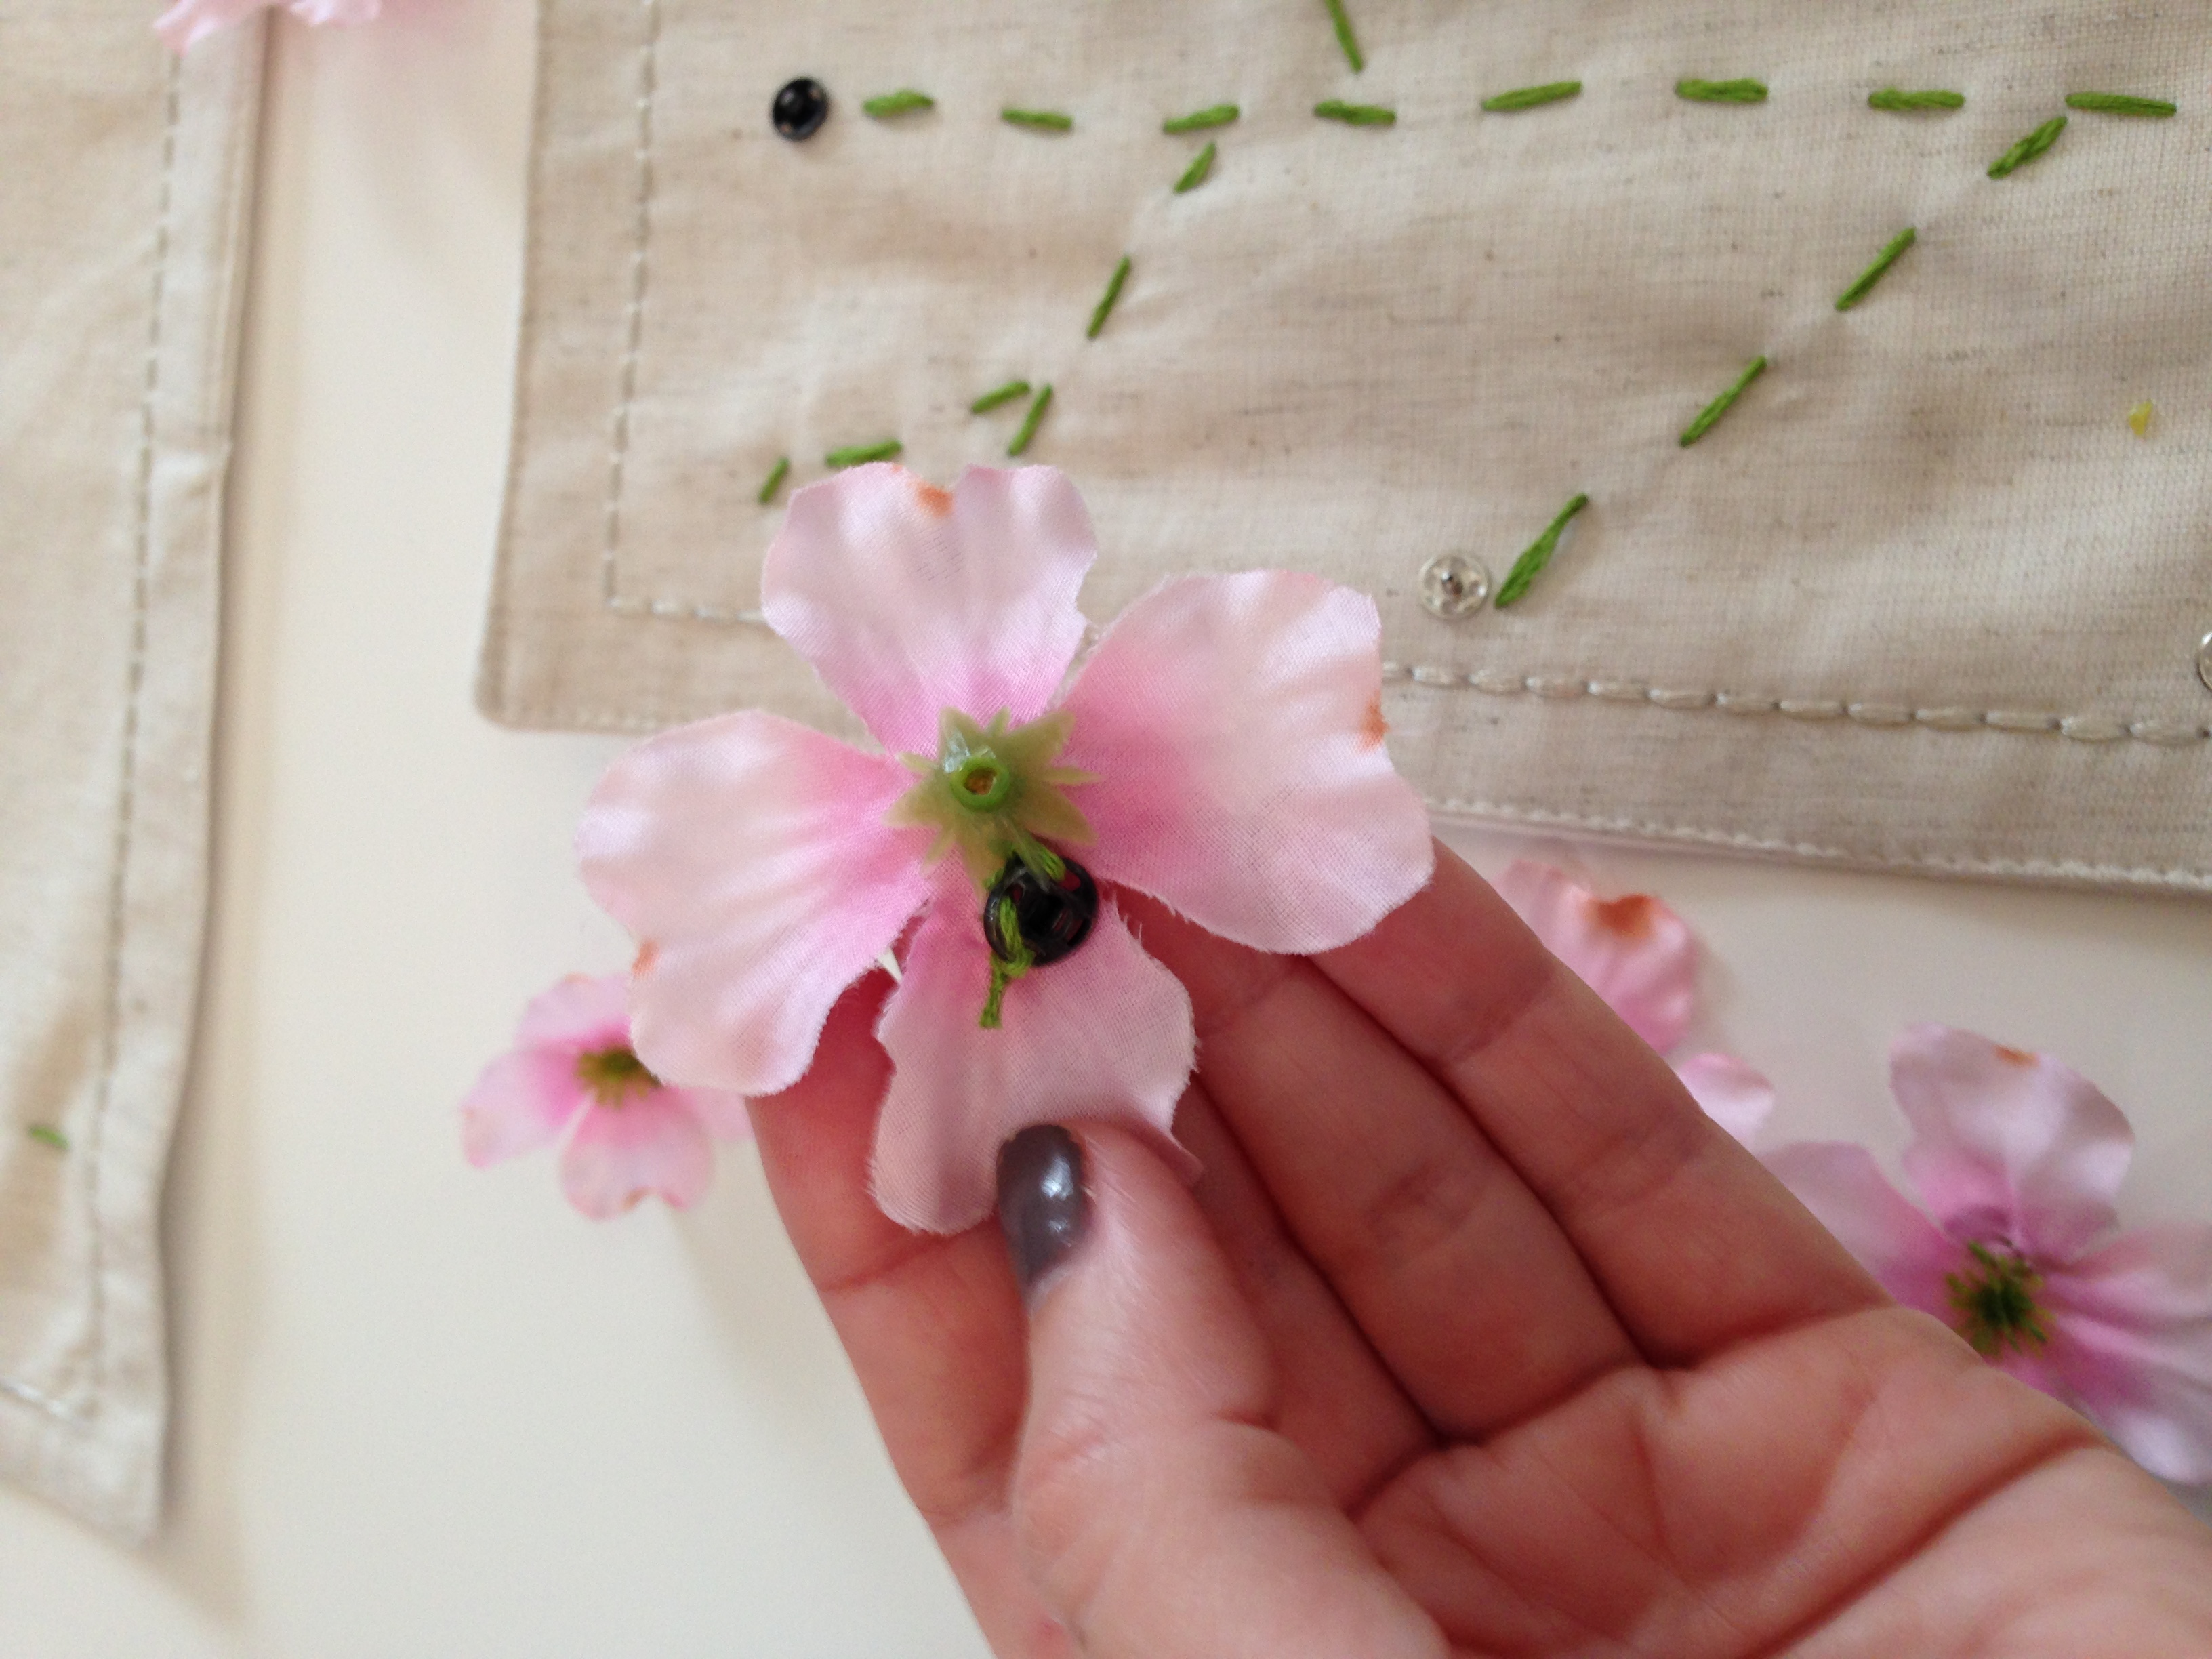
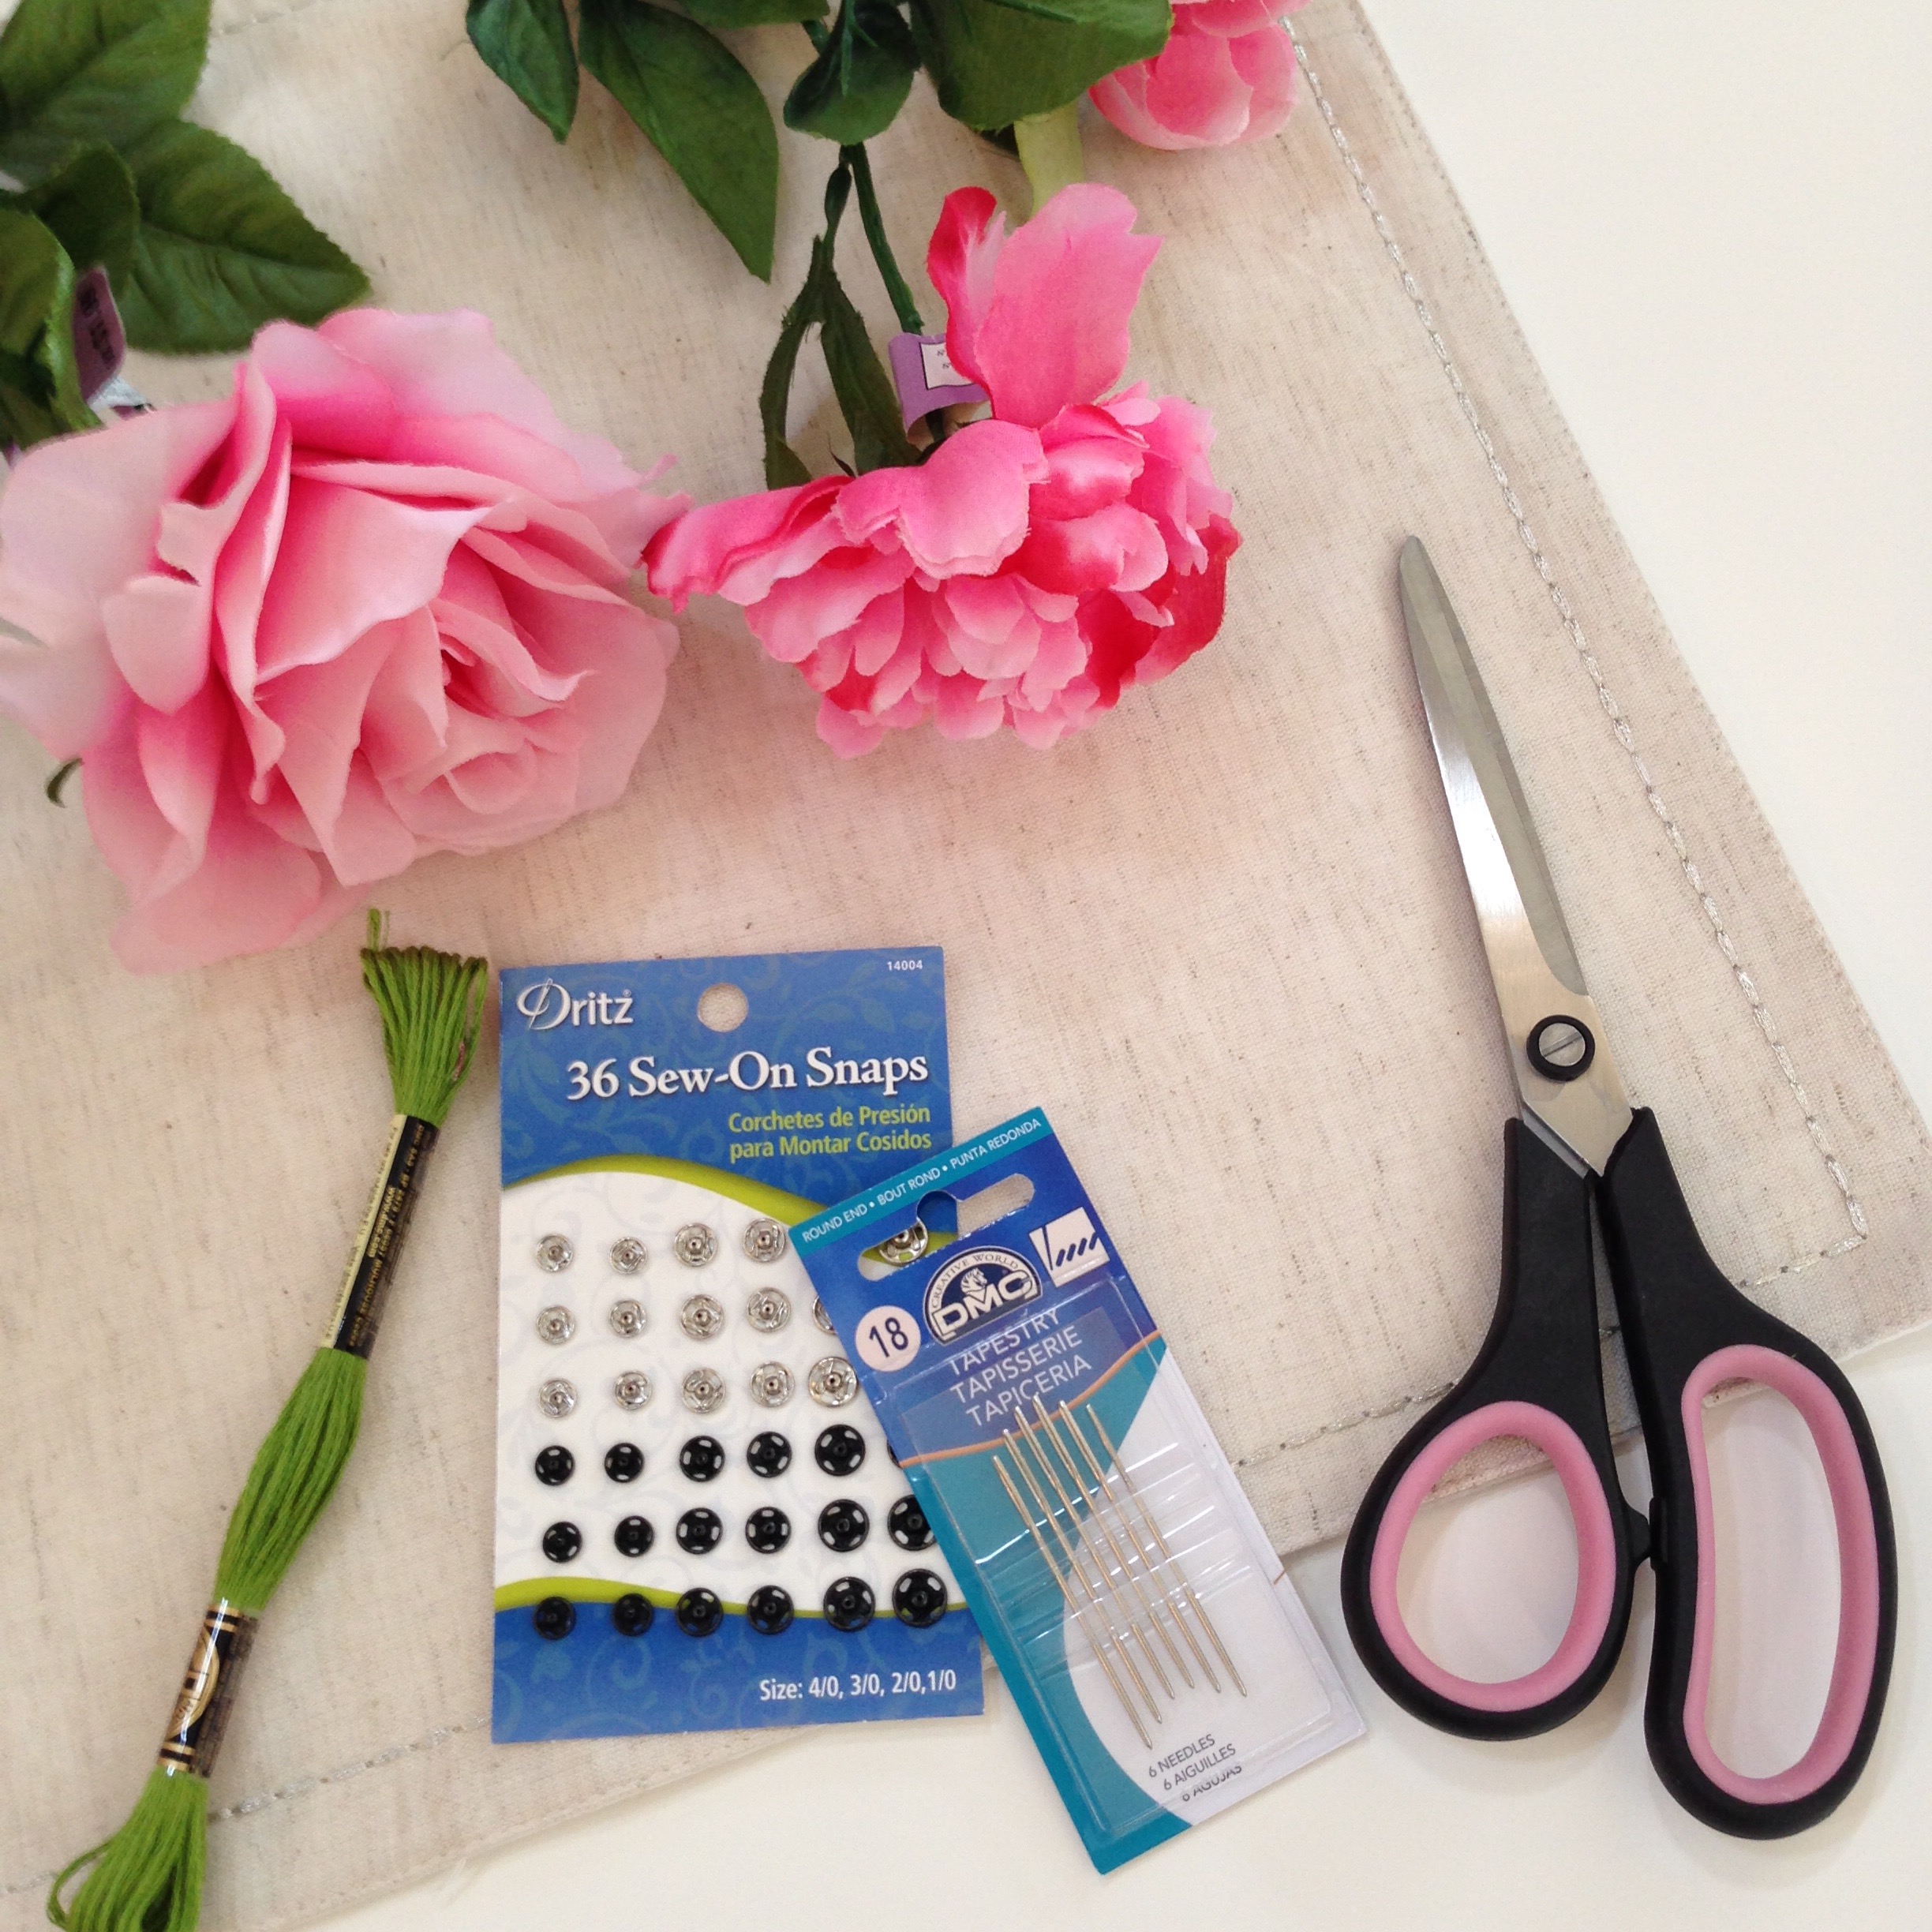 To start, I bought a classic and natural-colored placemat that I found at Steinmart for $3.99. I then bought some green embroidery thread at Michaels for $.39 each, a pack of tapestry needles for $2.50, a pack of snaps for $3.00 and some stems of pink fabric flowers for $1.99 each stem and that’s all you’ll need for this DIY project plus a pair of scissors at home.
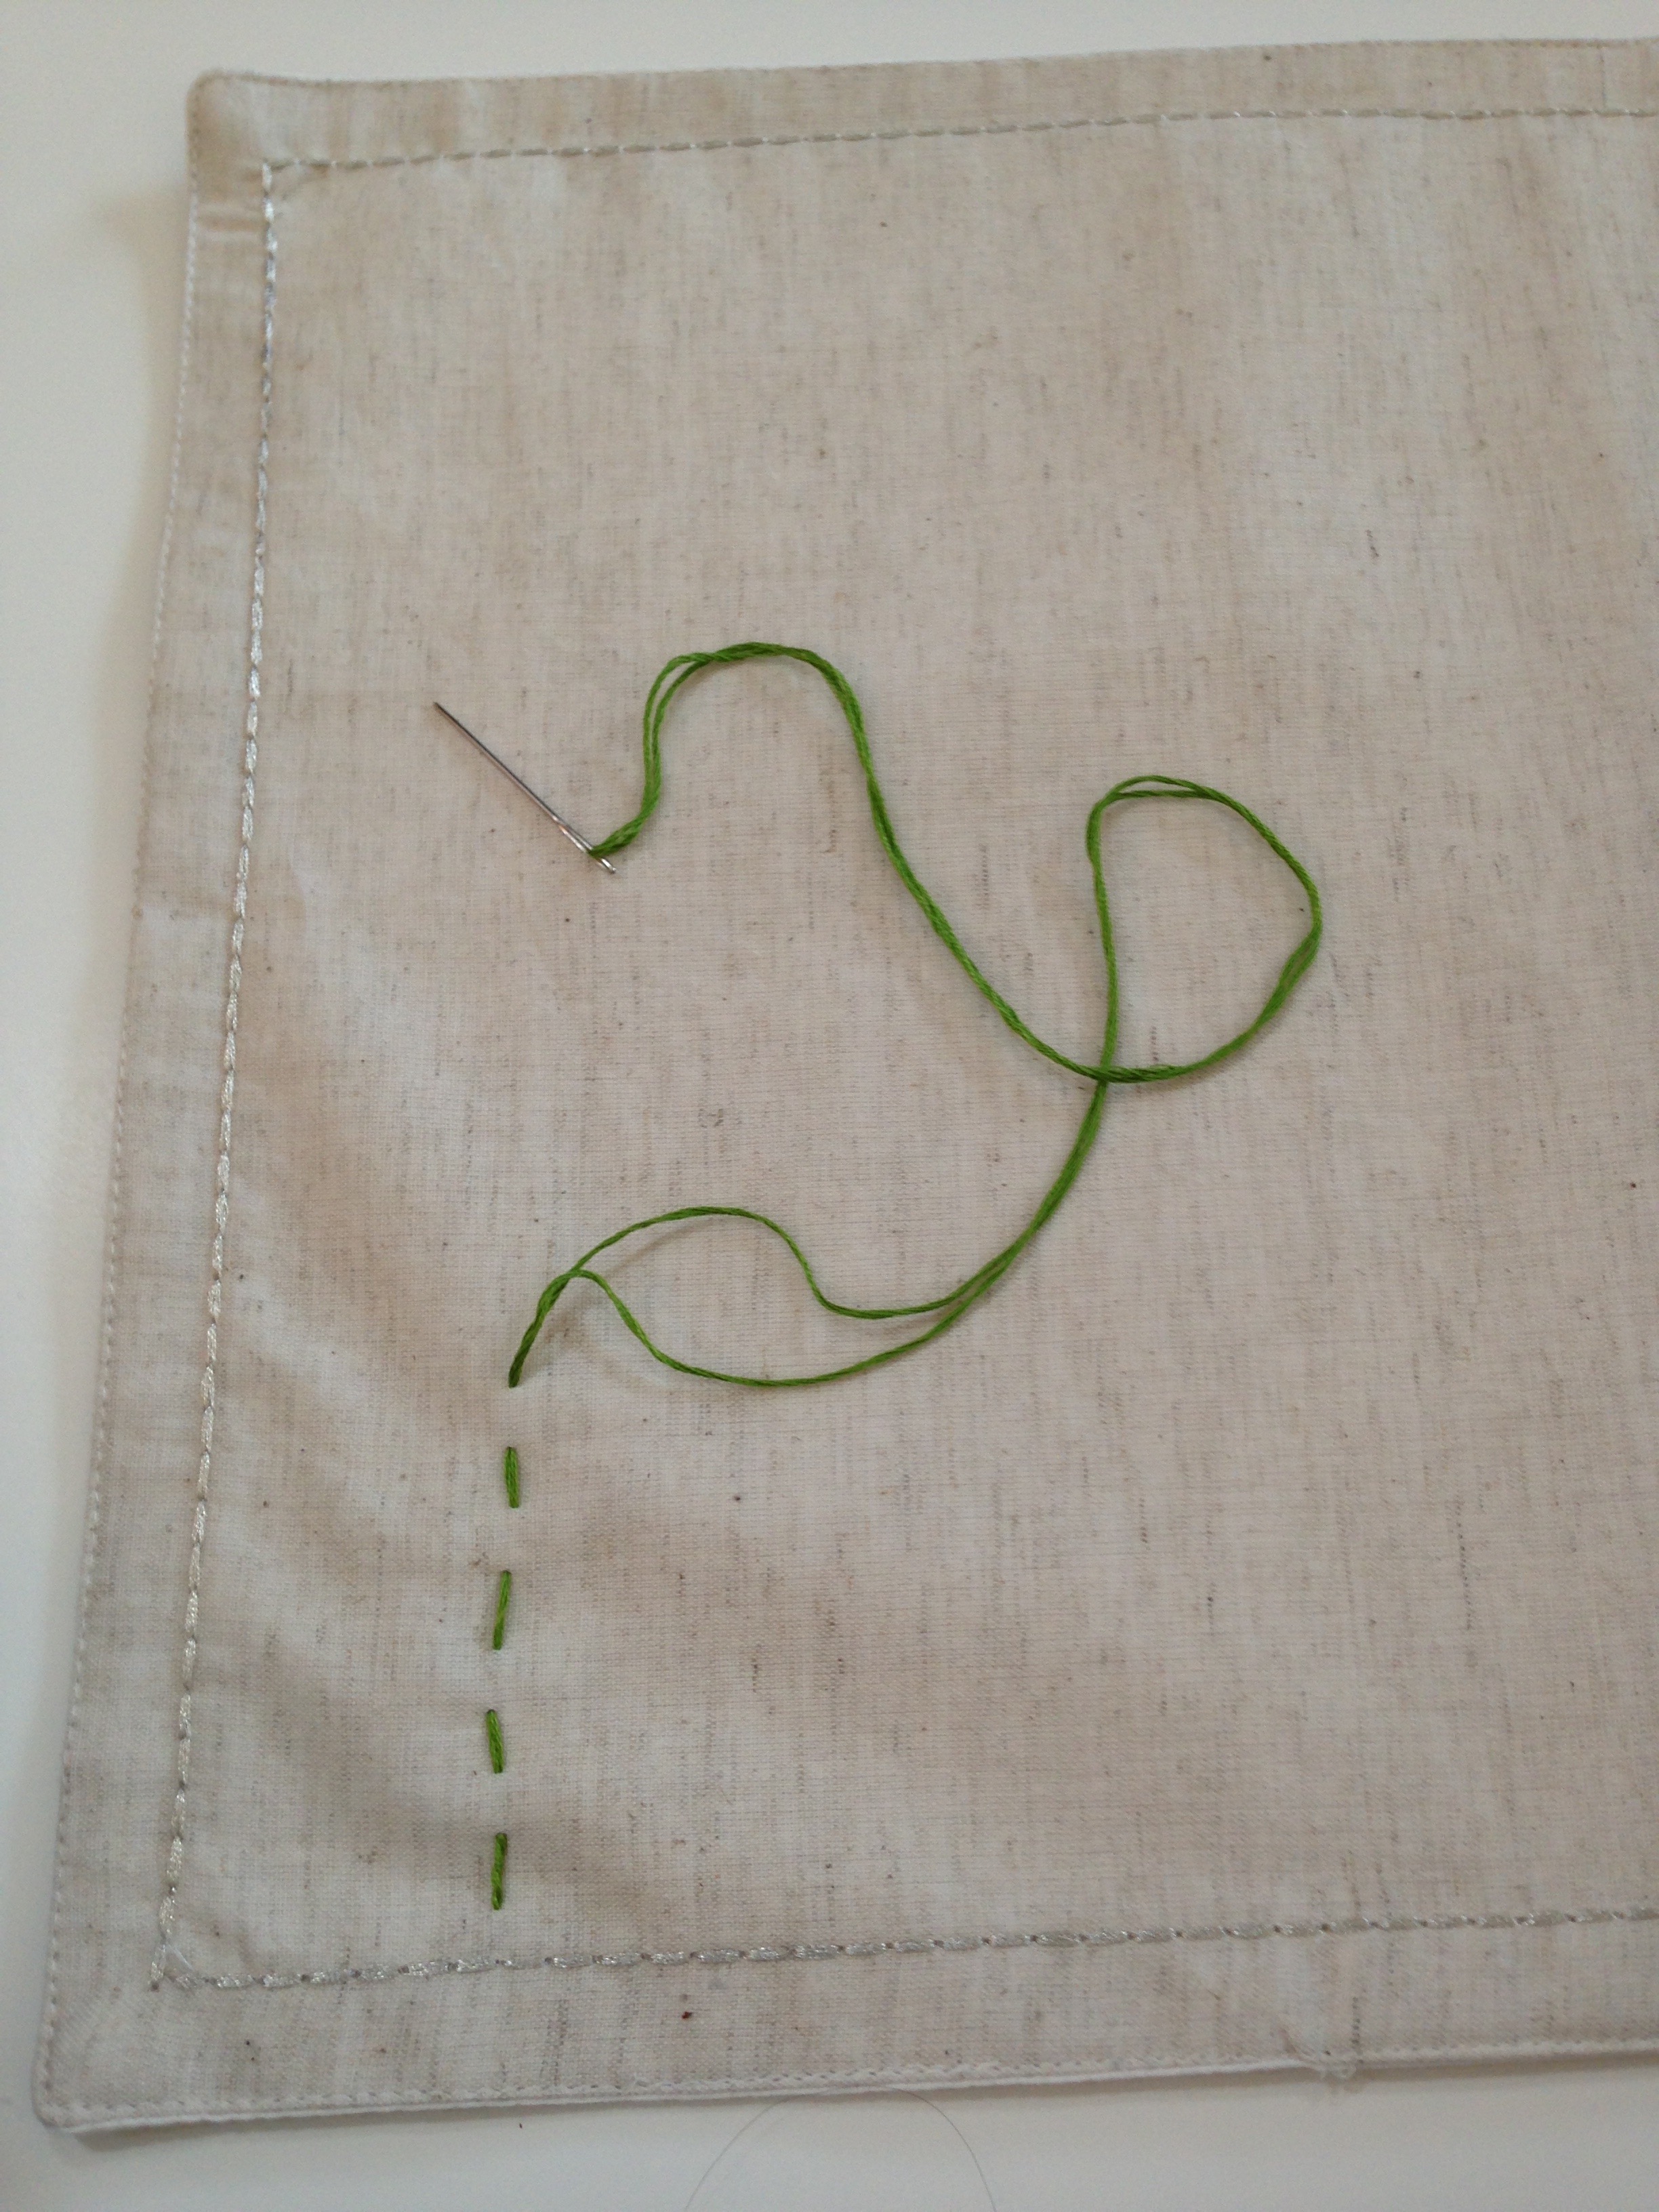
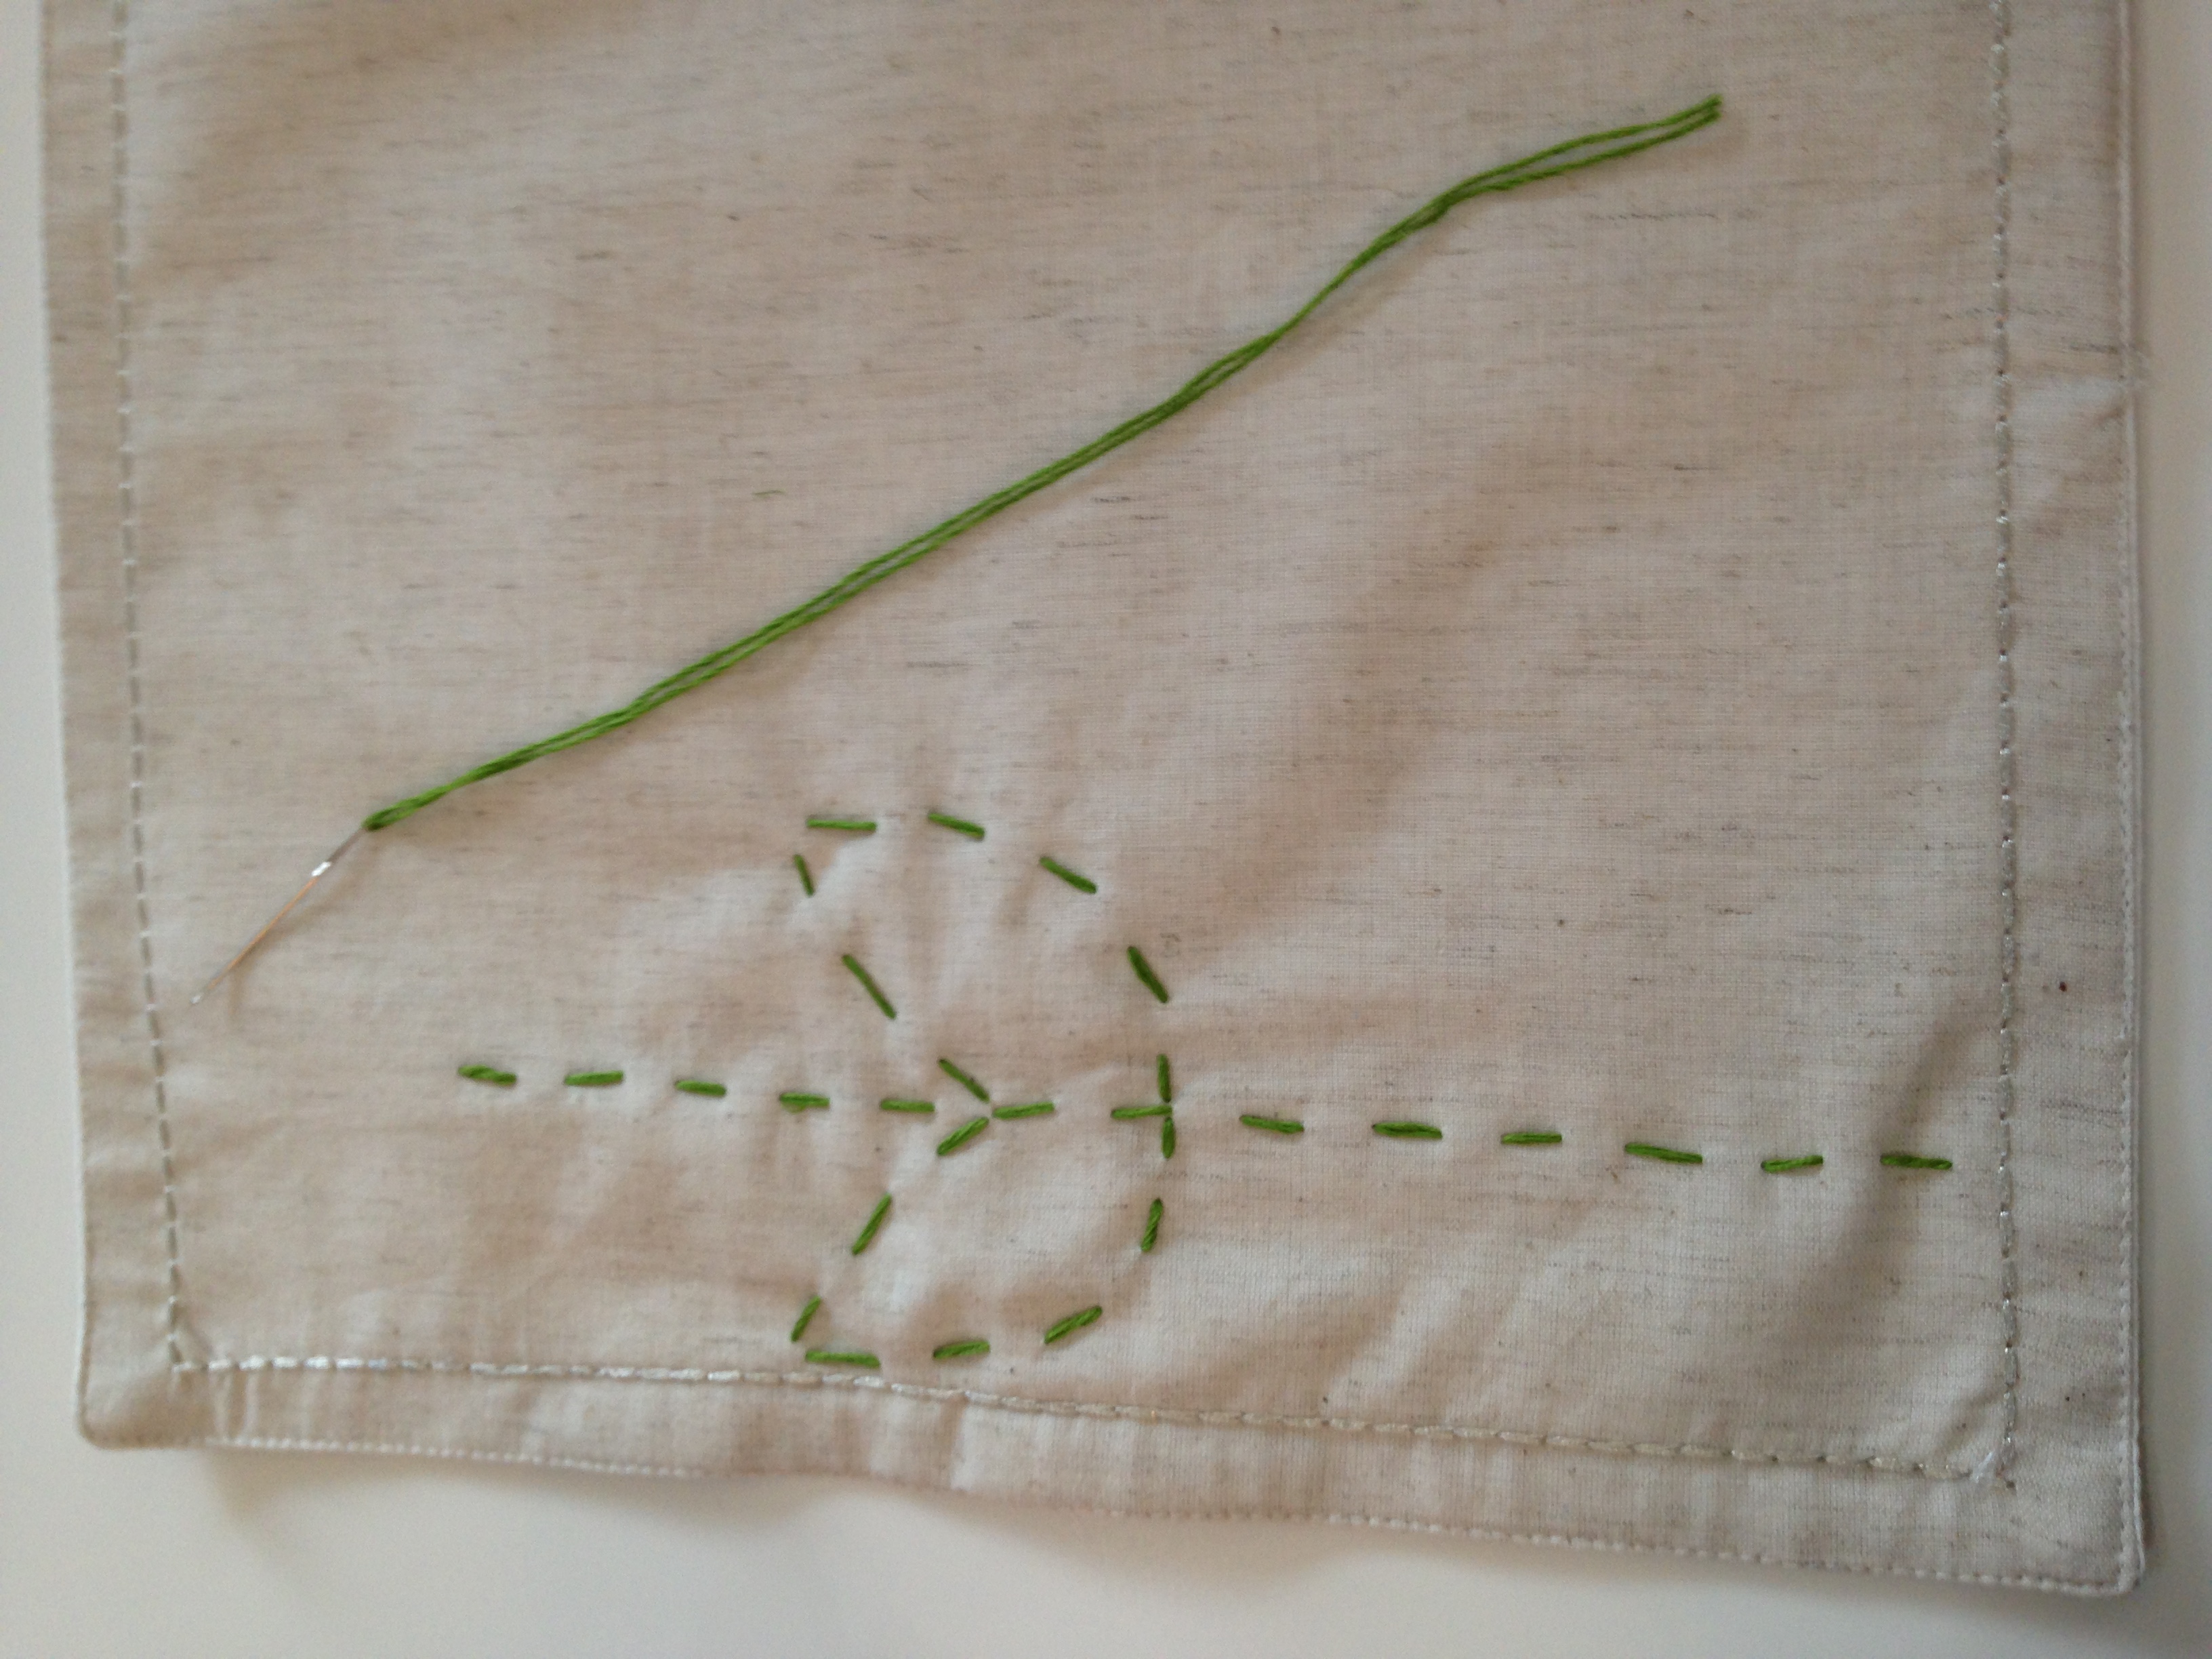
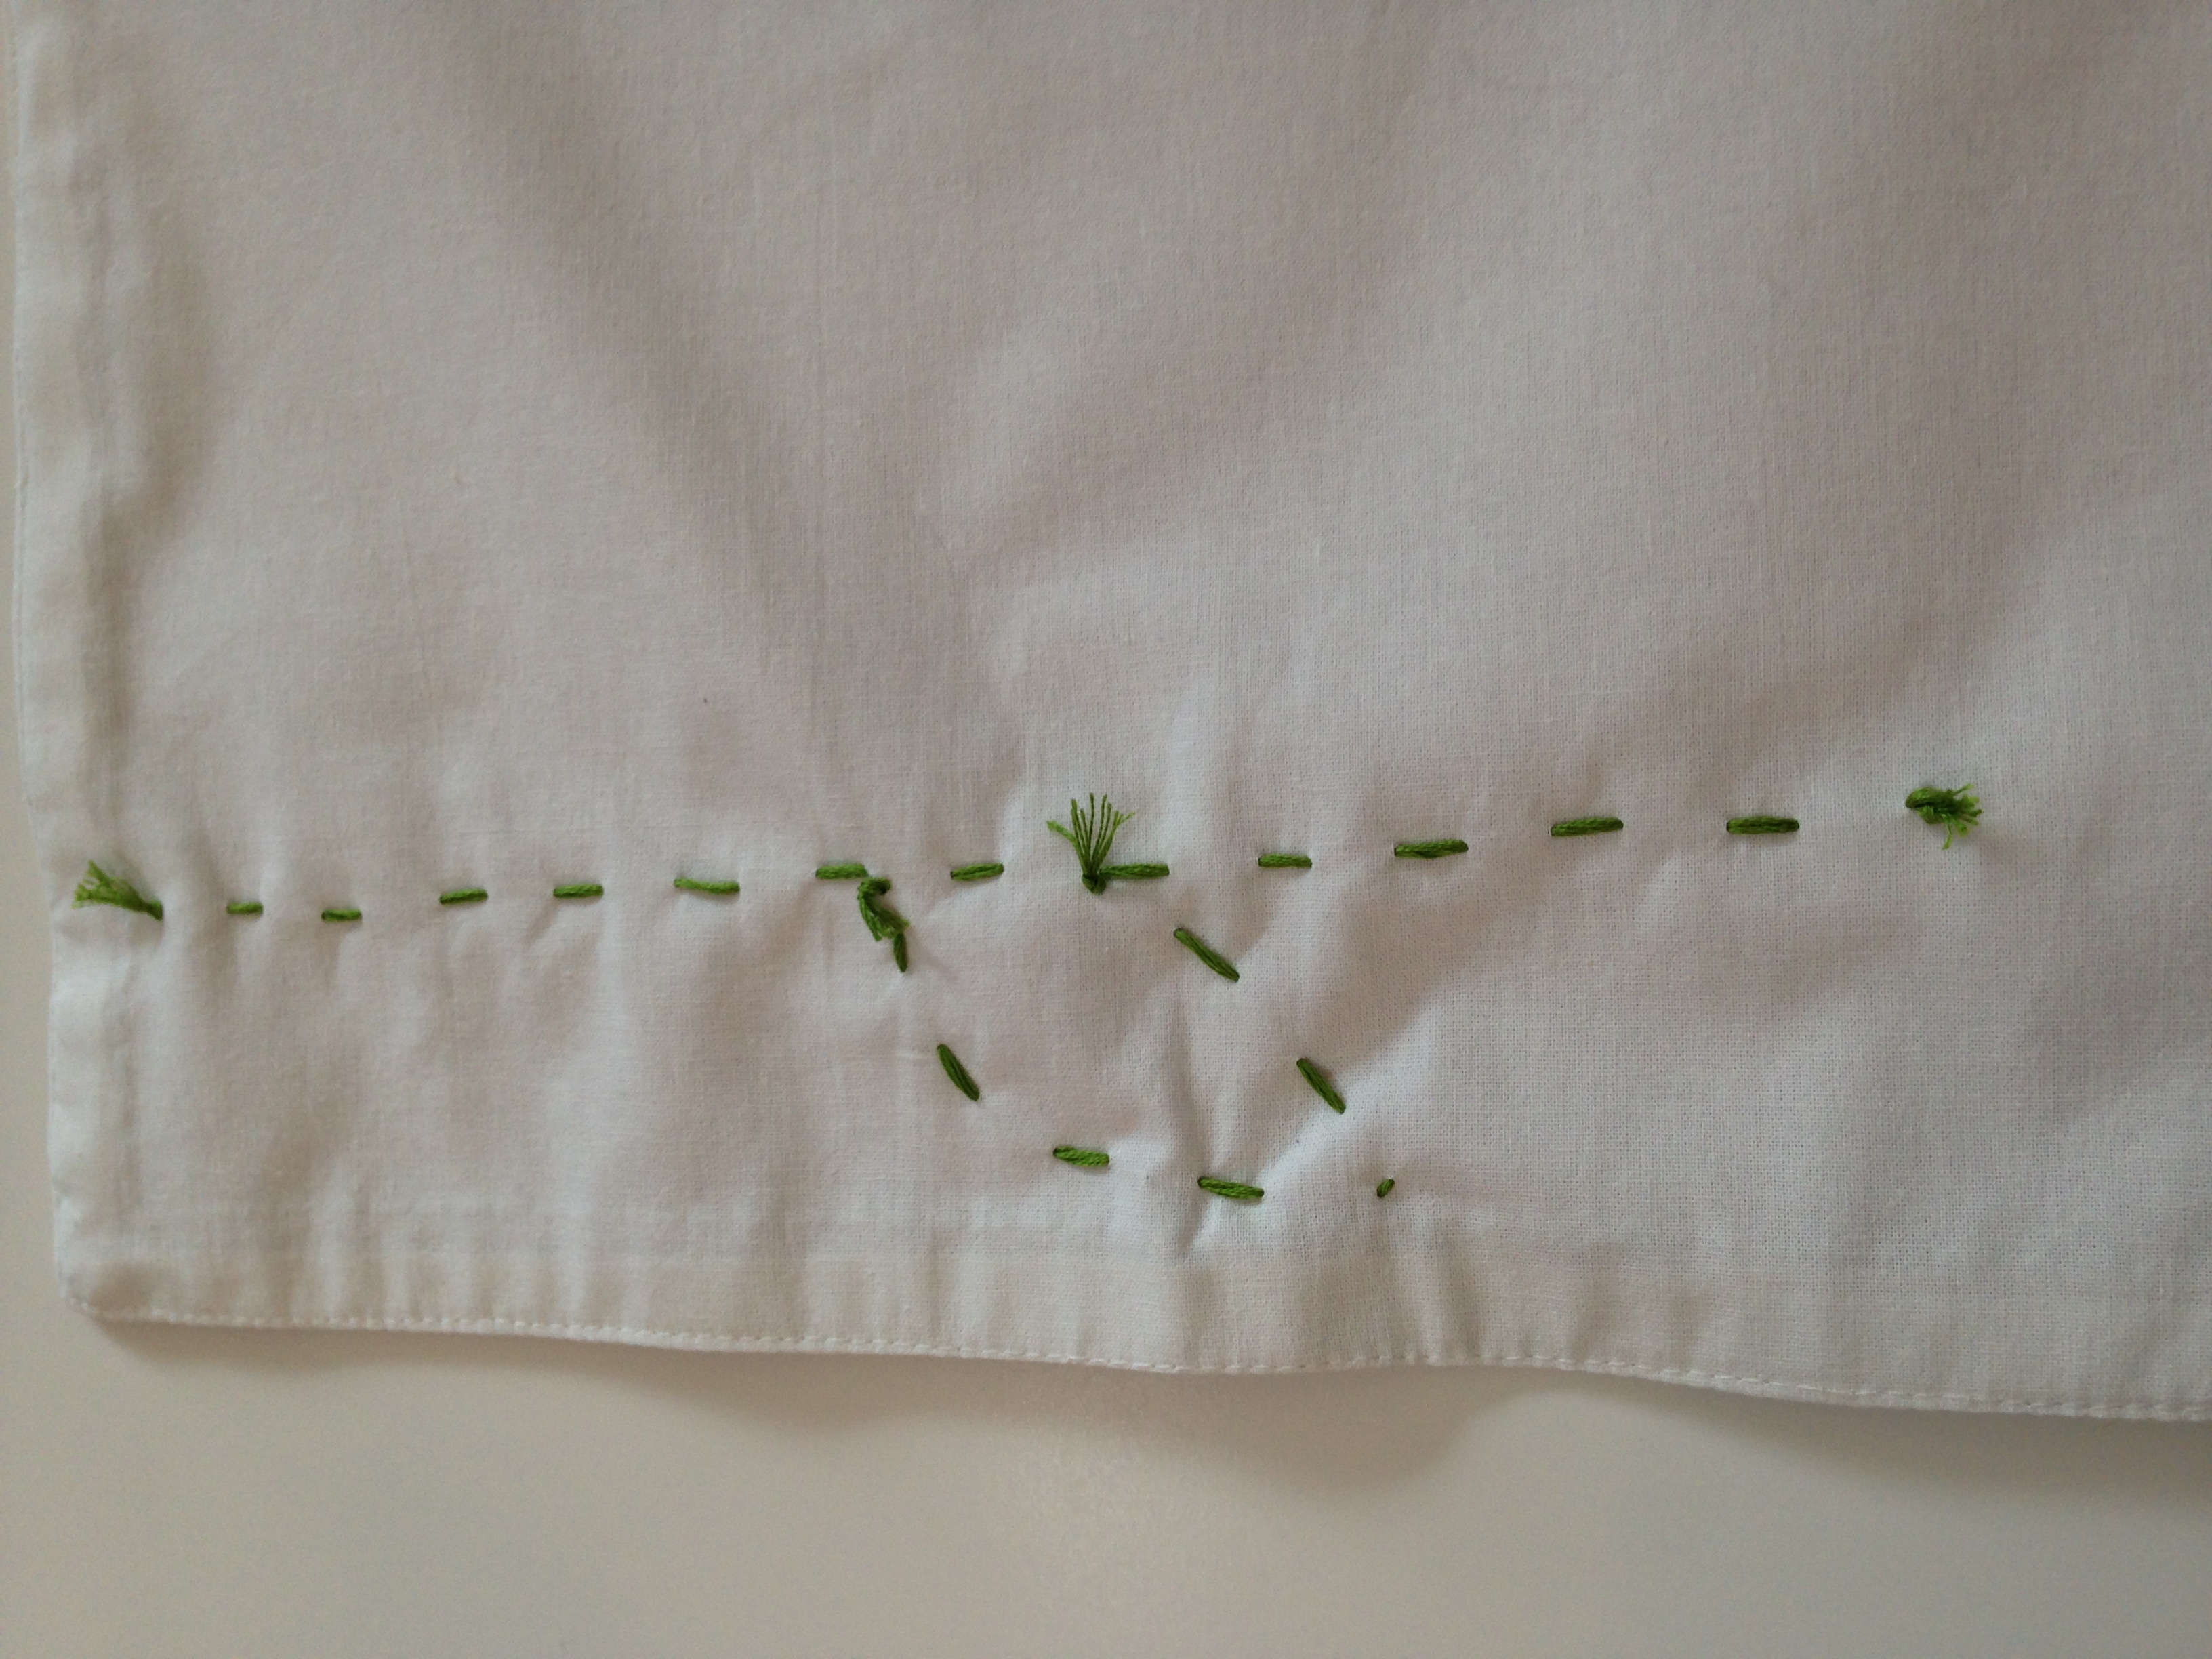
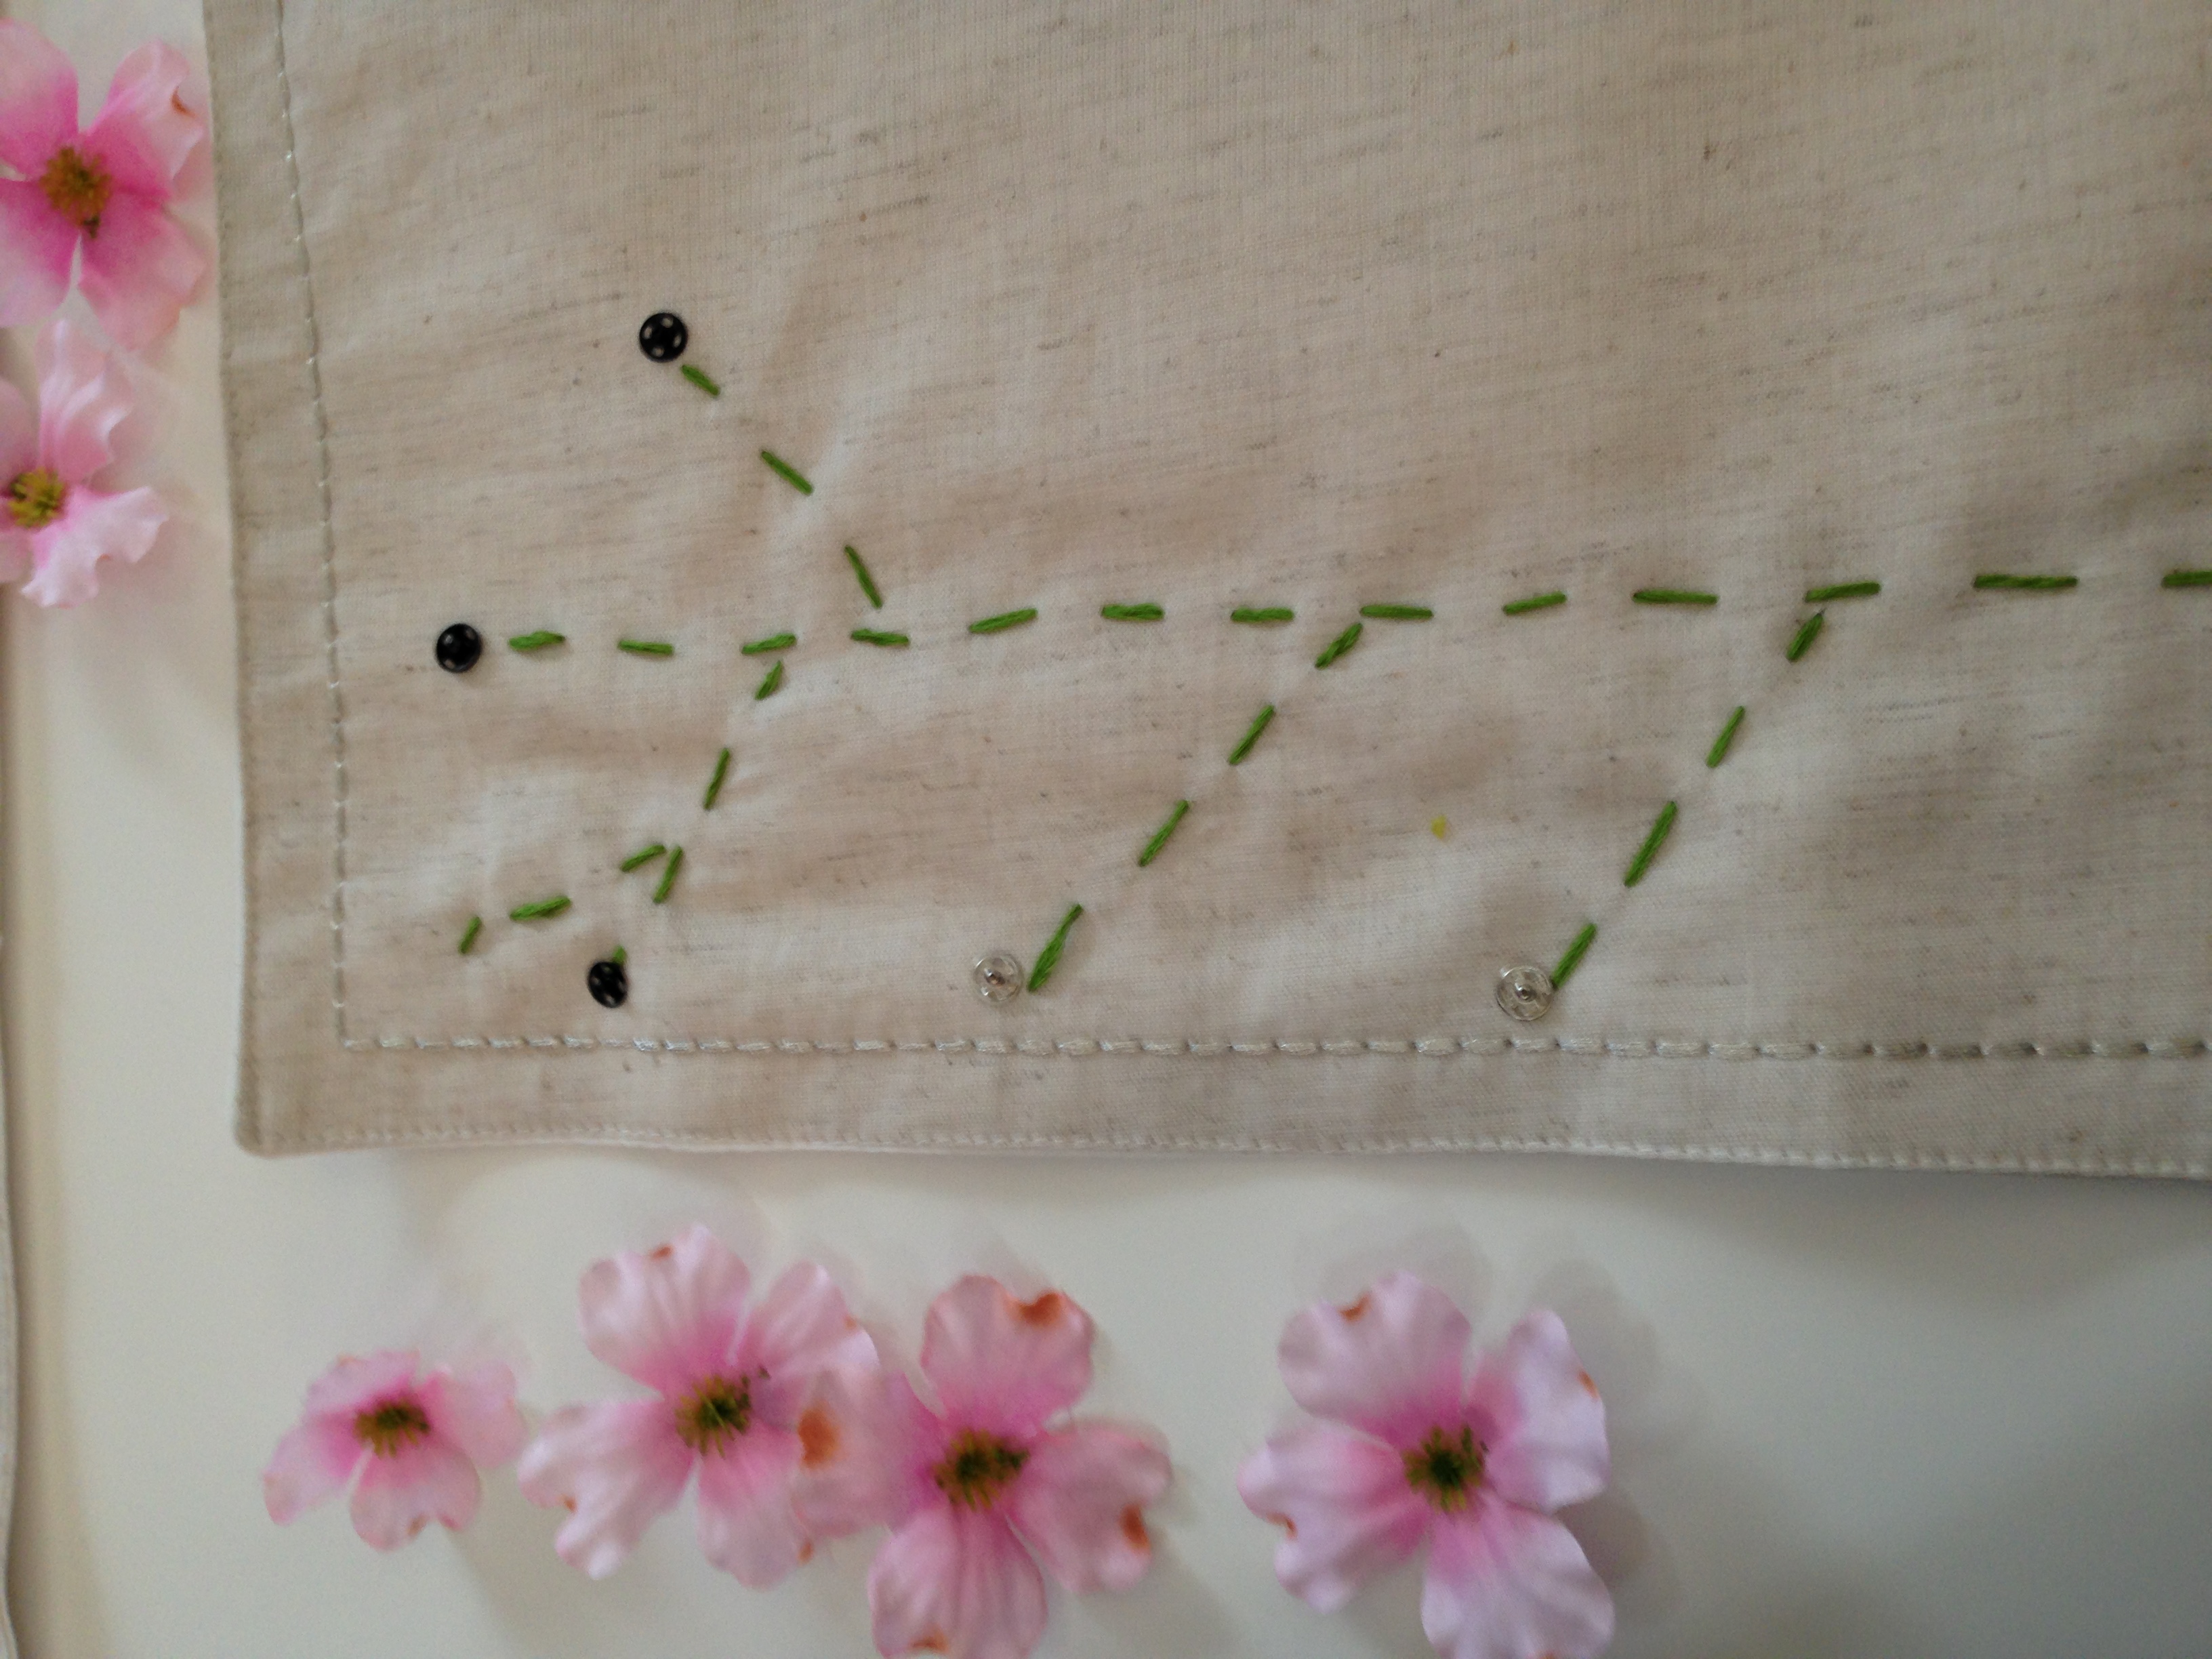
If you have a fabric pencil – usually in white – you can mark out the line for the stems and leaves you would like to stitch. Then use the embroidery thread to stitch the line for a stems and leaves. Quick Tip: Start your stitch from the backside of the placemat so the knot in the end of your embroidery thread is hidden. Then just simply weave back and through to create larger stitches for the look. Tie off the stitch again on the back of the placemat when you get to the top or the end of what you are sewing.
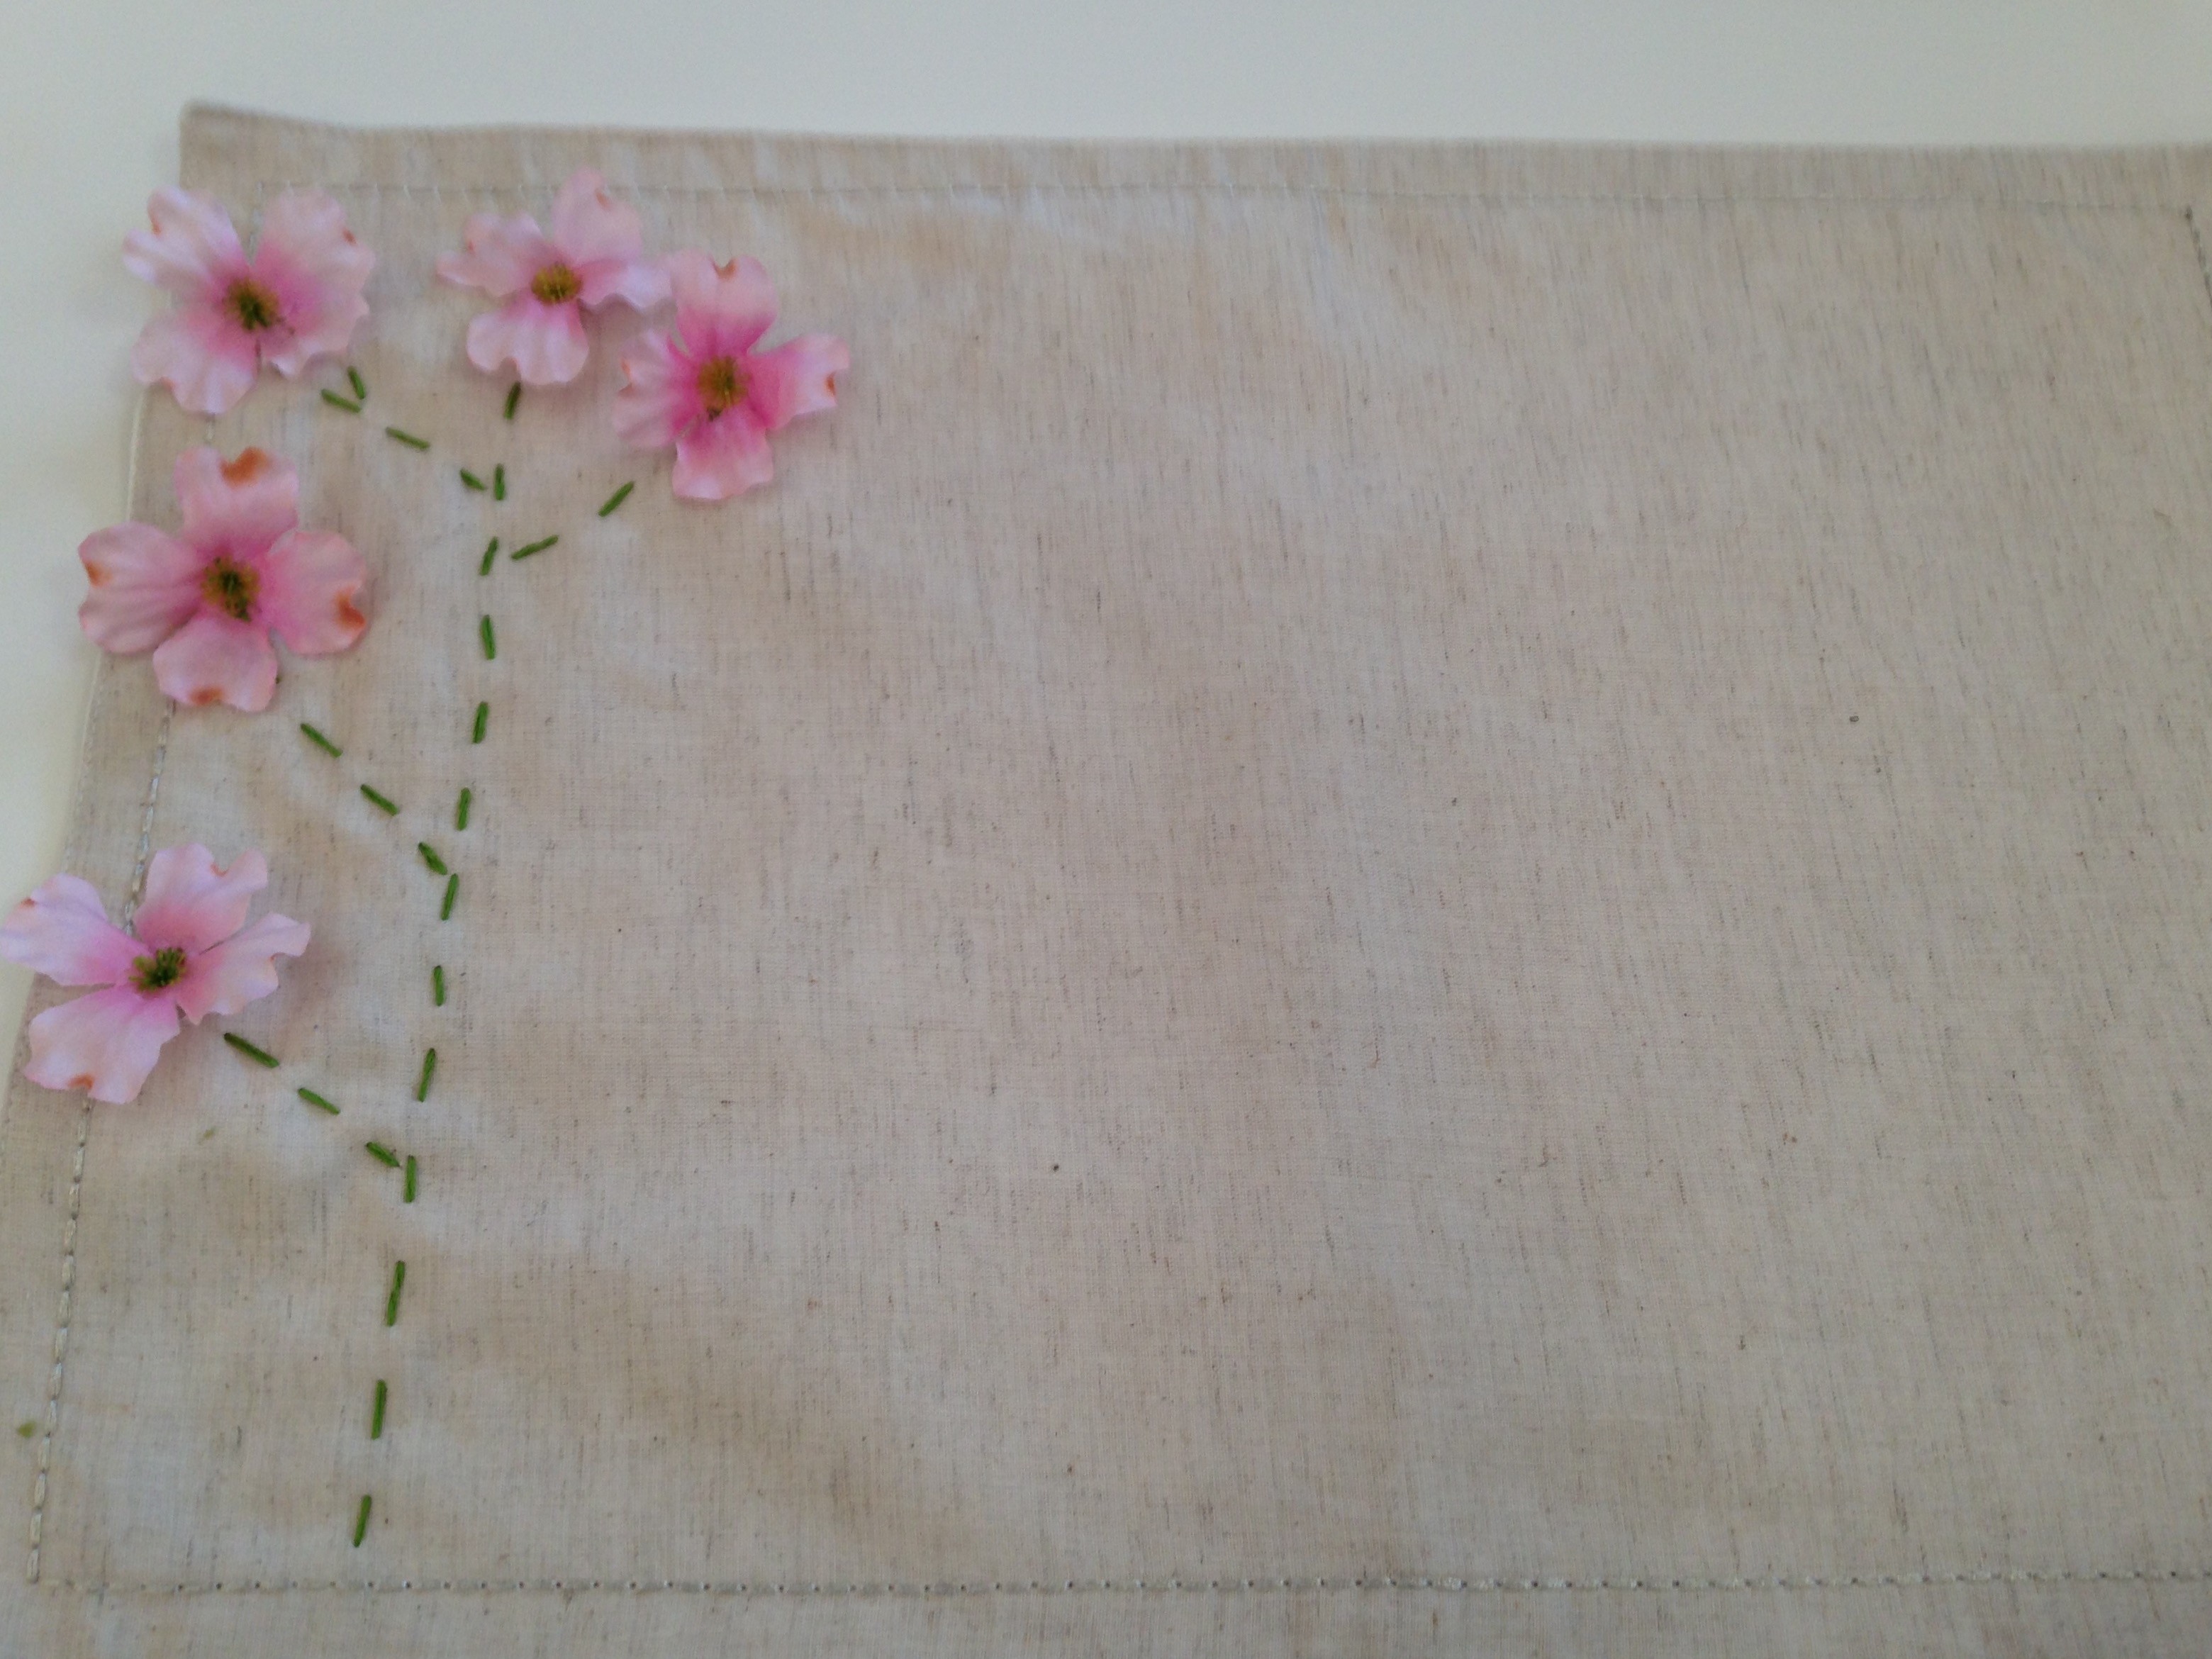
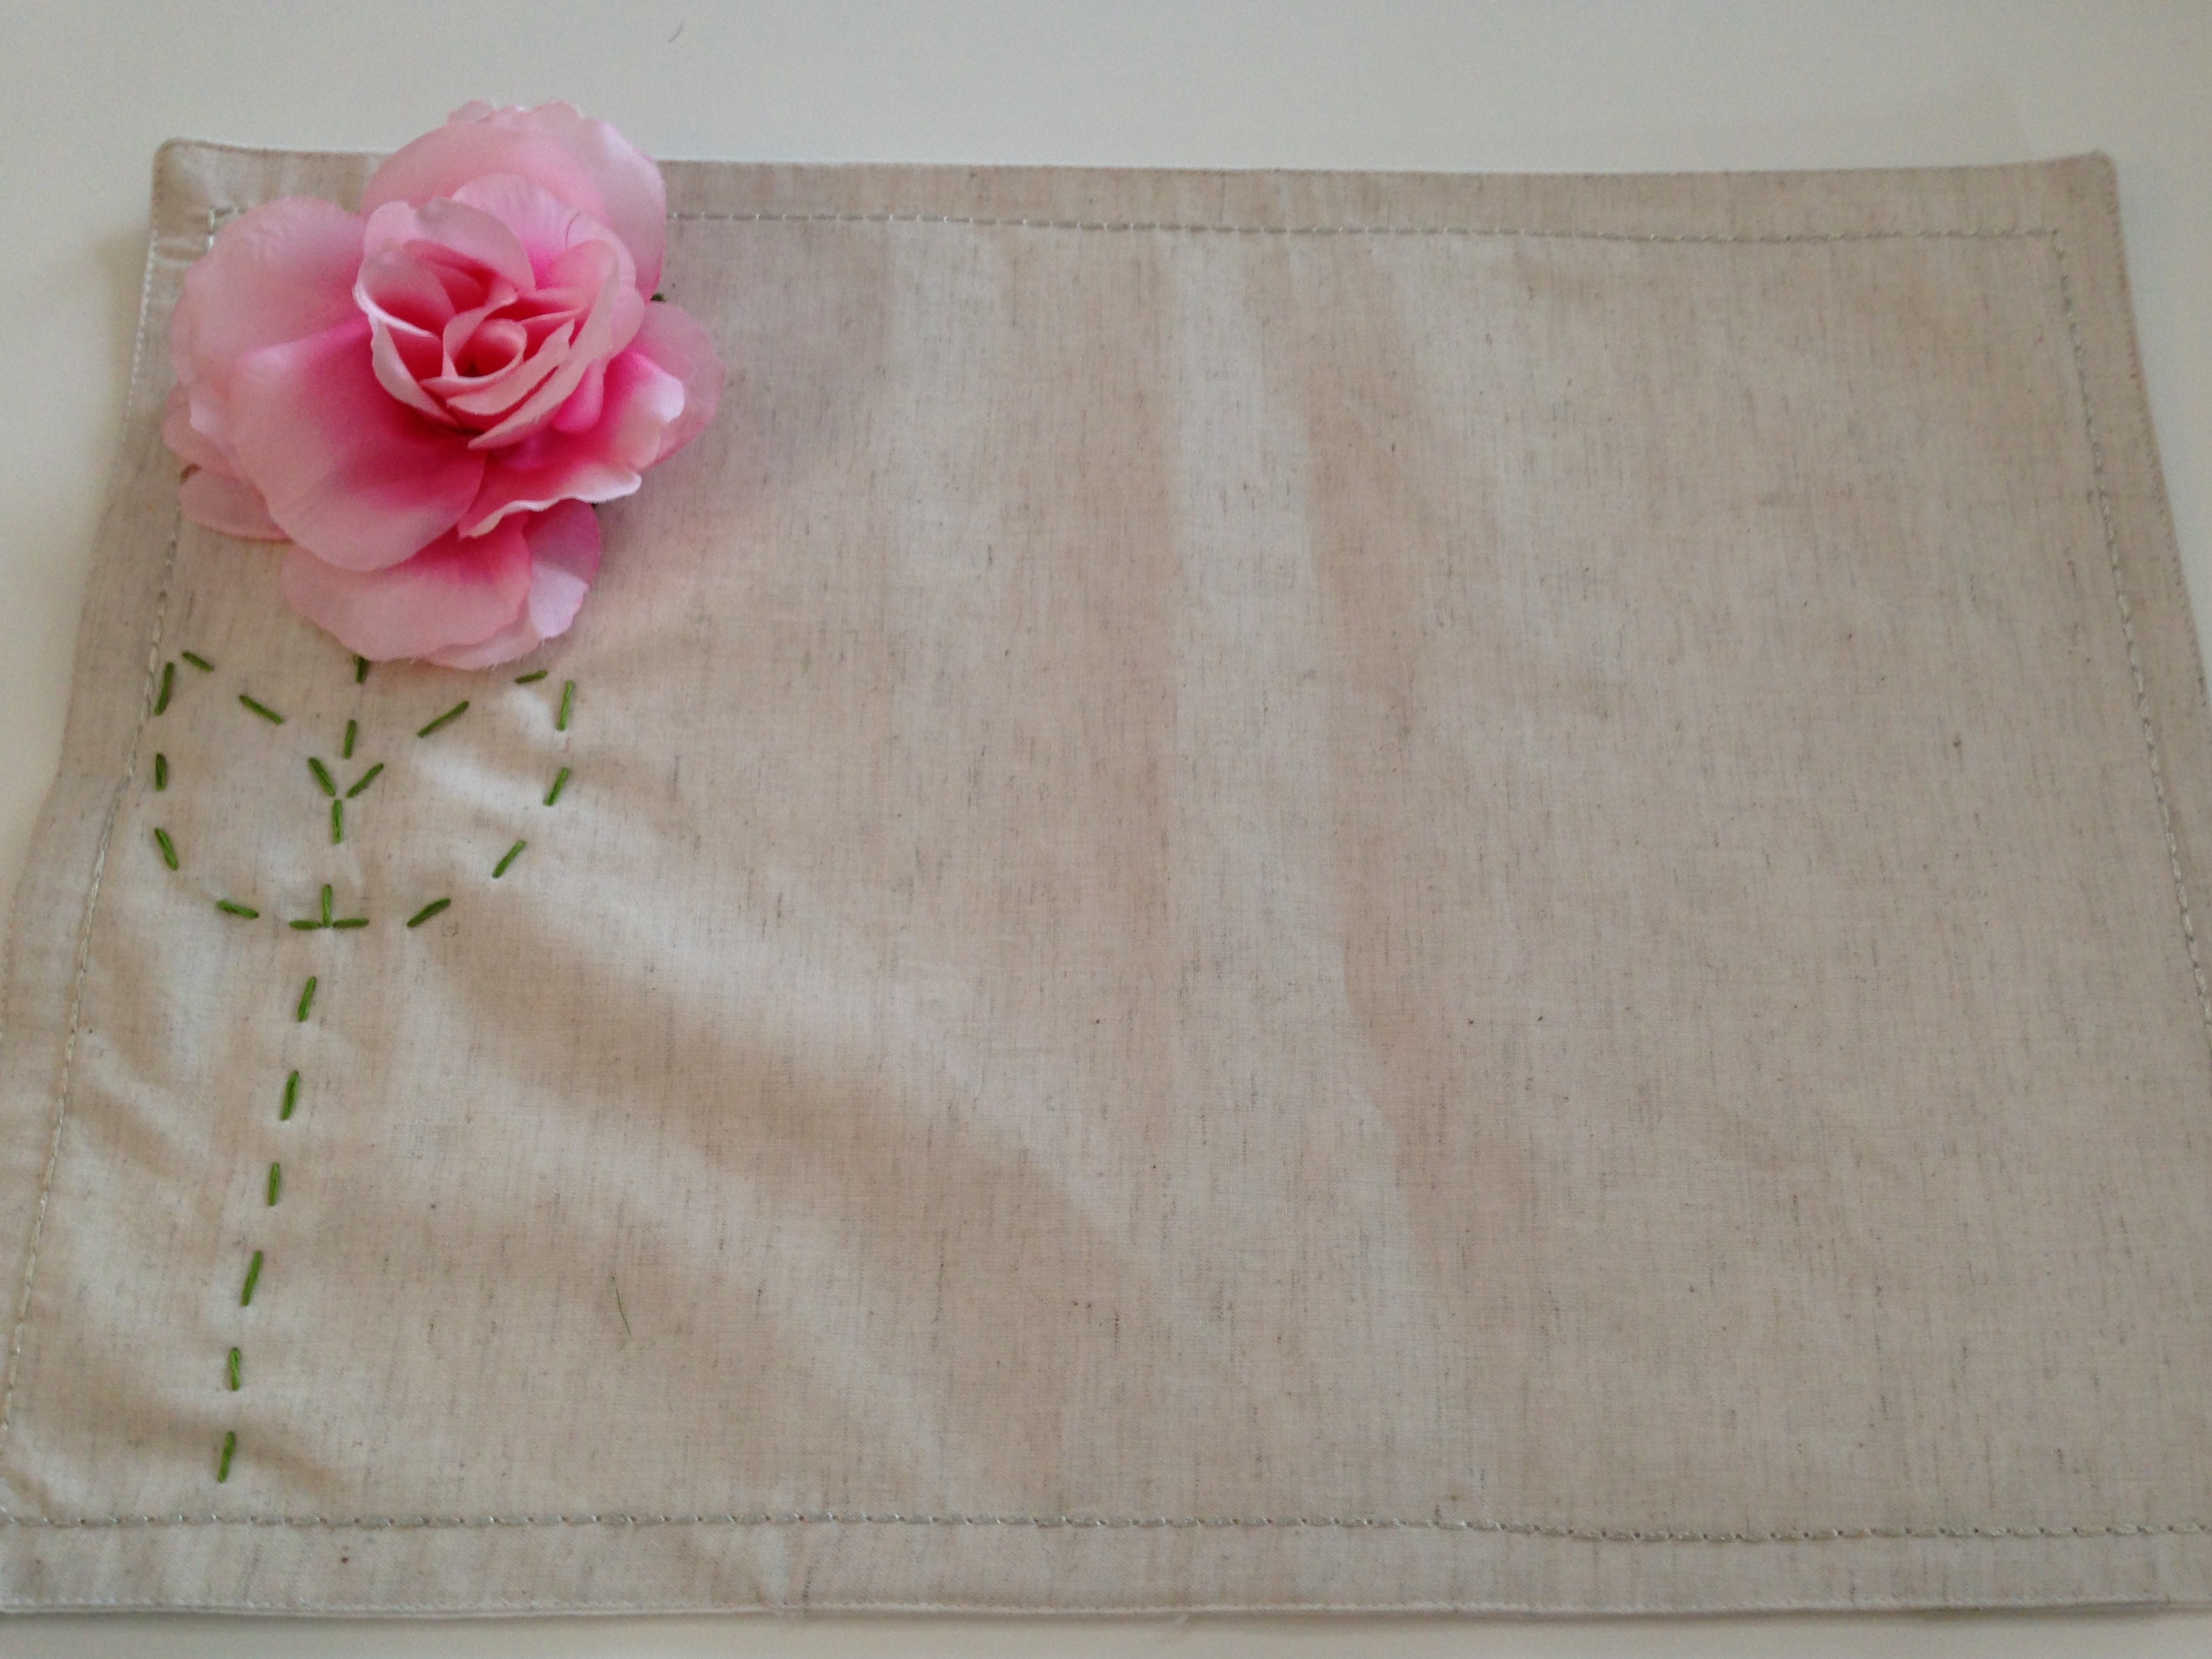
Then sew snaps to the top of the stem or end of branches on the place mat and sew a snap to the head of a silk flower near where you trimmed off the stem at the base of the head of the flower. Snap them together and your placemat will bloom to life, making a really cool 3-D placemat!
DIYs are all about expressing your creativity and creating memories together… Please share your favorite DIYs and photos below in the comments section… I would love to hear your favorite tips and see all of the amazing things you create!

Recommended
-
How to Prep and Enjoy the Big Game!February 6th, 2023
-
Summer Beauty, Wellness + FunJune 24th, 2021
-

Cabin Fever Ideas and Activities while at HomeMarch 23rd, 2020
-
Easy (and healthier) Fall Entertaining TipsOctober 17th, 2019
-

Easy Holiday Decor DIY Decorate Like the ProsDecember 5th, 2018